A $48,000 HDB Renovation Breakdown: A Couple In Their 30s Shares Their Renovation Journey
April 13, 2022
This story is part of our new reno series, which details renovated houses in Singapore and a breakdown of their reno costs.
At the end of 2020, Jessica and her fiancé found themselves in the same boat as many other first-time homebuyers in Singapore. They needed a home, but prices were seemingly spiralling out of control. Her fiancé was in the construction industry too, so he knew that they had to bite the bullet soon – prices would only be going up and not down.
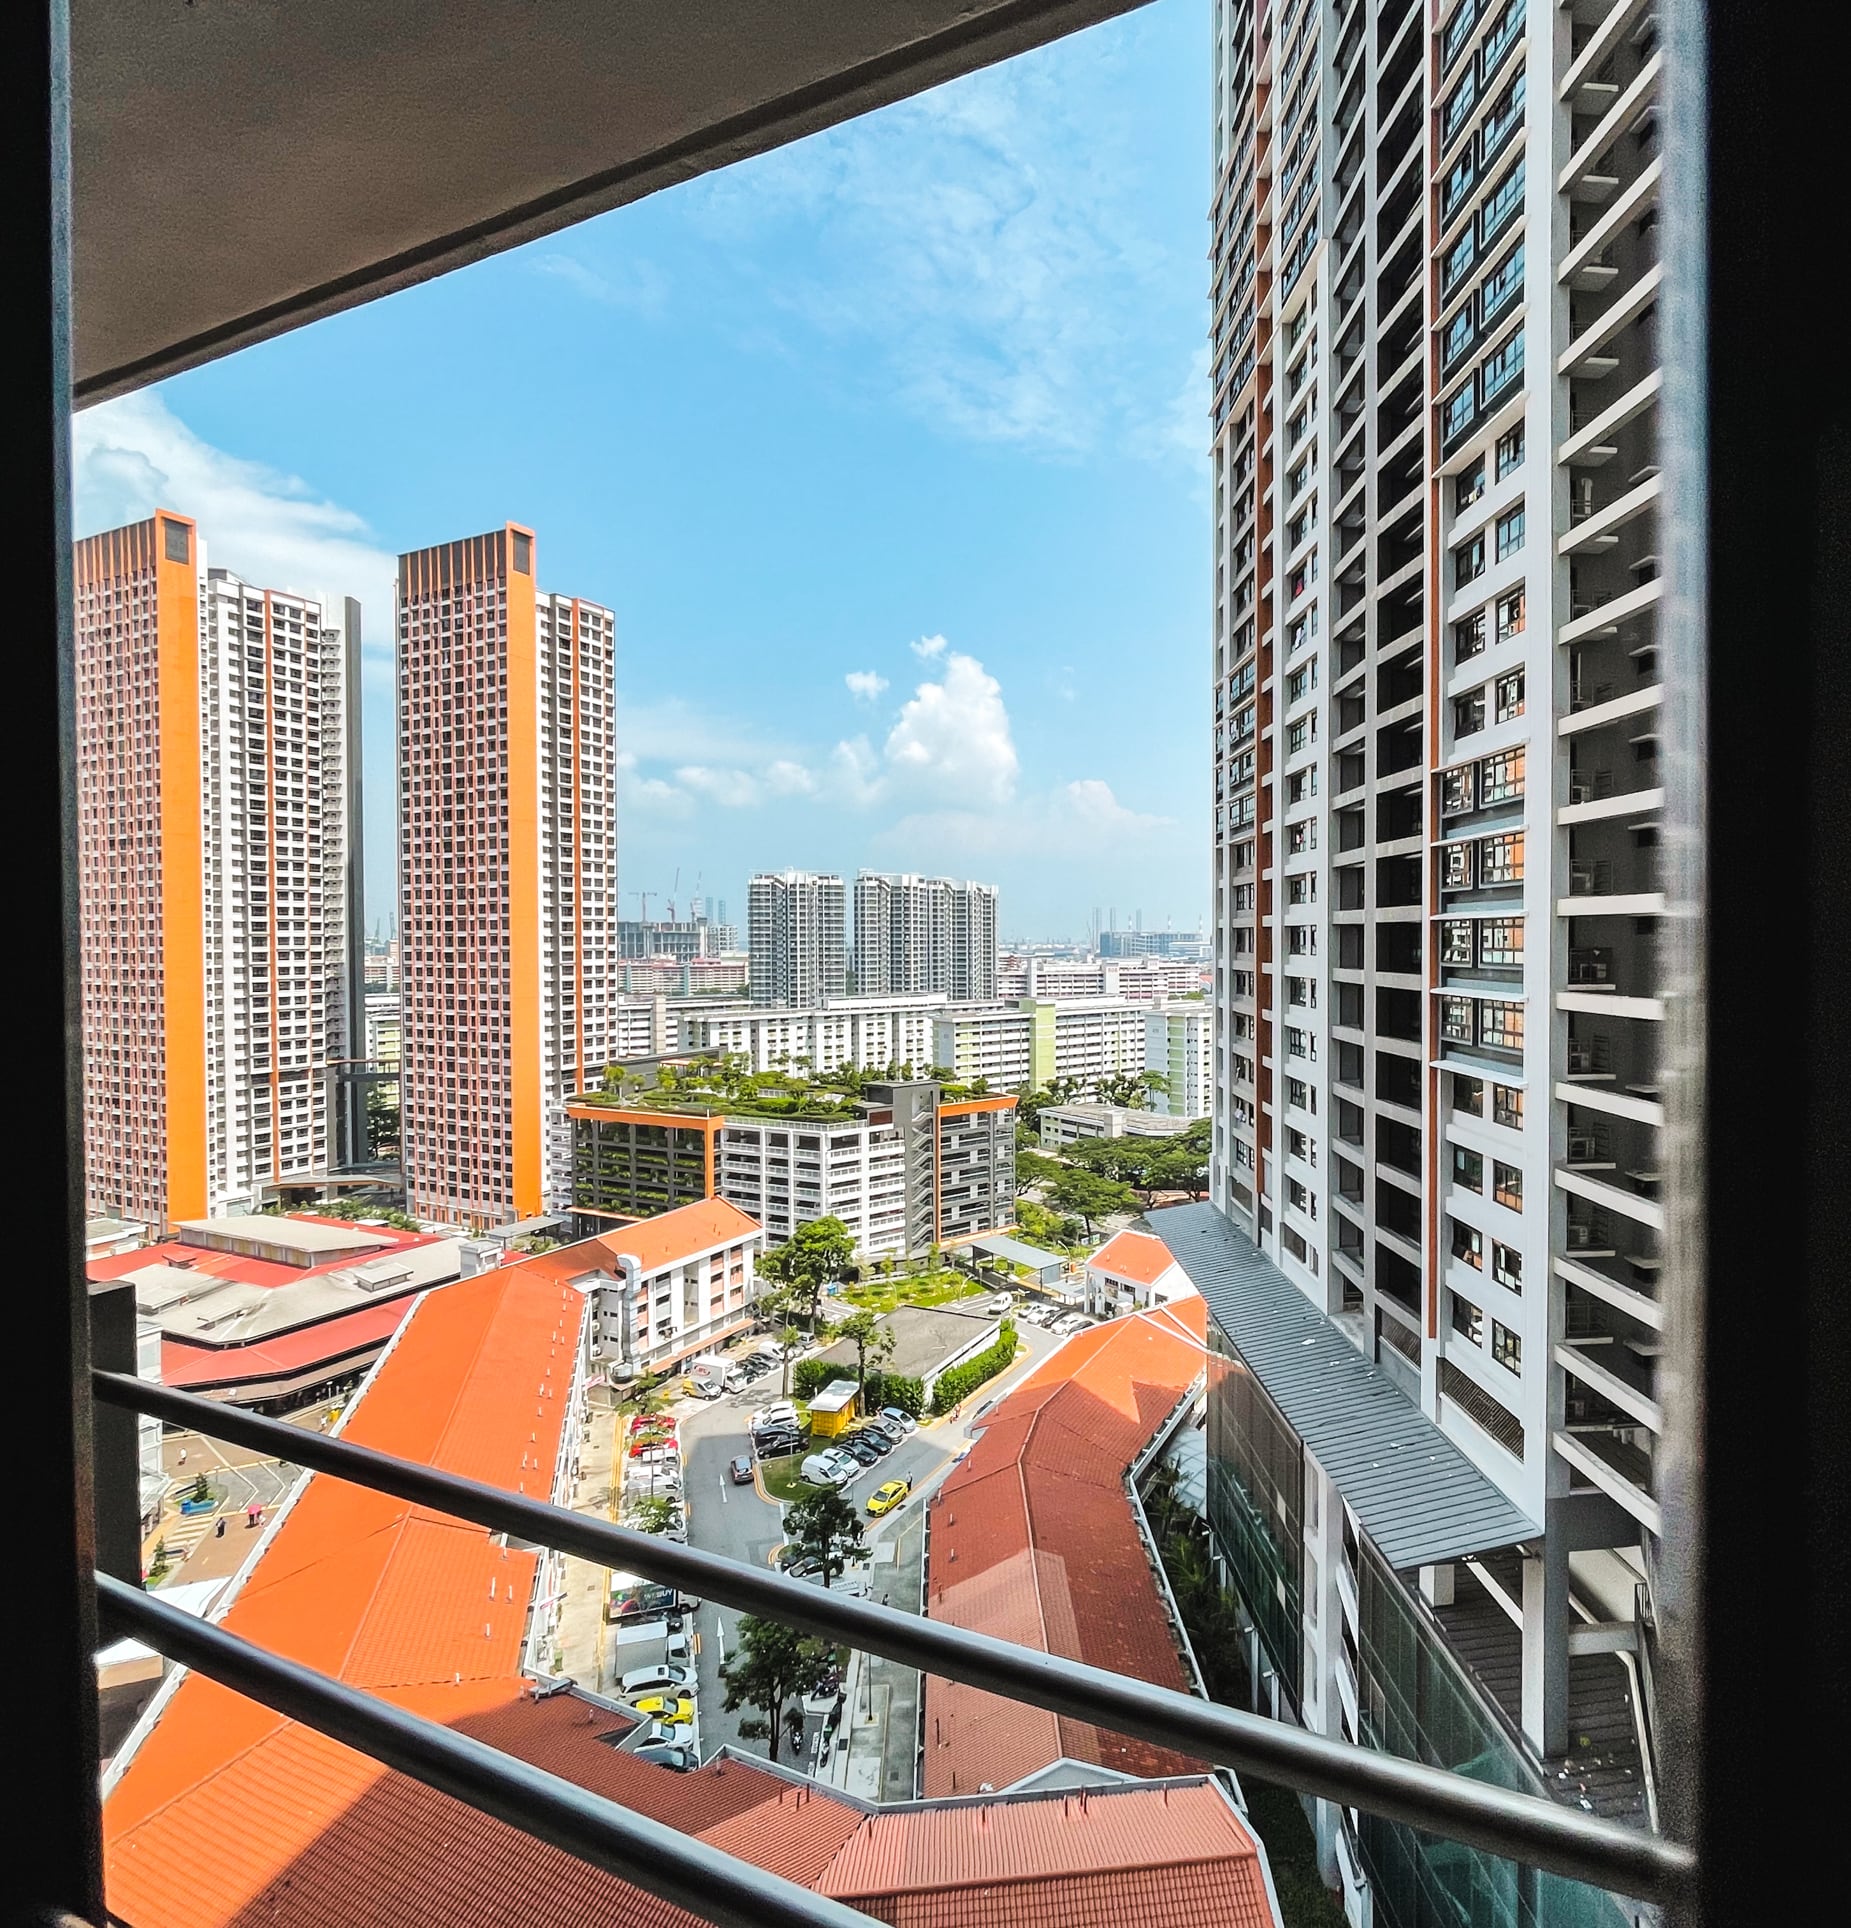
For them, the location was a major priority as they don’t drive. And so when they came across this 3-room HDB flat in Clementi it ticked all their boxes – except for the price.
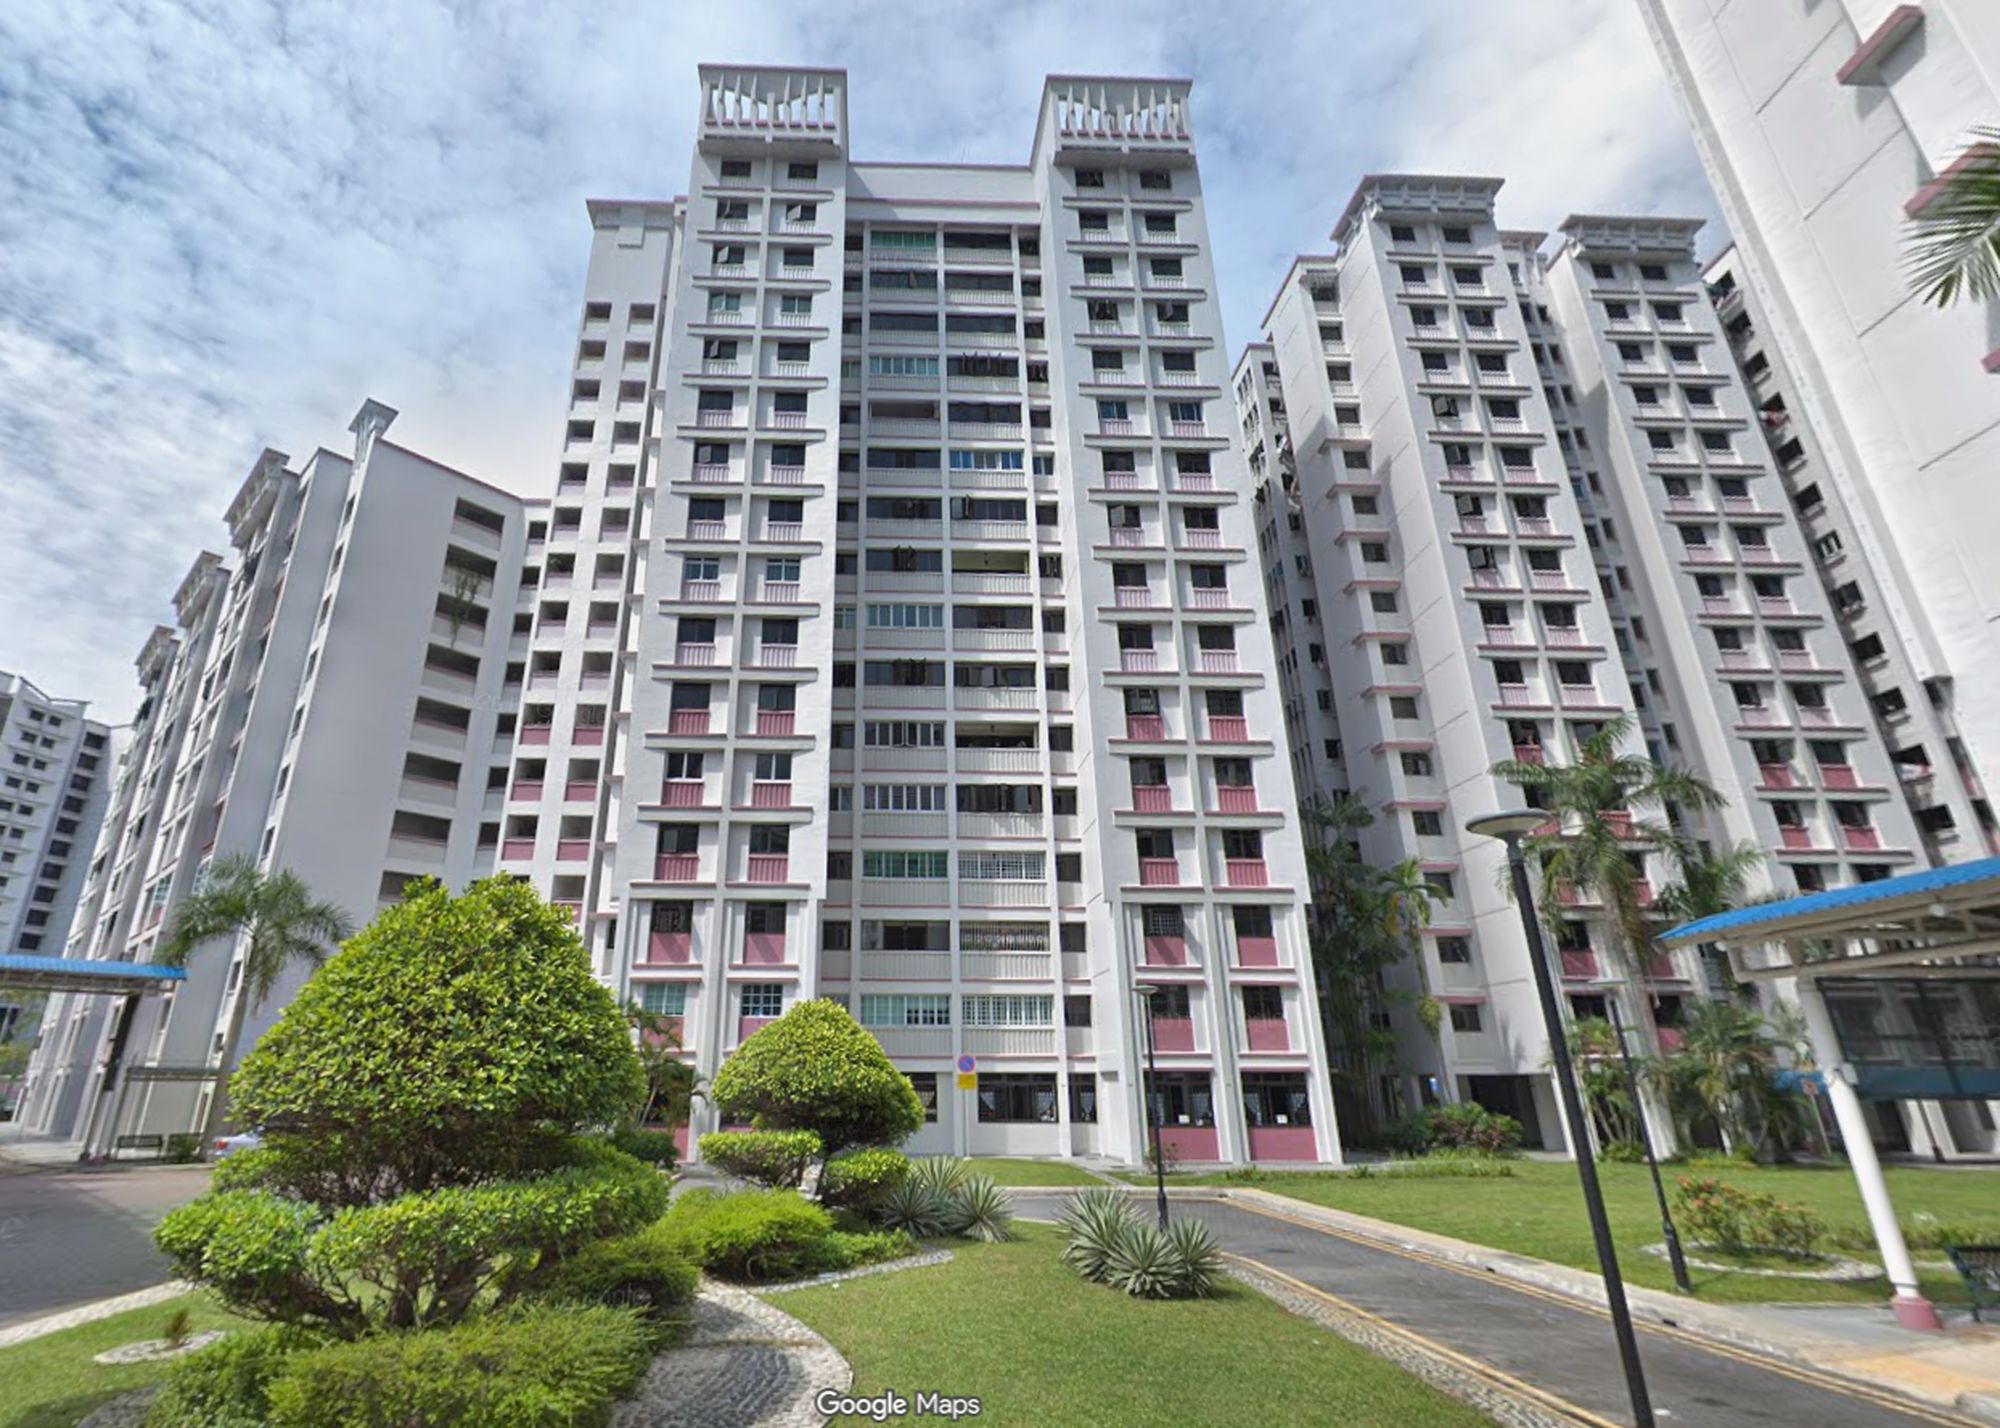
The Clementi towers, consisting of four blocks – 441A, 441B, 442, and 443, spearheaded accessibility in terms of flat development. Dubbed the million-dollar HDBs back then, they were the first HDB project to integrate mall and bus interchange.
So while it is no longer the newest kid on the block, it is still incredibly convenient.
“It was slightly over the budget we had for the flat,” Jessica said. But once they saw the unit and how convenient it was, it has hard to let go. “We had a frank discussion, and decided to cut our renovation budget in order to prudently afford the unit.”
And so they set themselves a lower budget of $45,000 to fully transform the space.
“It was definitely ambitious,” she admitted. They had to scrimp and save on some areas and be clever with maximising their money in others.
Here’s how they transformed their 3-room HDB and a breakdown of their $48,000 renovation project.
Maximising a Three-Room Flat with an Open Concept Floor Plan
All three rooms have large windows facing Clementi Central in the original floor plan. But while it has its own merits, it doesn’t align well with the open concept the couple desired.
“We weren’t specifically looking for a flat with an open floor plan,” Jessica said. But once they got the unit, they decided that an open concept aligns with their personal preferences better. “We were just really lucky that the floor plan allowed us to hack the walls down where we wanted,” she revealed.

The final outcome of the renovation was almost precisely as Jessica envisioned it during the planning phase. “The design was entirely done by me,” she said, “thus I was able to ensure what was planned in concept was executed properly on site.“
The secret sauce in turning their vision into a reality is vigilance. “I frequently visited the site during the renovation, especially during major project milestones, to ensure that works are done according to the plan,” Jessica added.

Reno budgets should always come in two parts: the initial and the follow-up. This protects homeowners from unexpected expenses since construction costs in Singapore are always so opaque.
She said that the initial budget allocated for renovation was $45,000. However, she had to “allocate more due to some unforeseen works.” Keep in mind, though, that the reno cost doesn’t include the expenses incurred for the new furniture and appliances.
Some unexpected tasks that brought the reno cost to exactly $47,587.60 included moving the DB box from the entryway to conceal it within a cabinet and relocating drainage and water points in the service yard. They also needed to shell out additional money for the partitioning of AC trunking and exposed piping.
When asked about her primary motivation for doing the reno, Jessica answered, “I wanted to decorate my home primarily with loose furniture and minimal built-ins. This allows me to conveniently change the house layout in the future if there is a need to.”
Let’s explore how each room turned out before and after the renovation.
Living Room
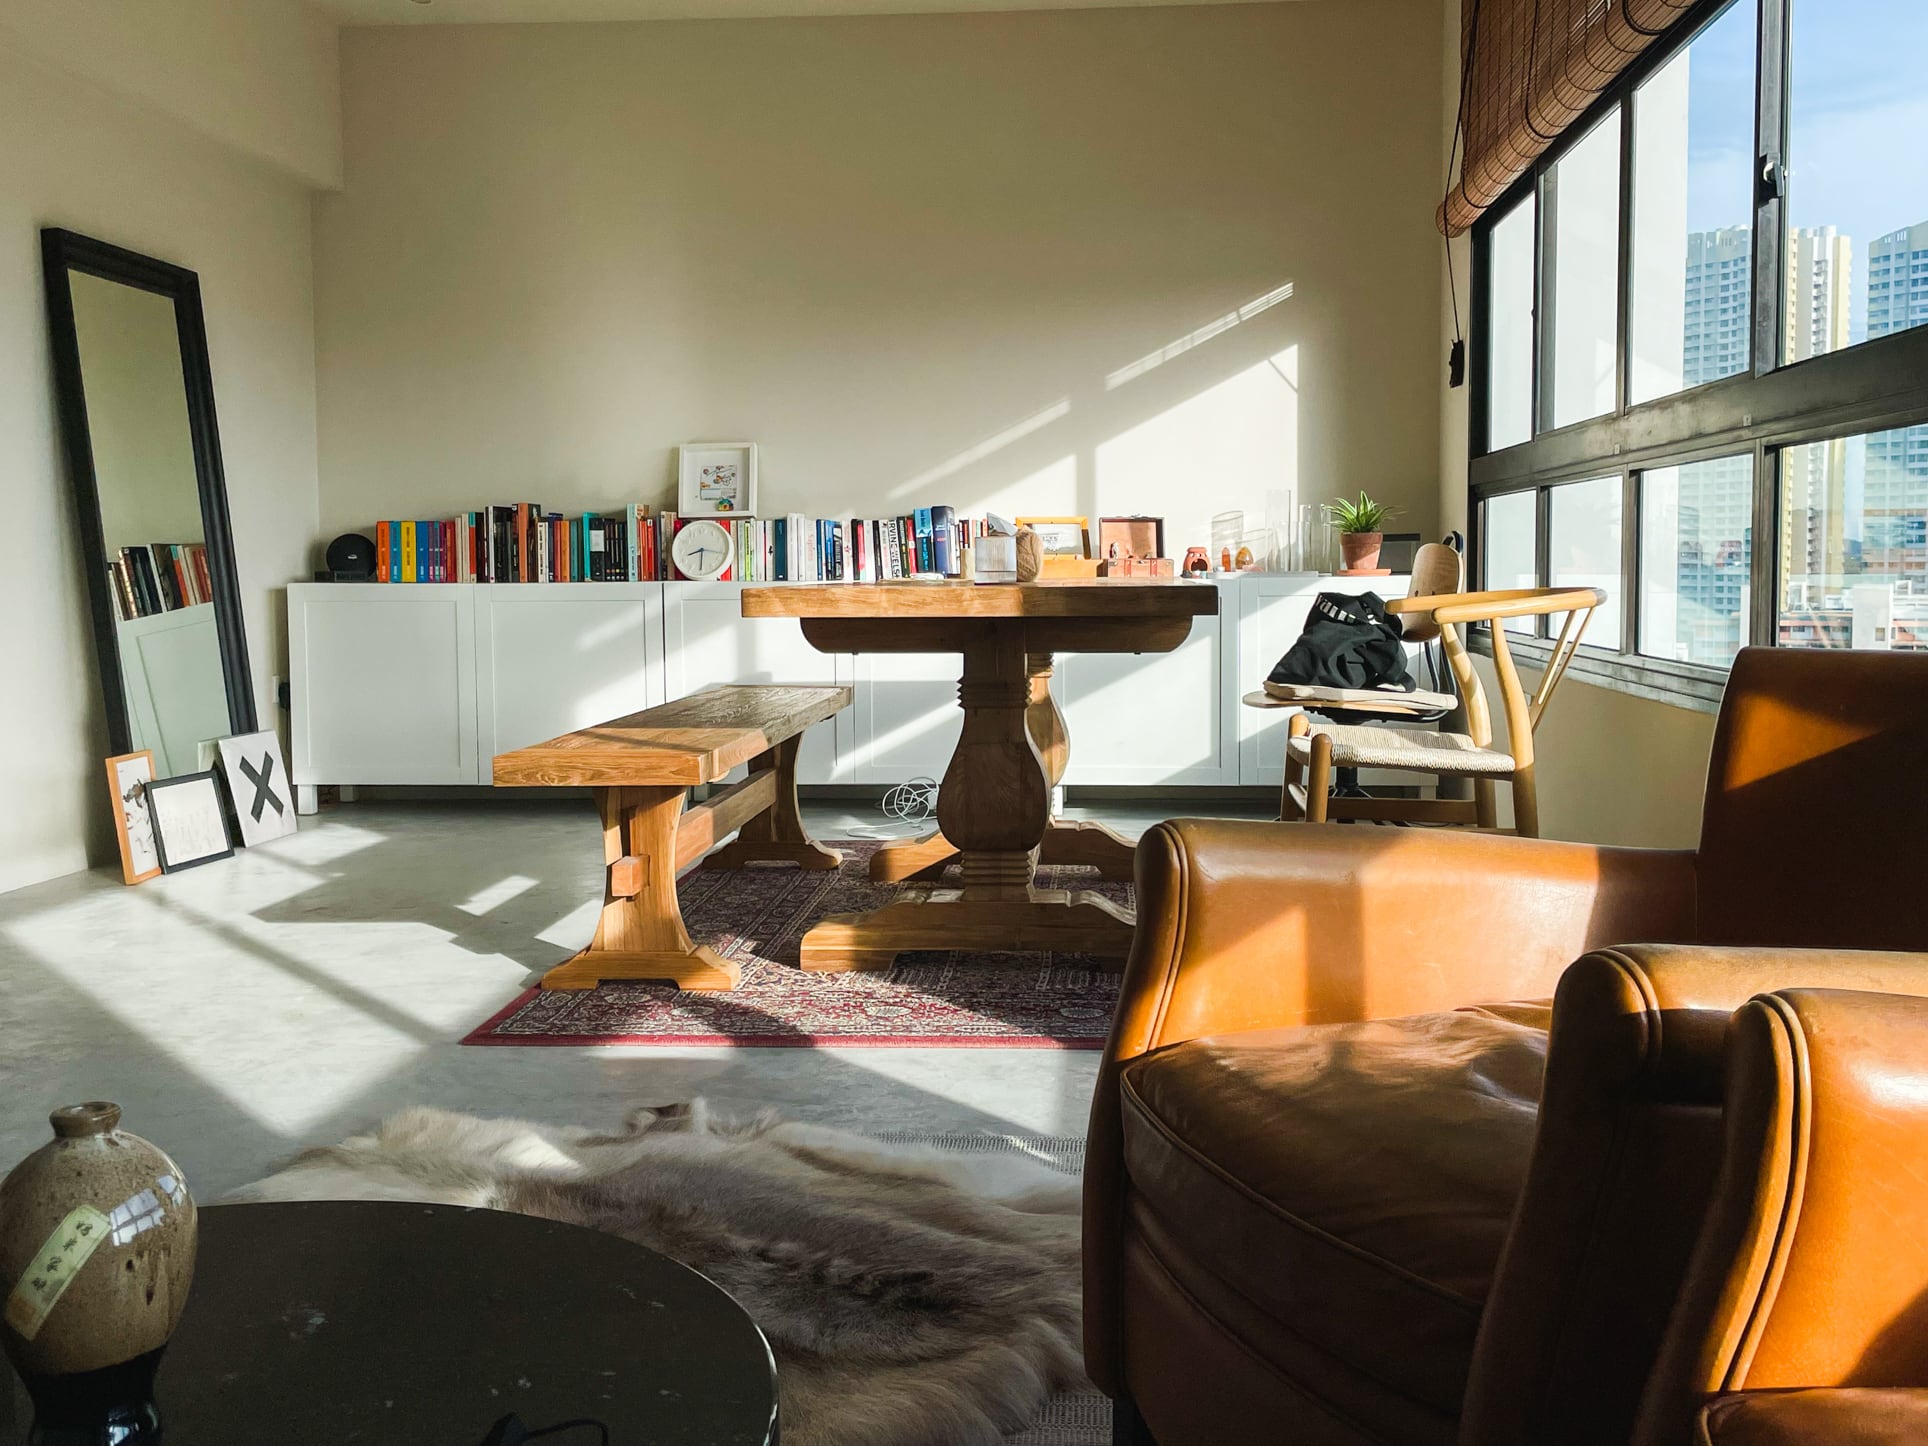
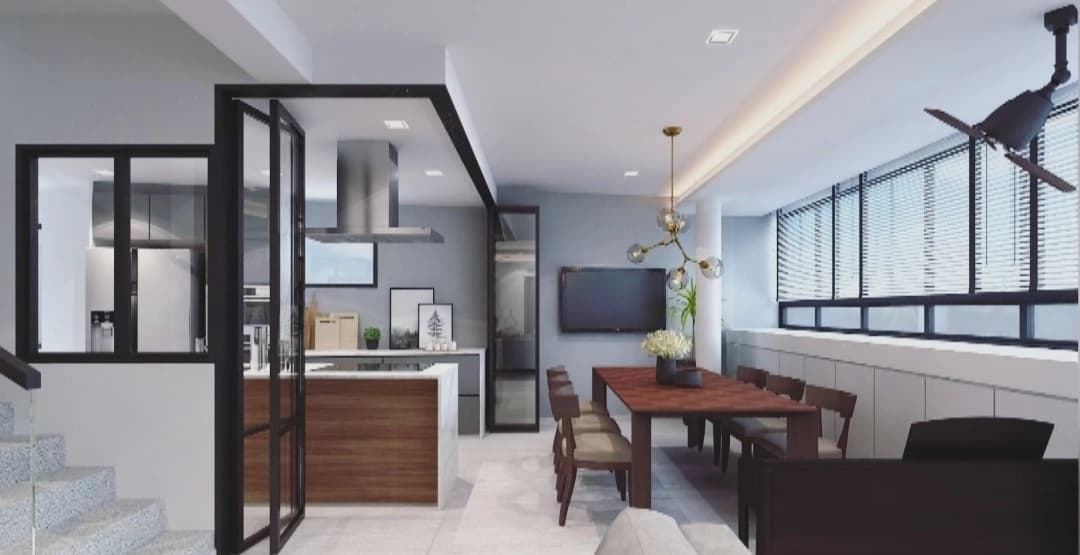
After passing through the foyer, the living-cum dining room is the first area to accommodate both visitors and occupants alike.
There was nothing remarkable in its previous setup. With a size of only around 15 square meters, it was challenging to fully maximize the functionality of this room. A common bedroom sits adjacent to it, occupying significant space that could have been used for a different purpose otherwise.
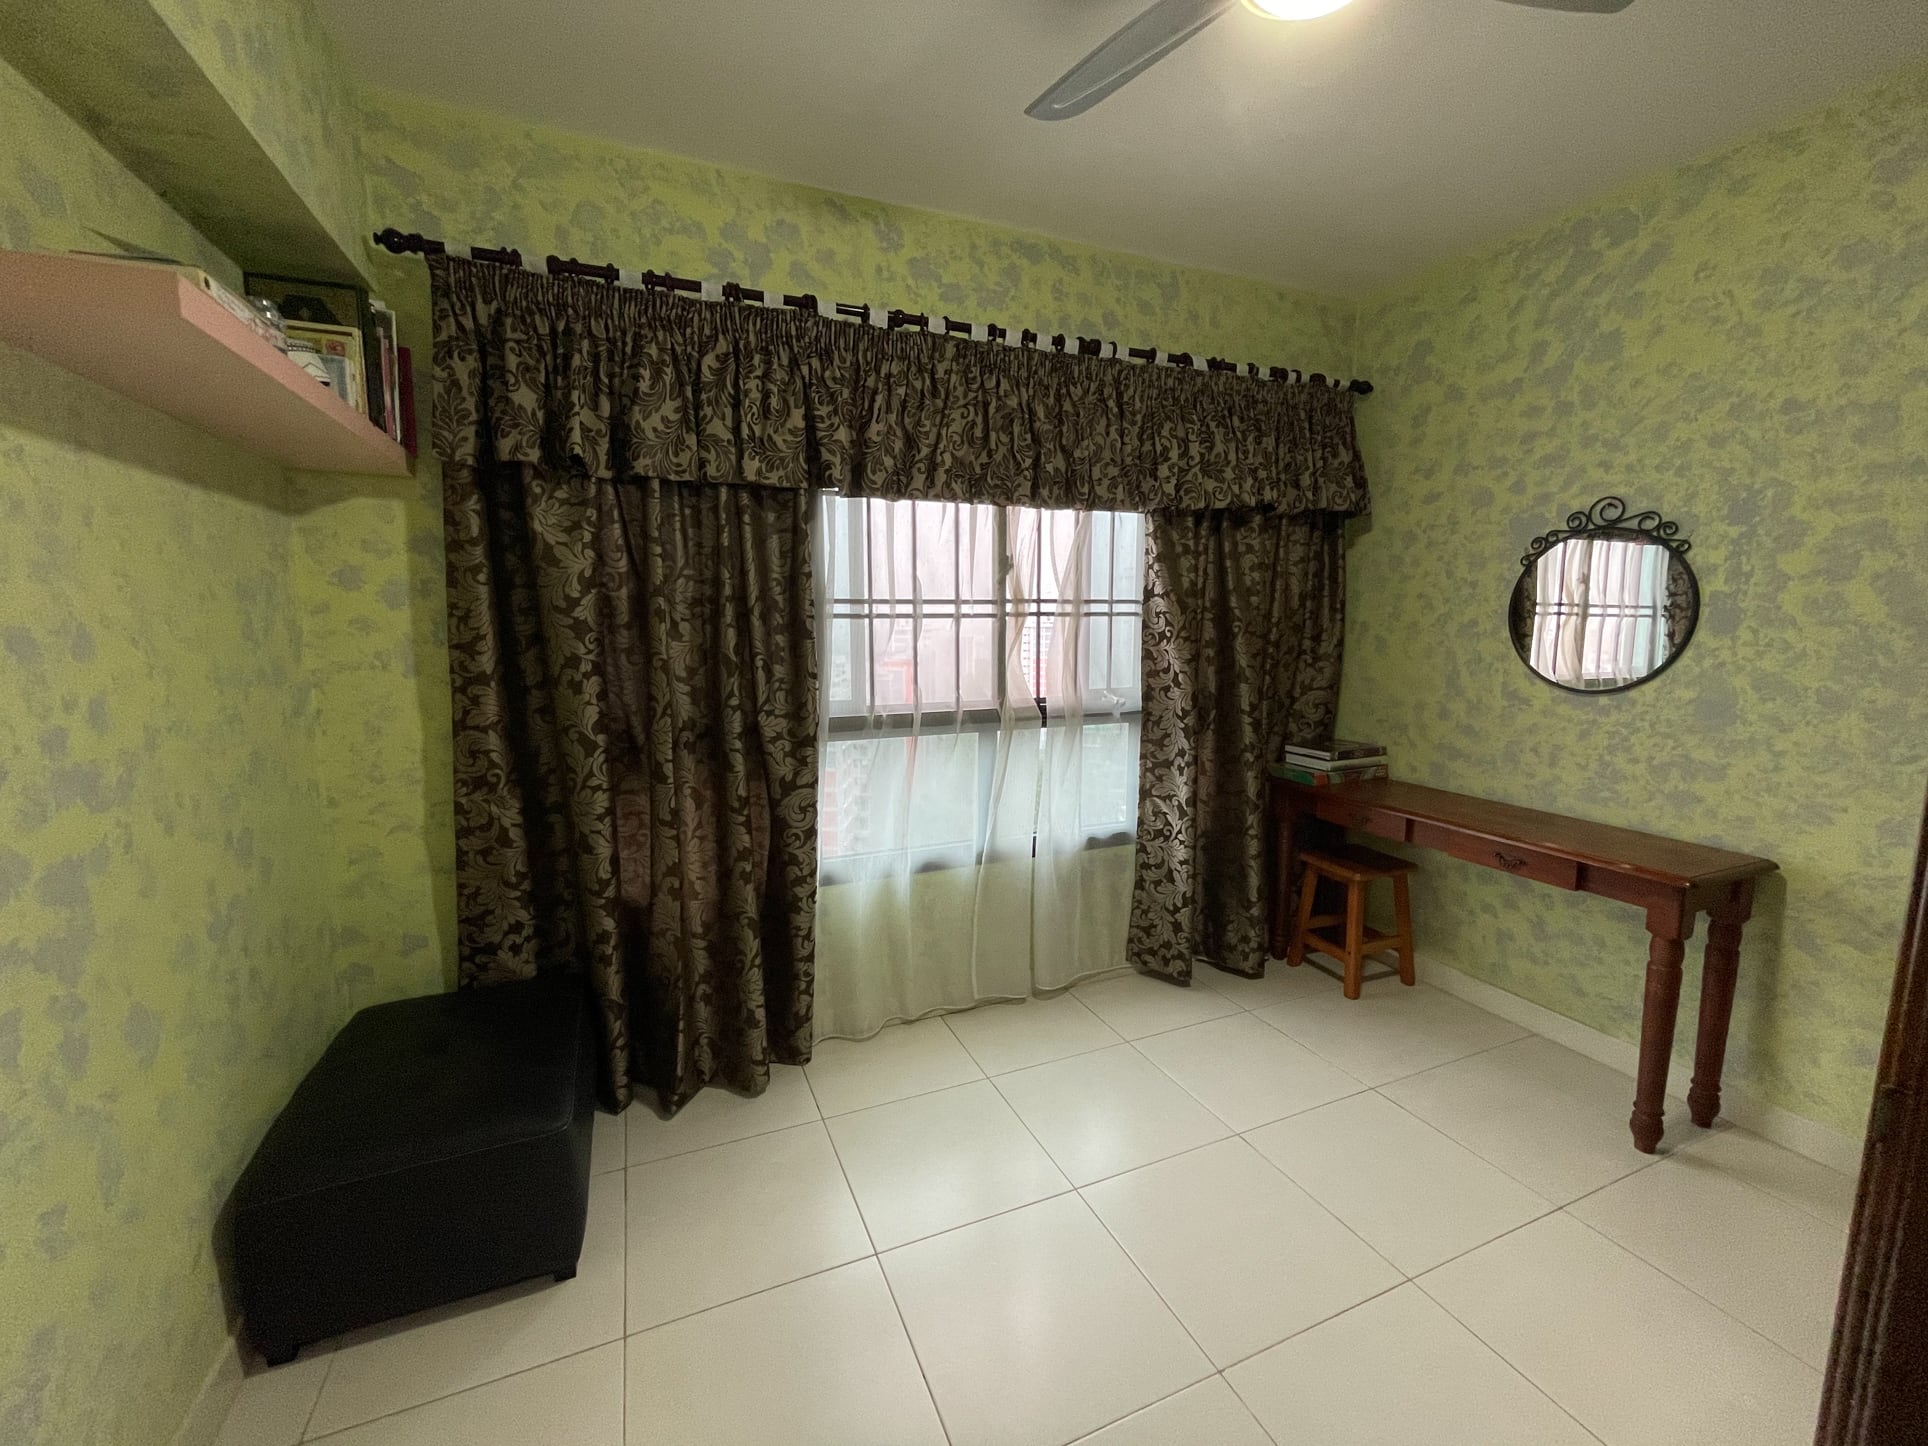
Furthermore, both rooms created another void area in the house leading to the master’s bedroom – a hallway one meter wide only.
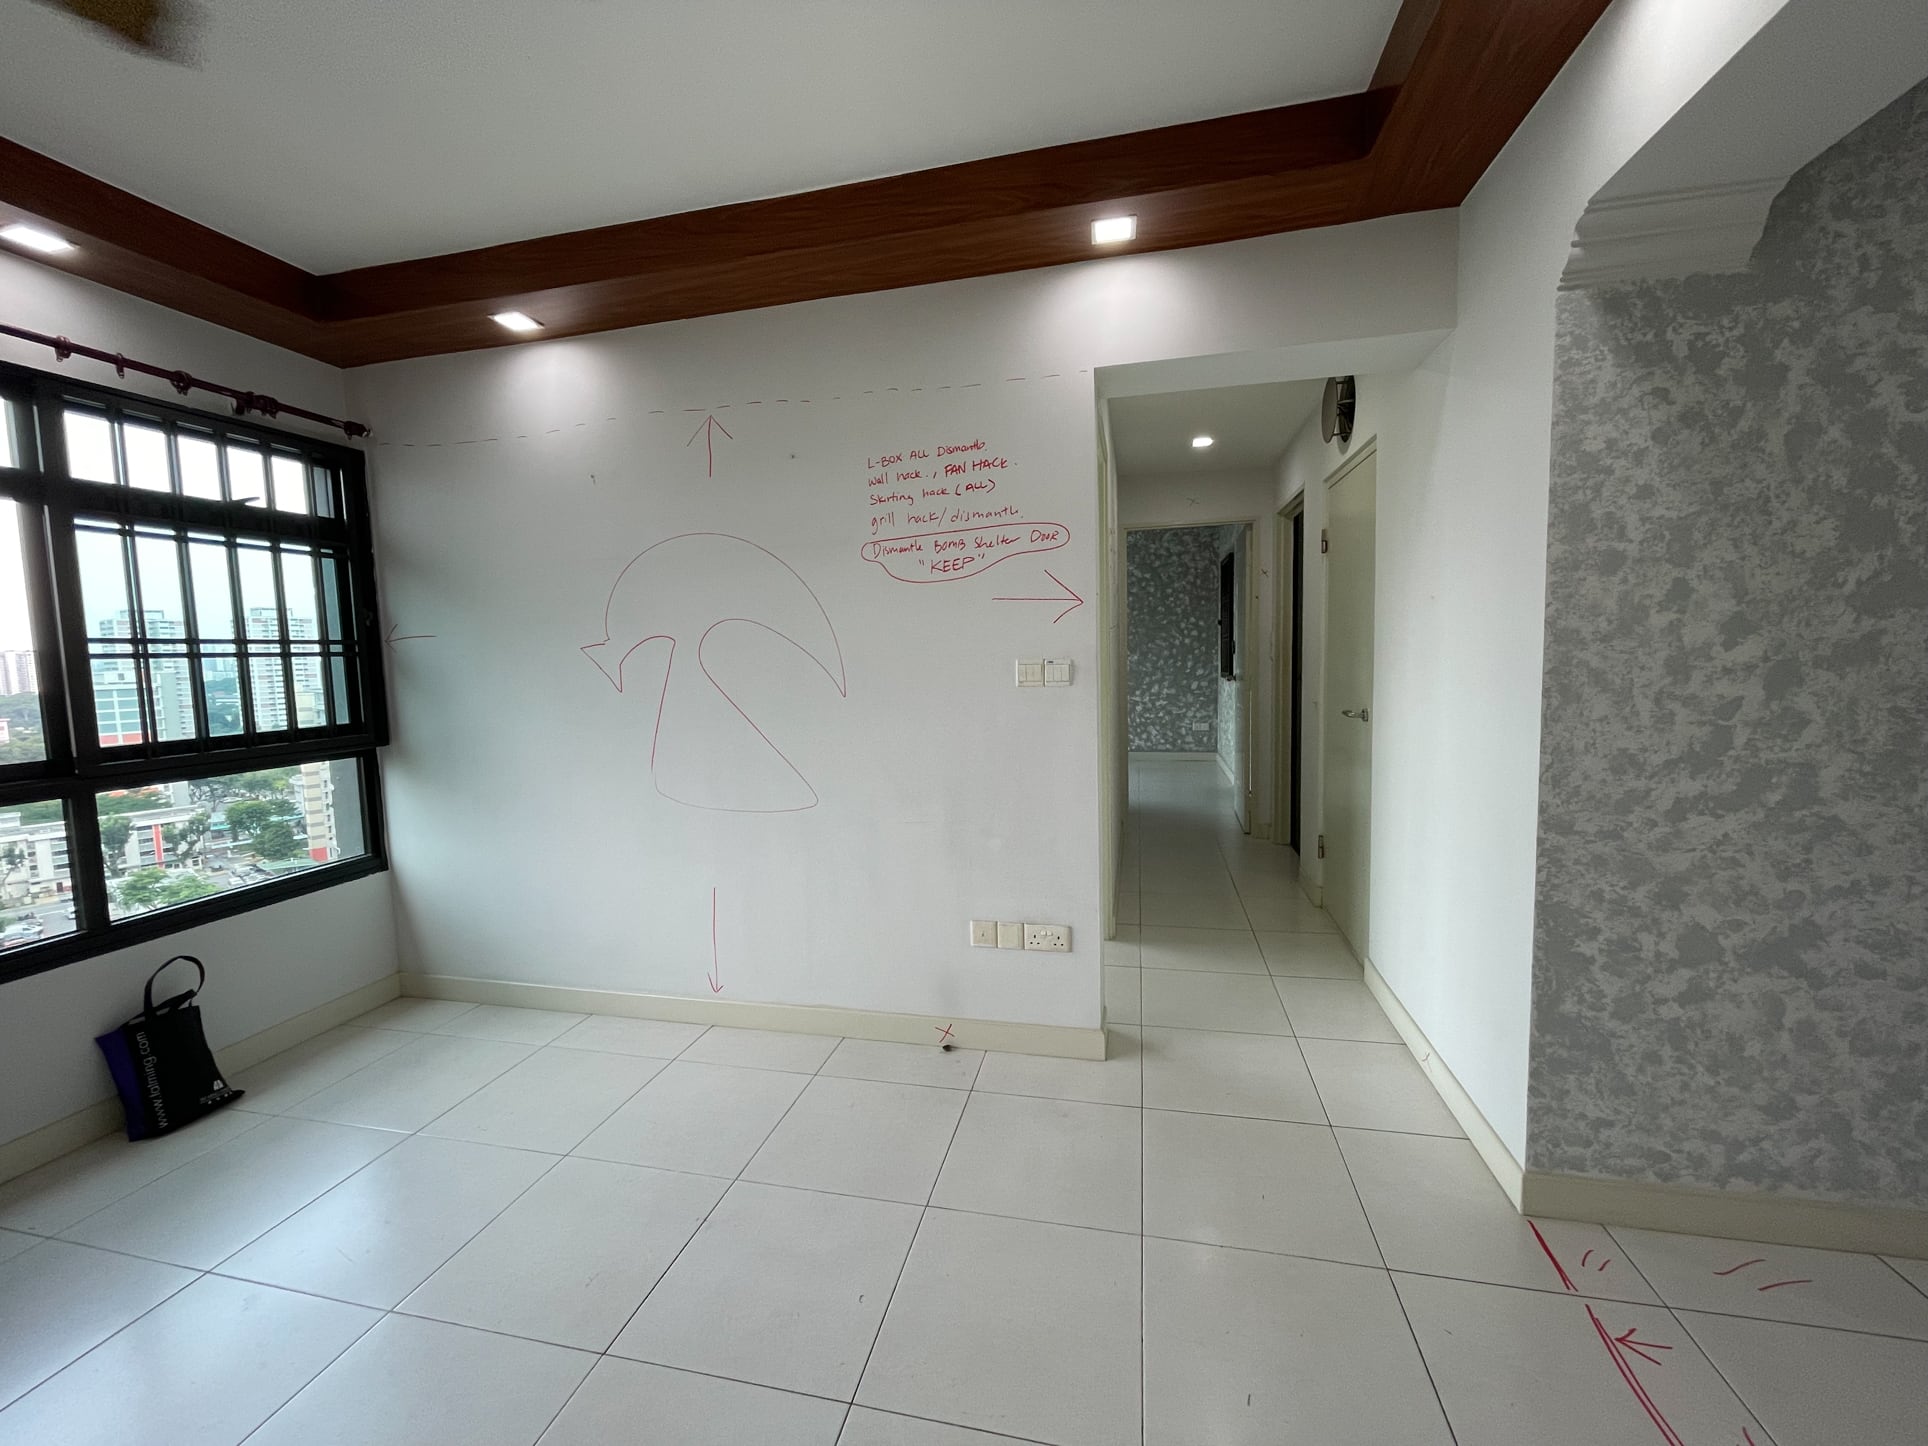
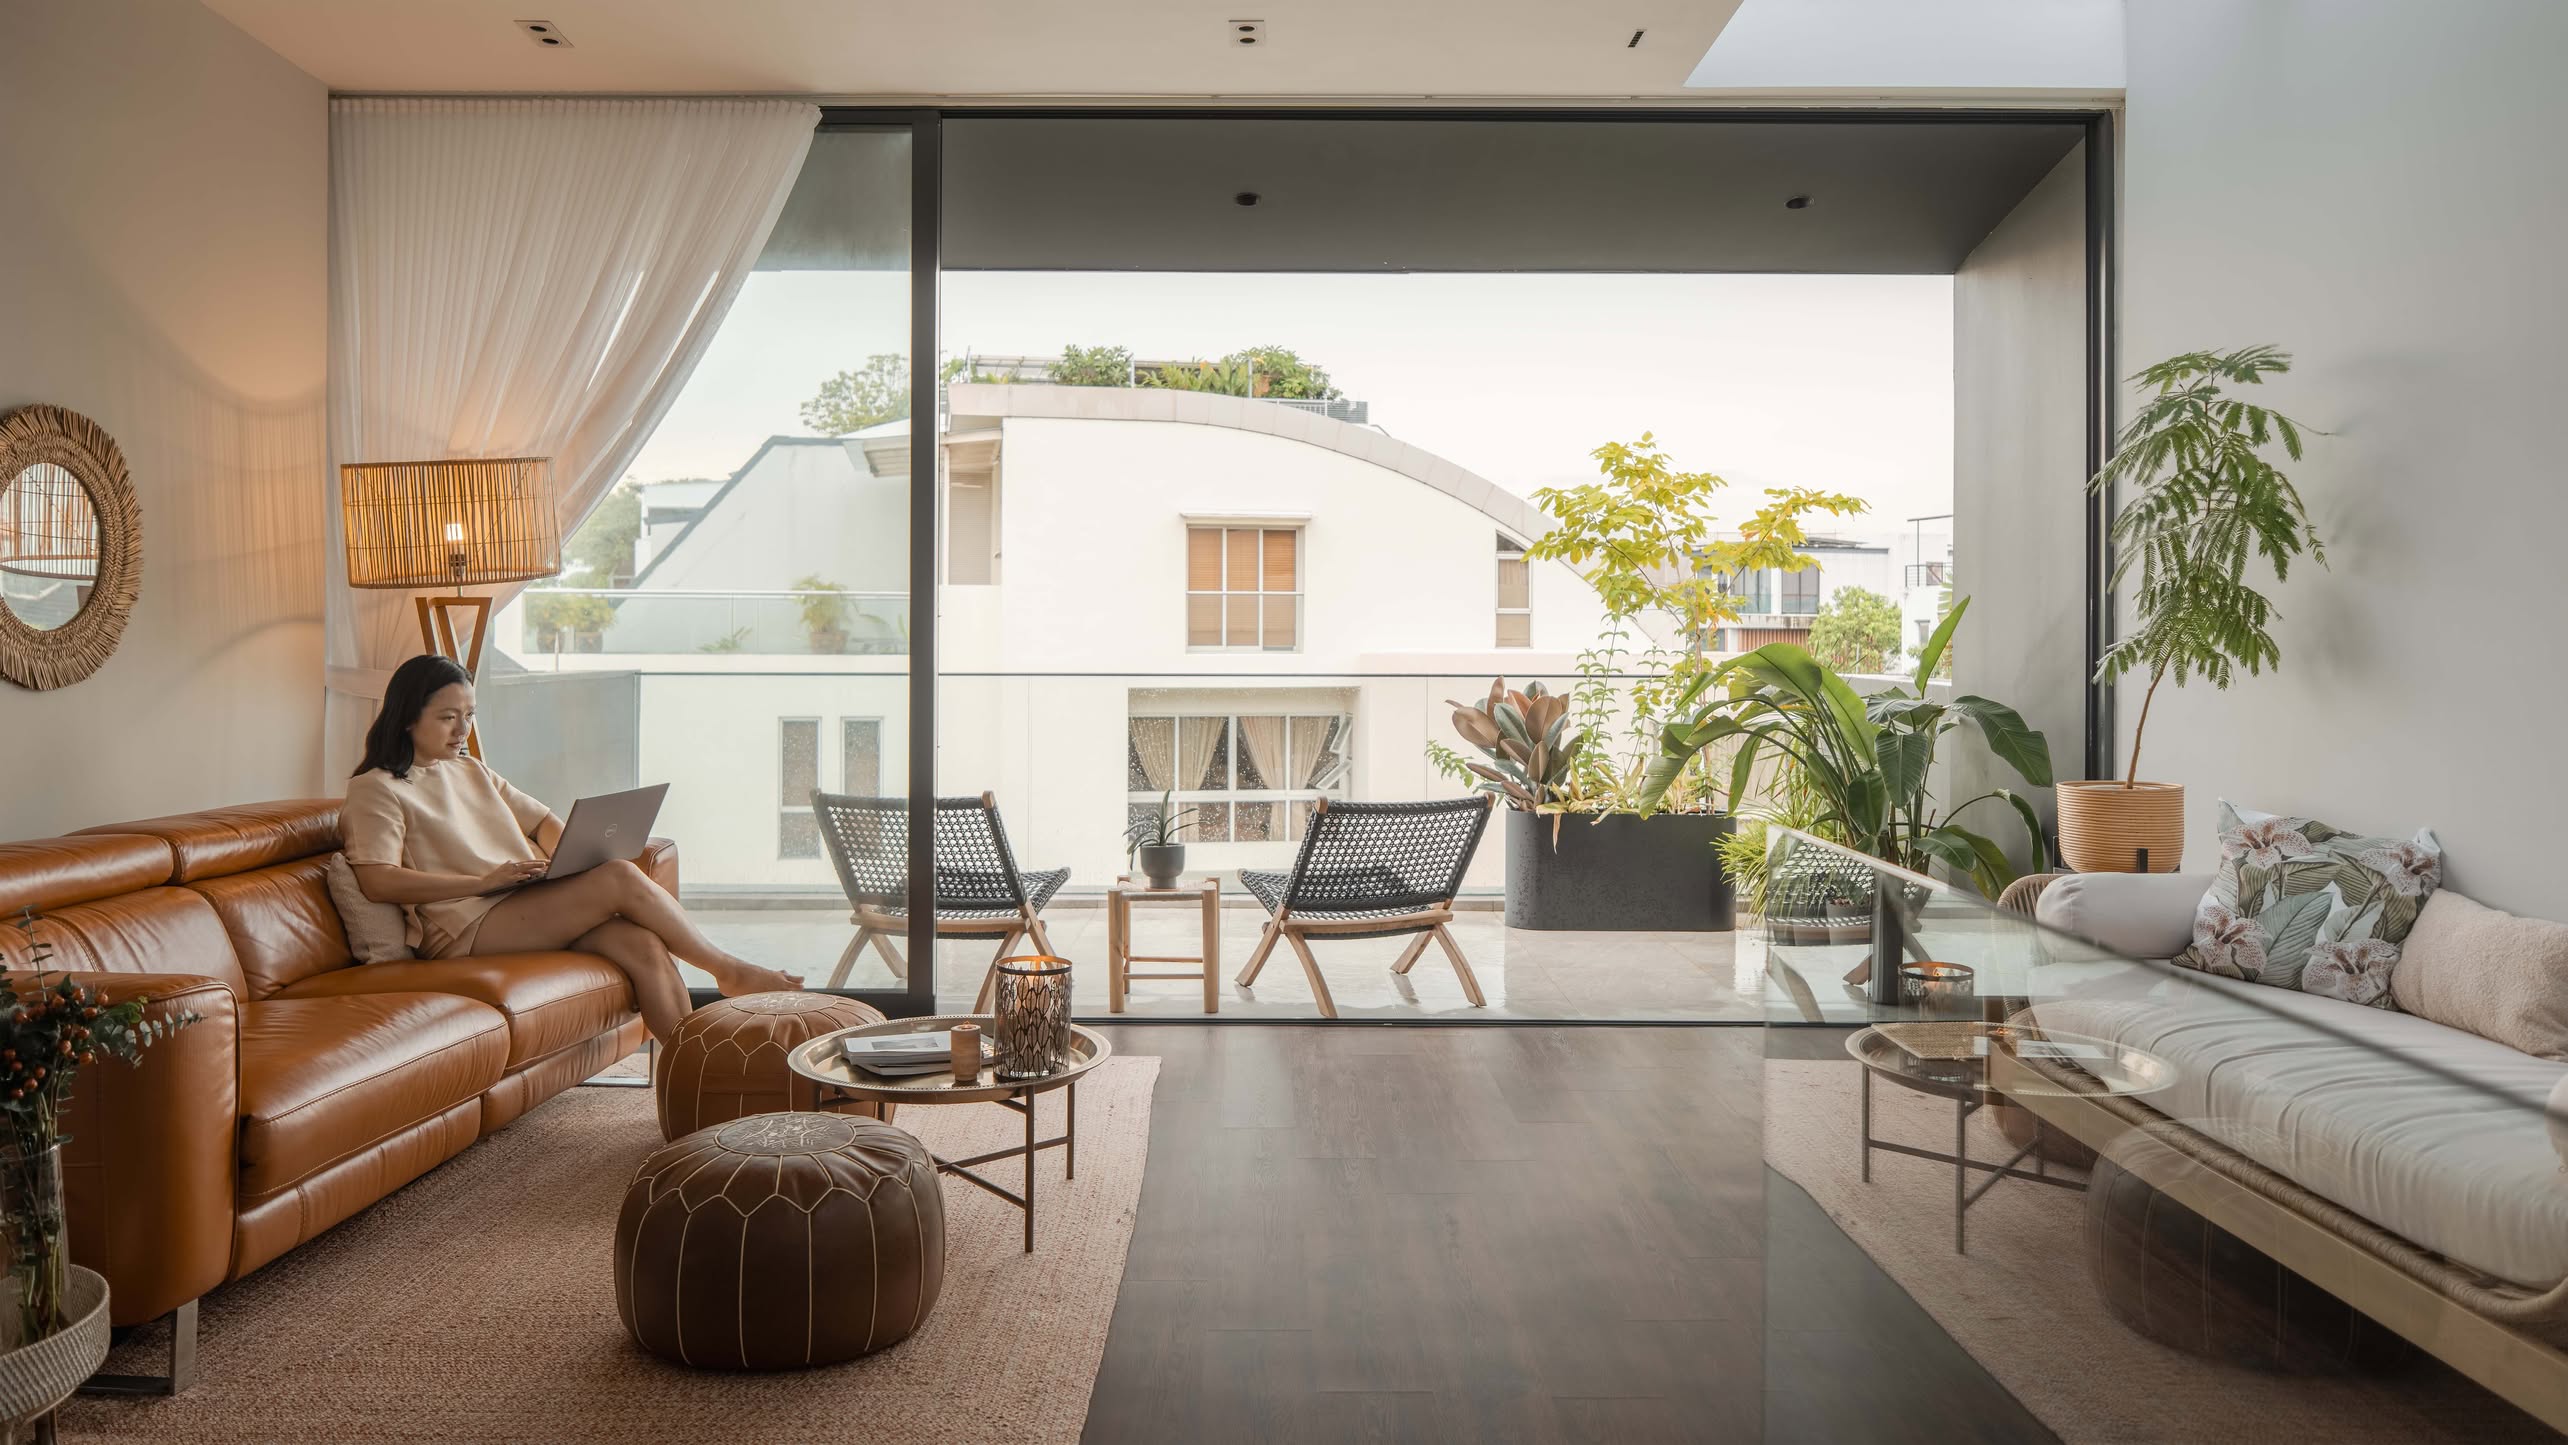
Jessica wanted more open, unrestricted space – a great room instead of a living room (great rooms are large living rooms with an open floor plan design, creating a space for entertainment, recreation, and relaxation). Fortunately, it was as simple as removing the common bedroom. “The absence of a structural wall between the common bedroom and the living room allowed me to have a true unobstructed open concept,” she said.
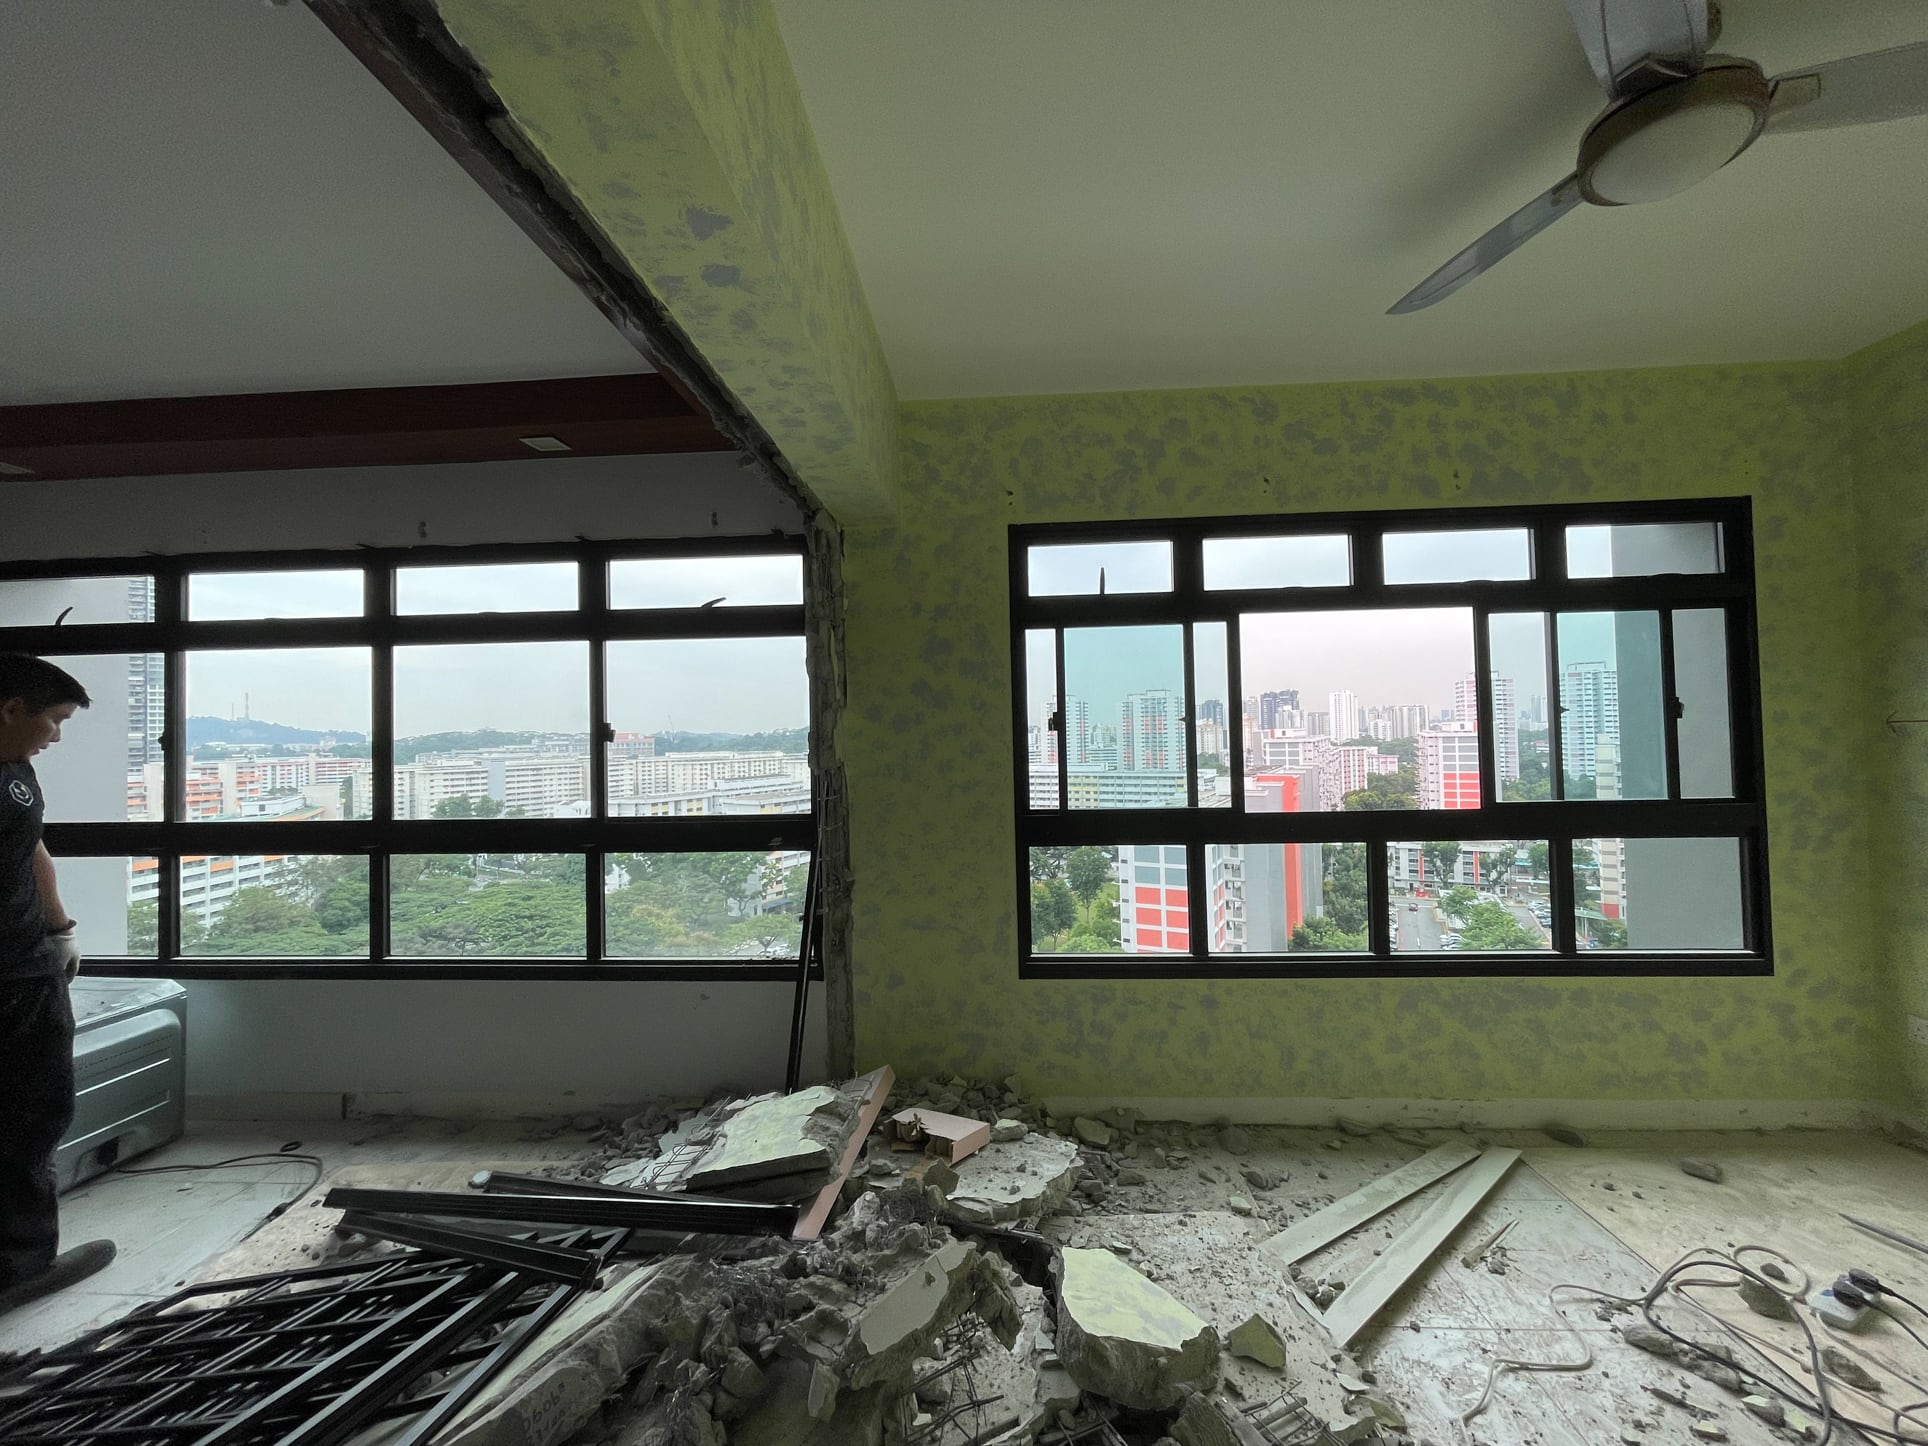
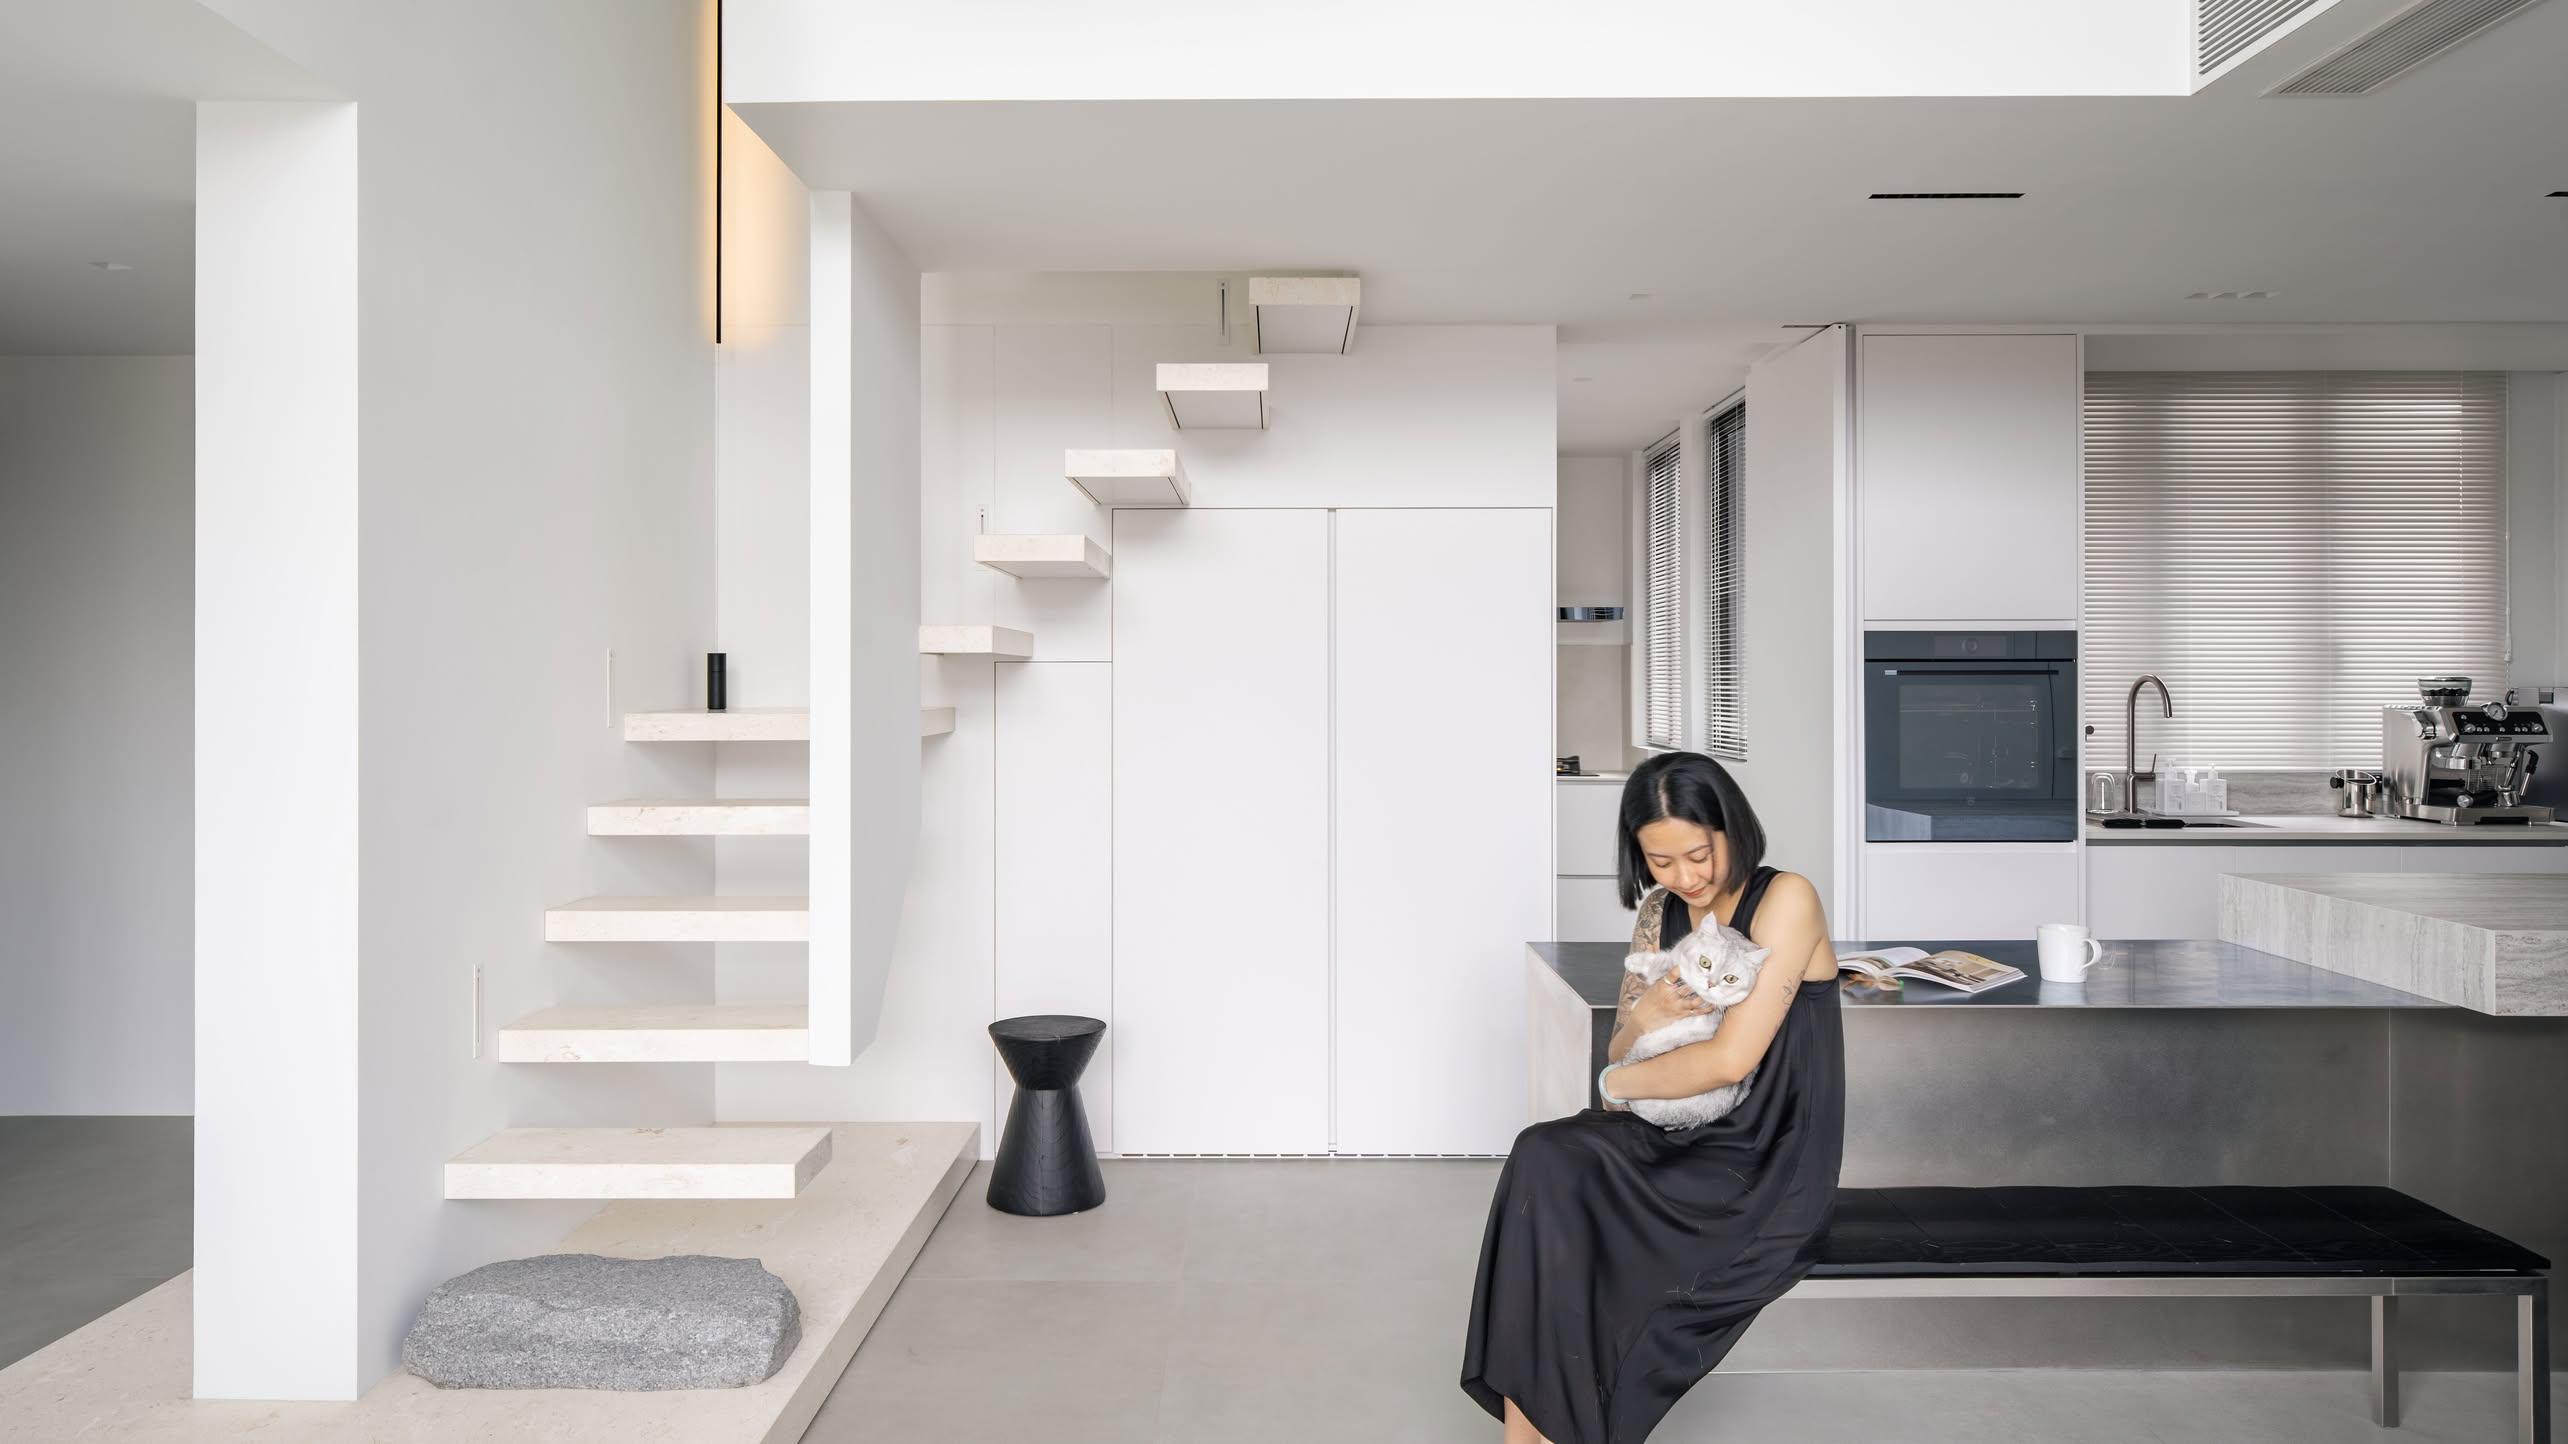
Today, the great room still functions as a space to entertain and dine, but it’s no longer claustrophobic as before. In fact, it’s quite the opposite since the absence of a structural wall eliminated the hallway and created a seamless environment. The majestic view of Clementi Central – reaching as far as the west coast of Singapore on a bright day – is no longer obstructed.

But opening up the floor plan would be utterly useless if the furniture doesn’t match this open space. So the couple sourced furniture from a variety of portals – a combination of custom, retail, and re-used furnishings.
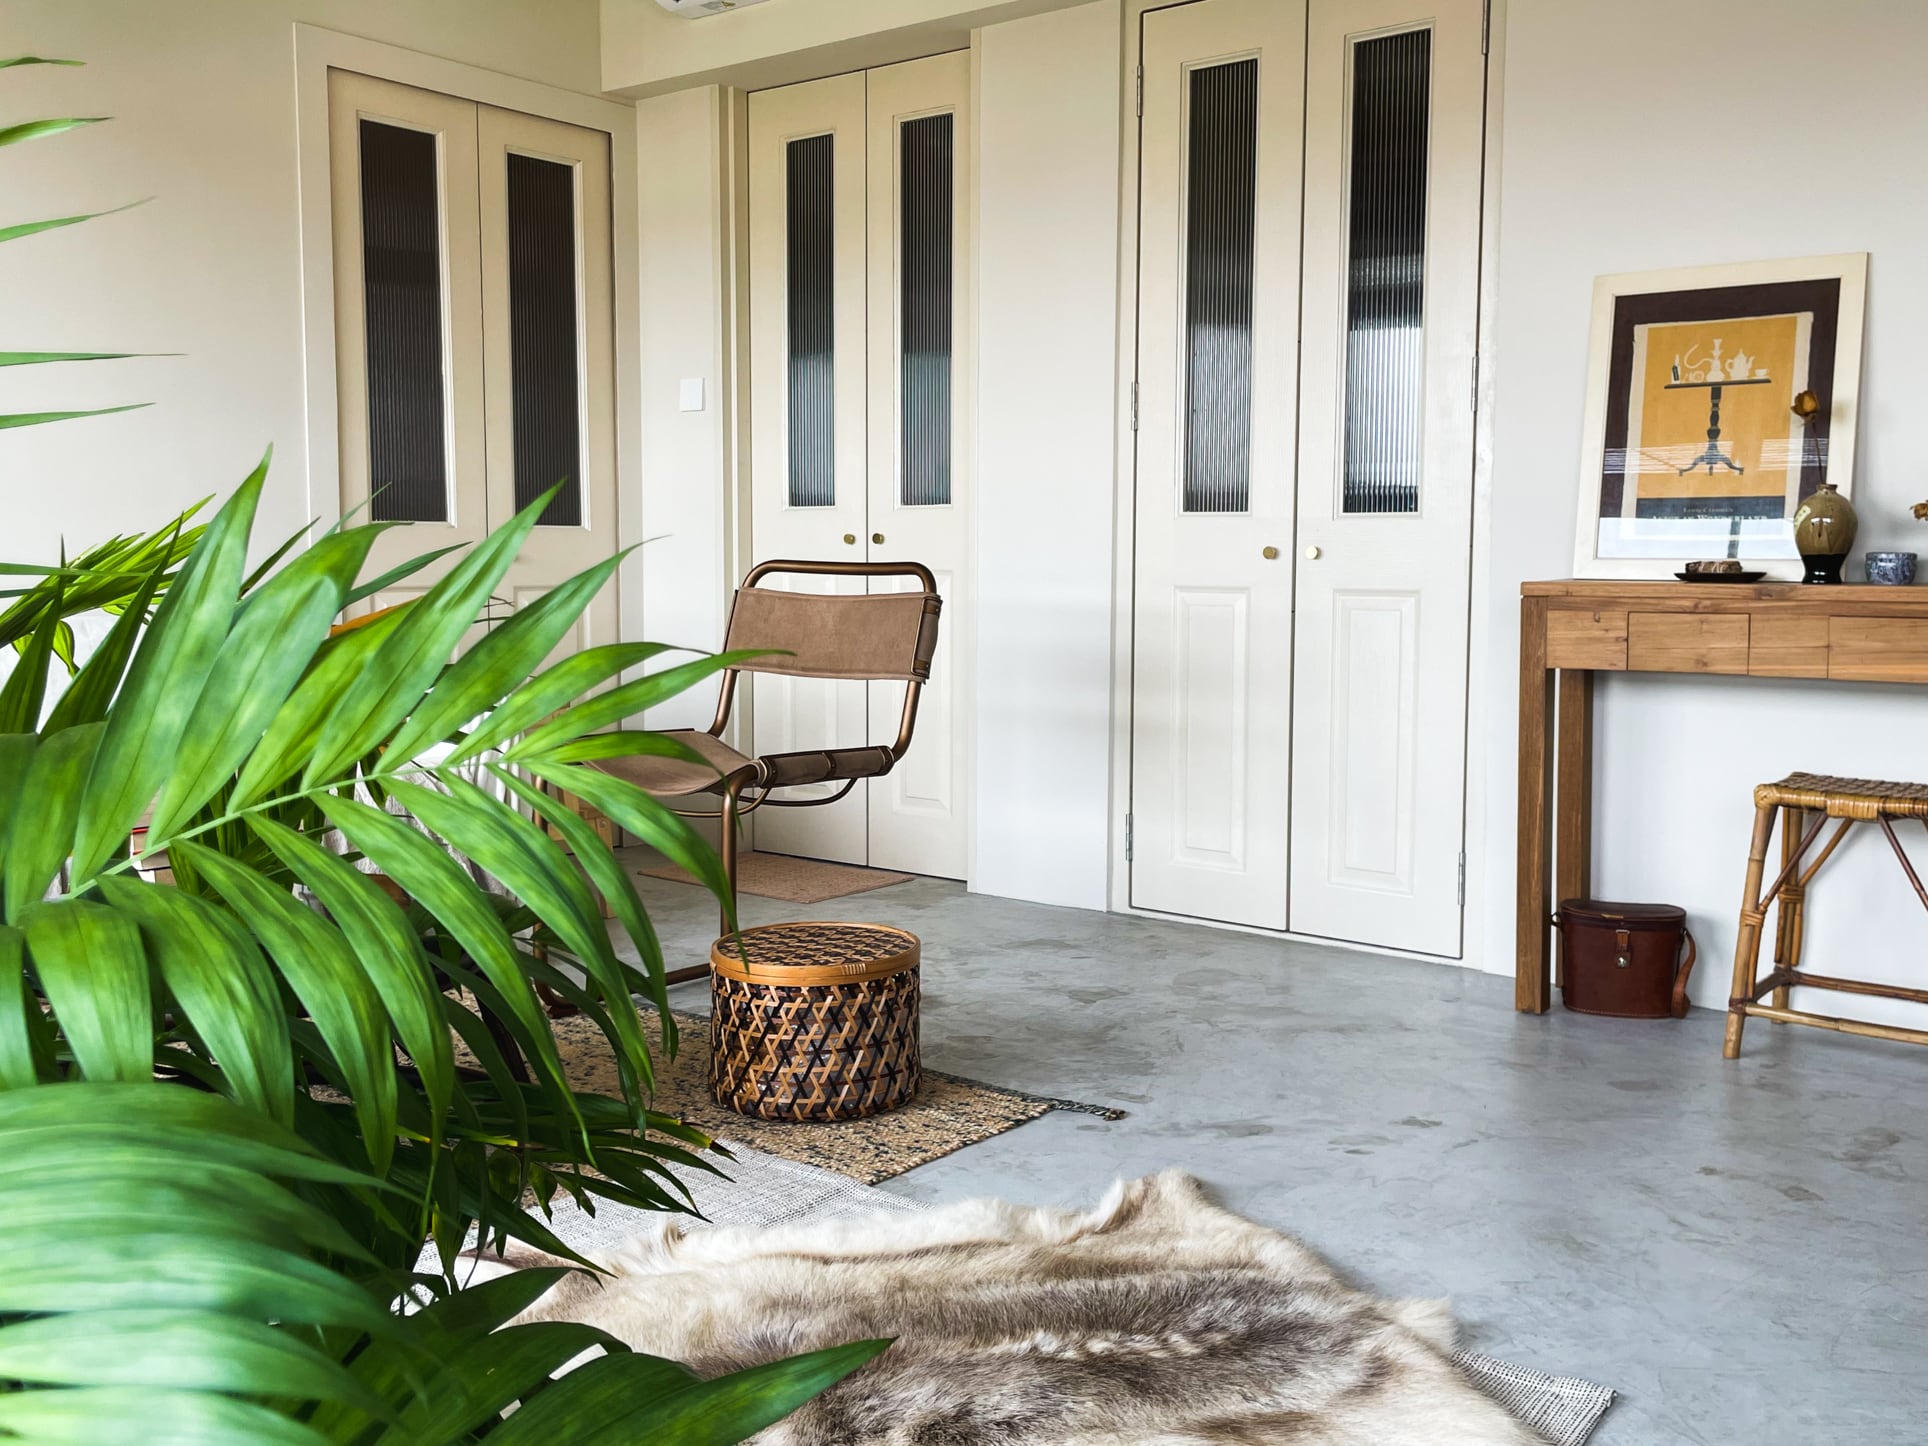
“I tend to gravitate towards materials that would age over time. I appreciate how the aging, scratches, dents, and imperfections form the story and character of the home,” said Jessica. “If I had to assign it a style, I would say it’s Indonesian wabi-sabi.”
It’s not a blend of styles that you come by in Singapore every day that’s for sure.
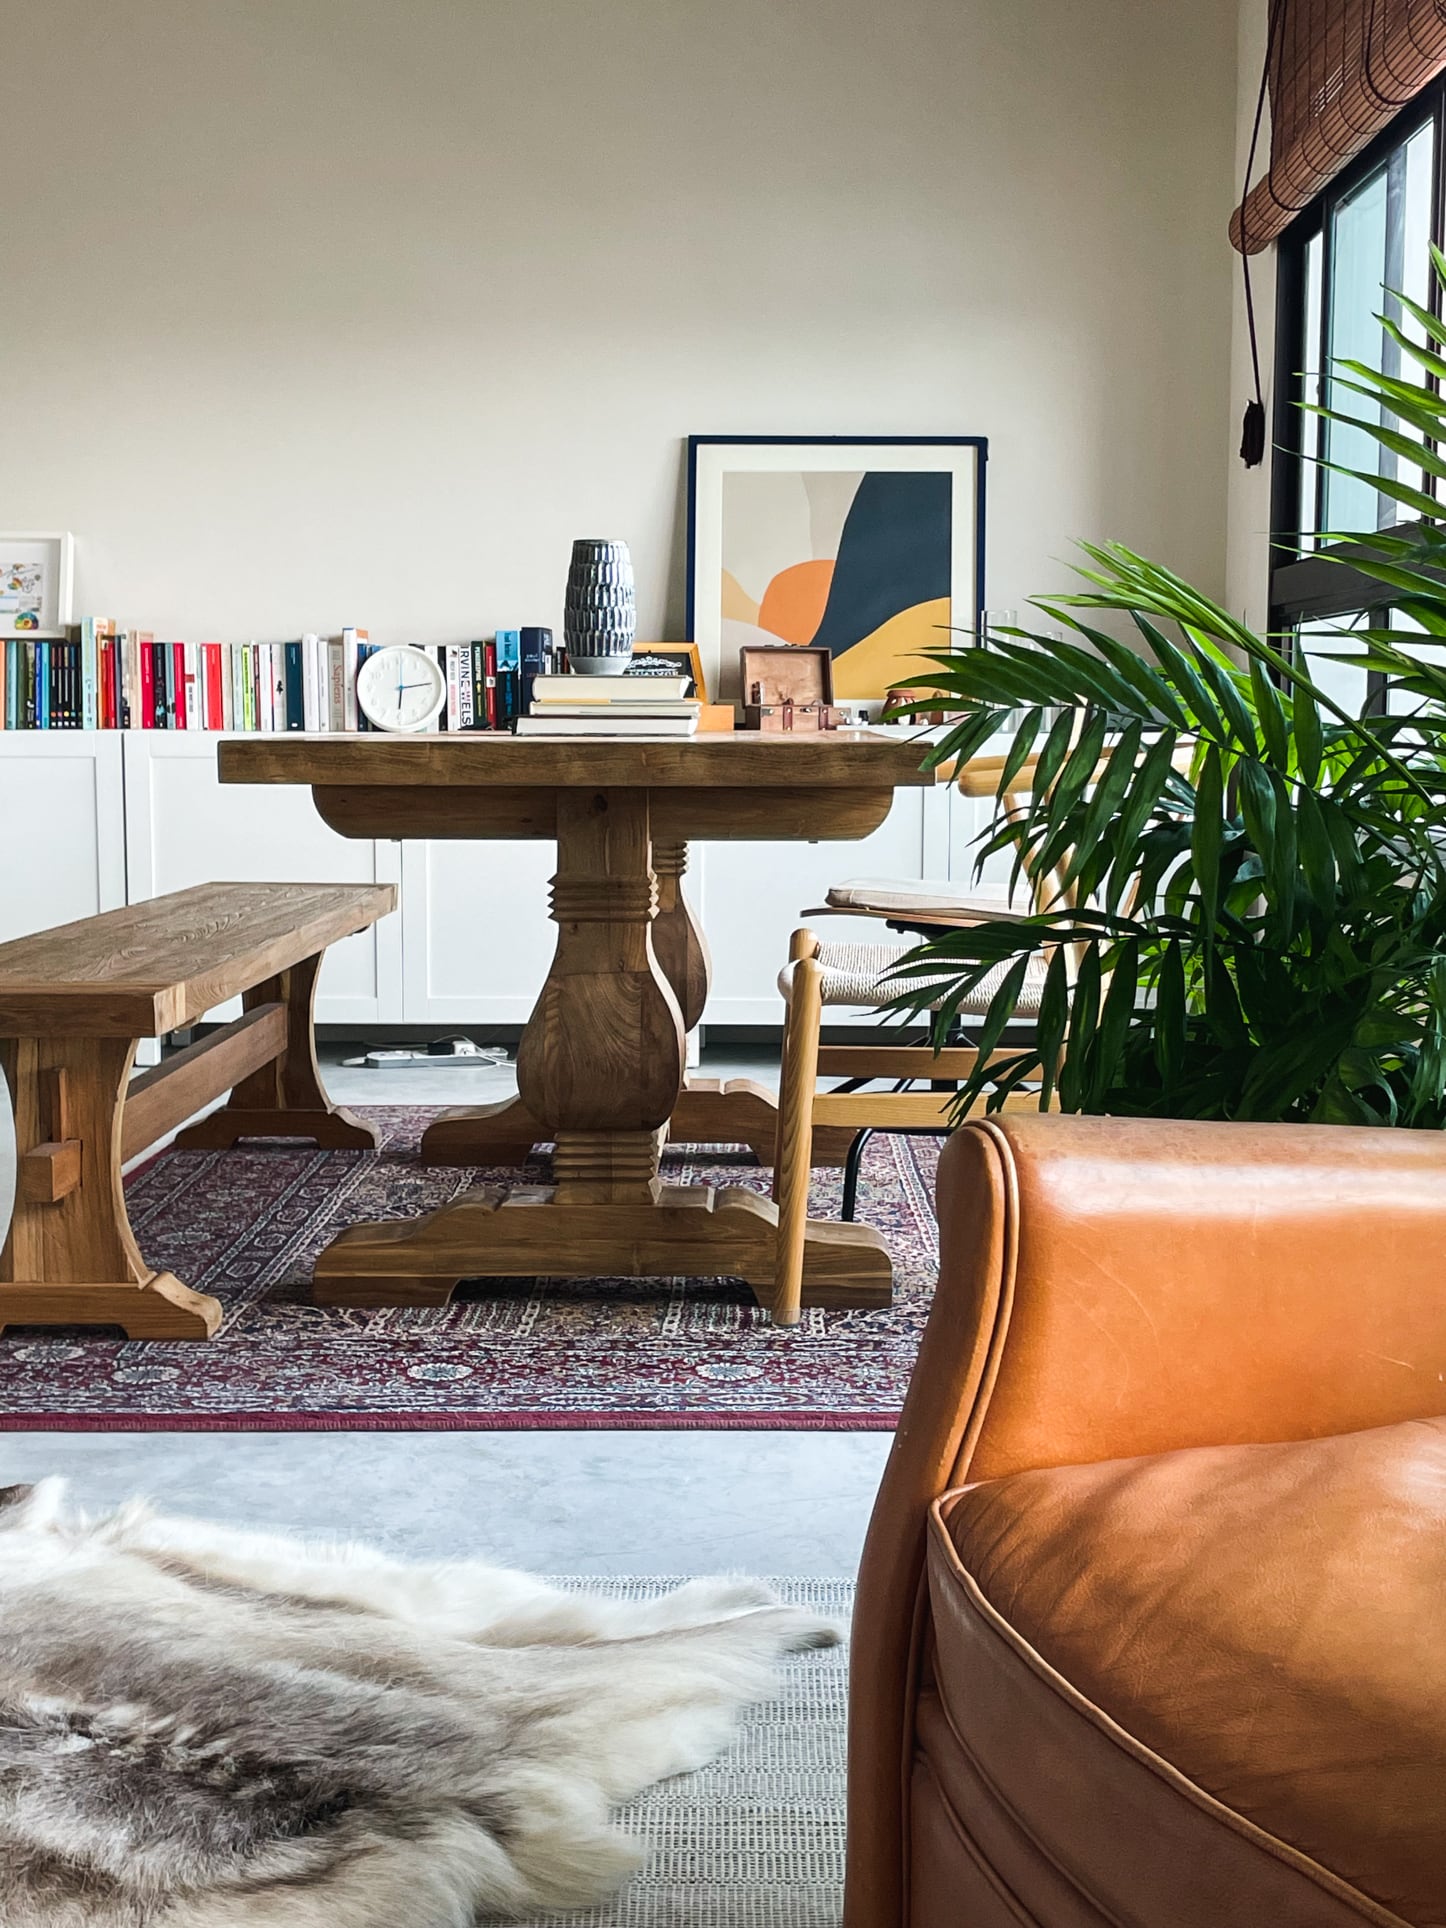
To further compliment the space, the dining table was custom-made by an Indonesian furniture supplier located at Tan Boon Liat.
An outcome of creative synthesis, even the coffee table has its own story to tell. Its legs came from a rattan chair Jessica found at an HDB disposal point, while the black marble top, which adds sentimental value, was from an old broken side table that her mom used to own.
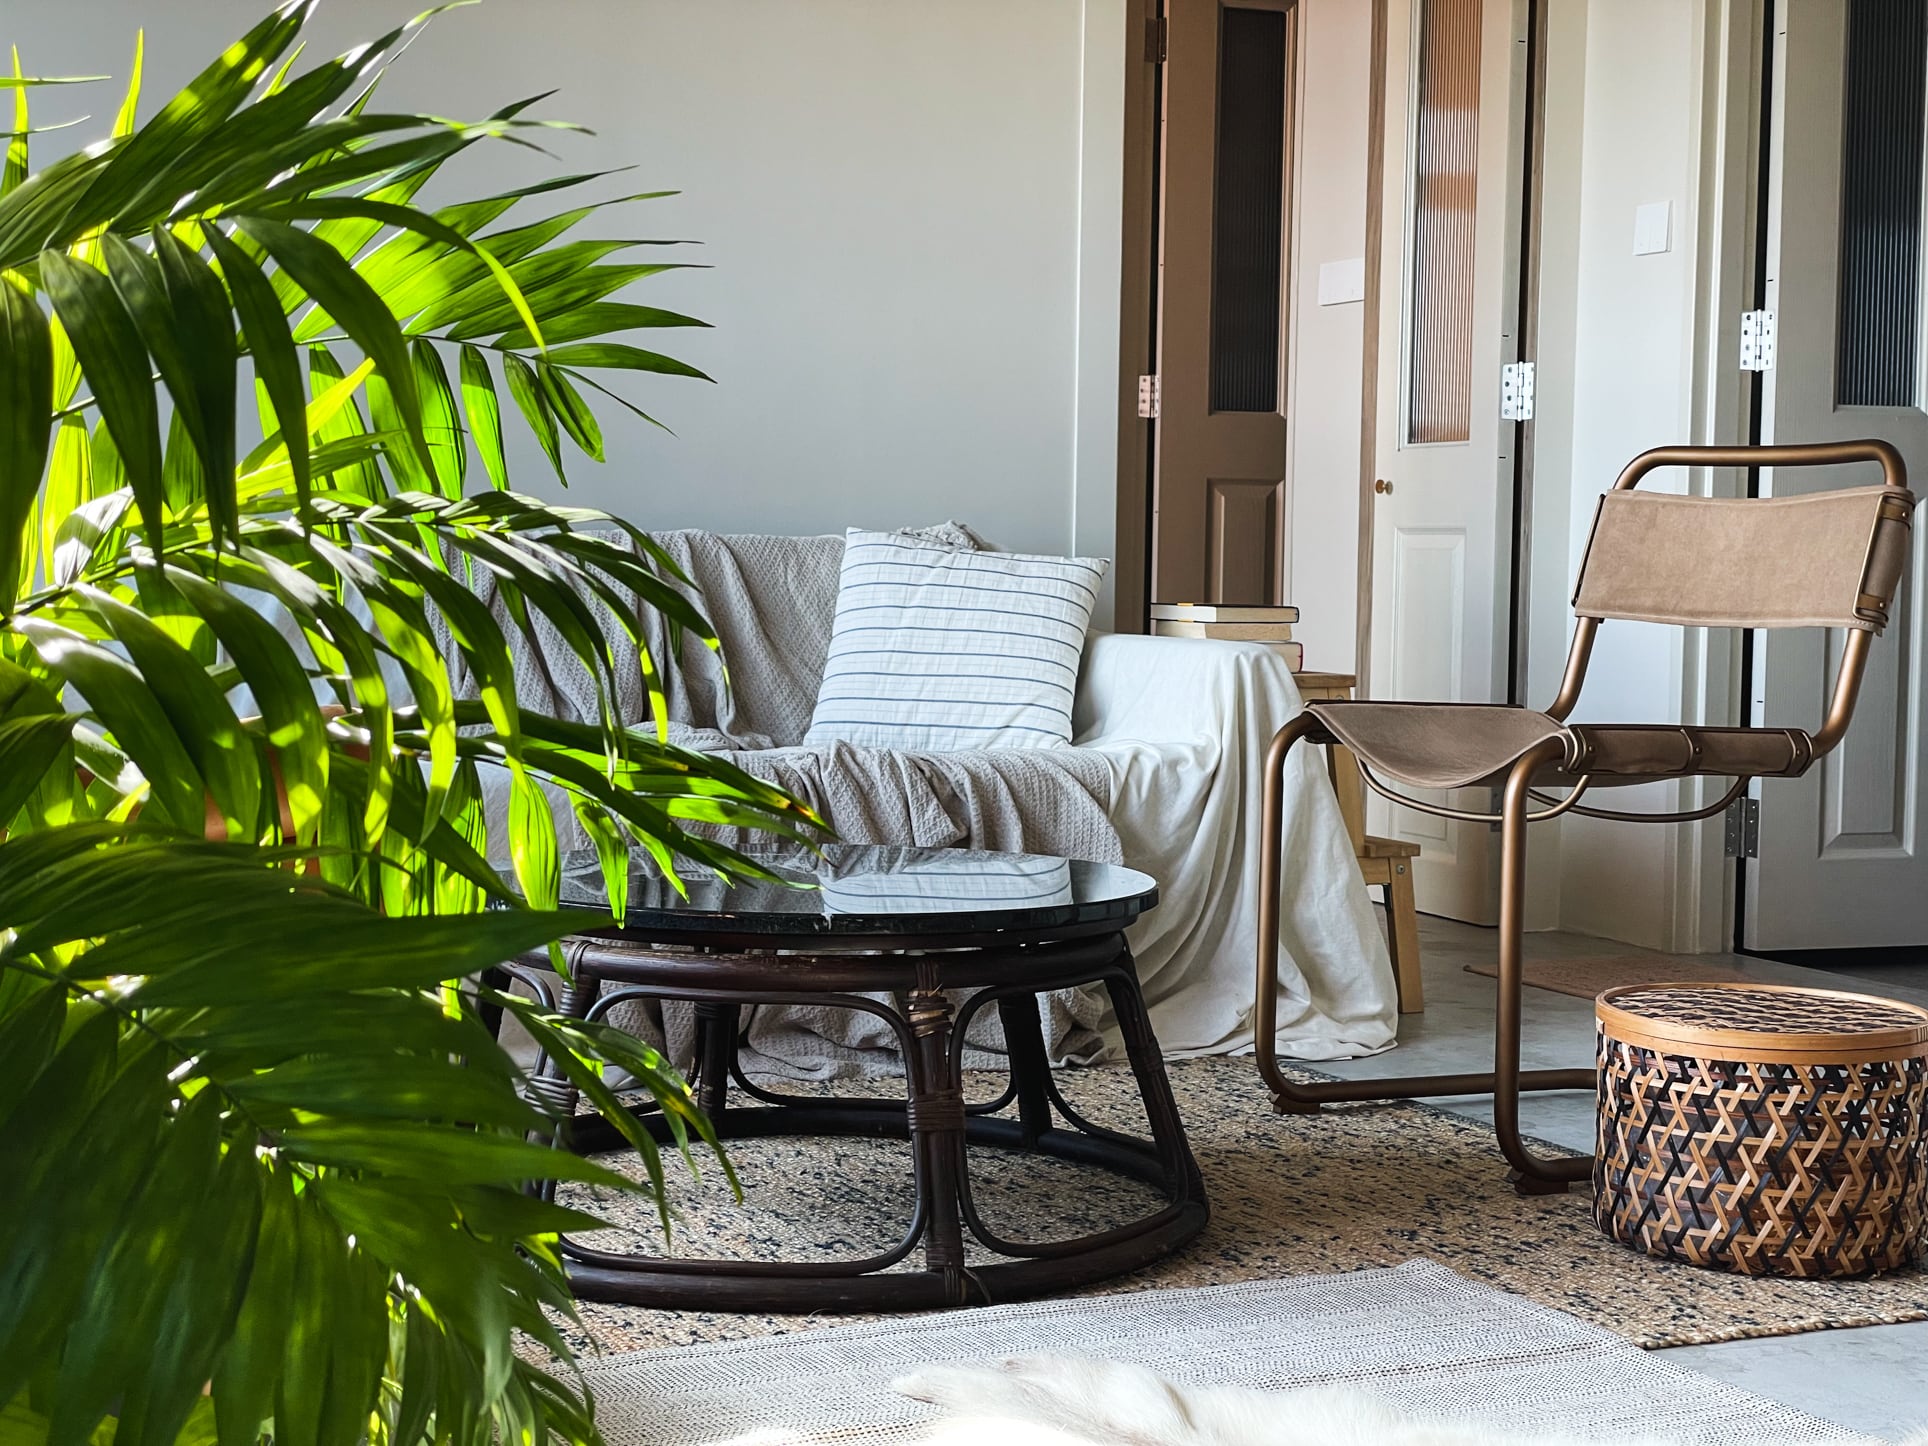
“The white console with shaker doors along with the rugs are from IKEA,” she added.
Master Bedroom
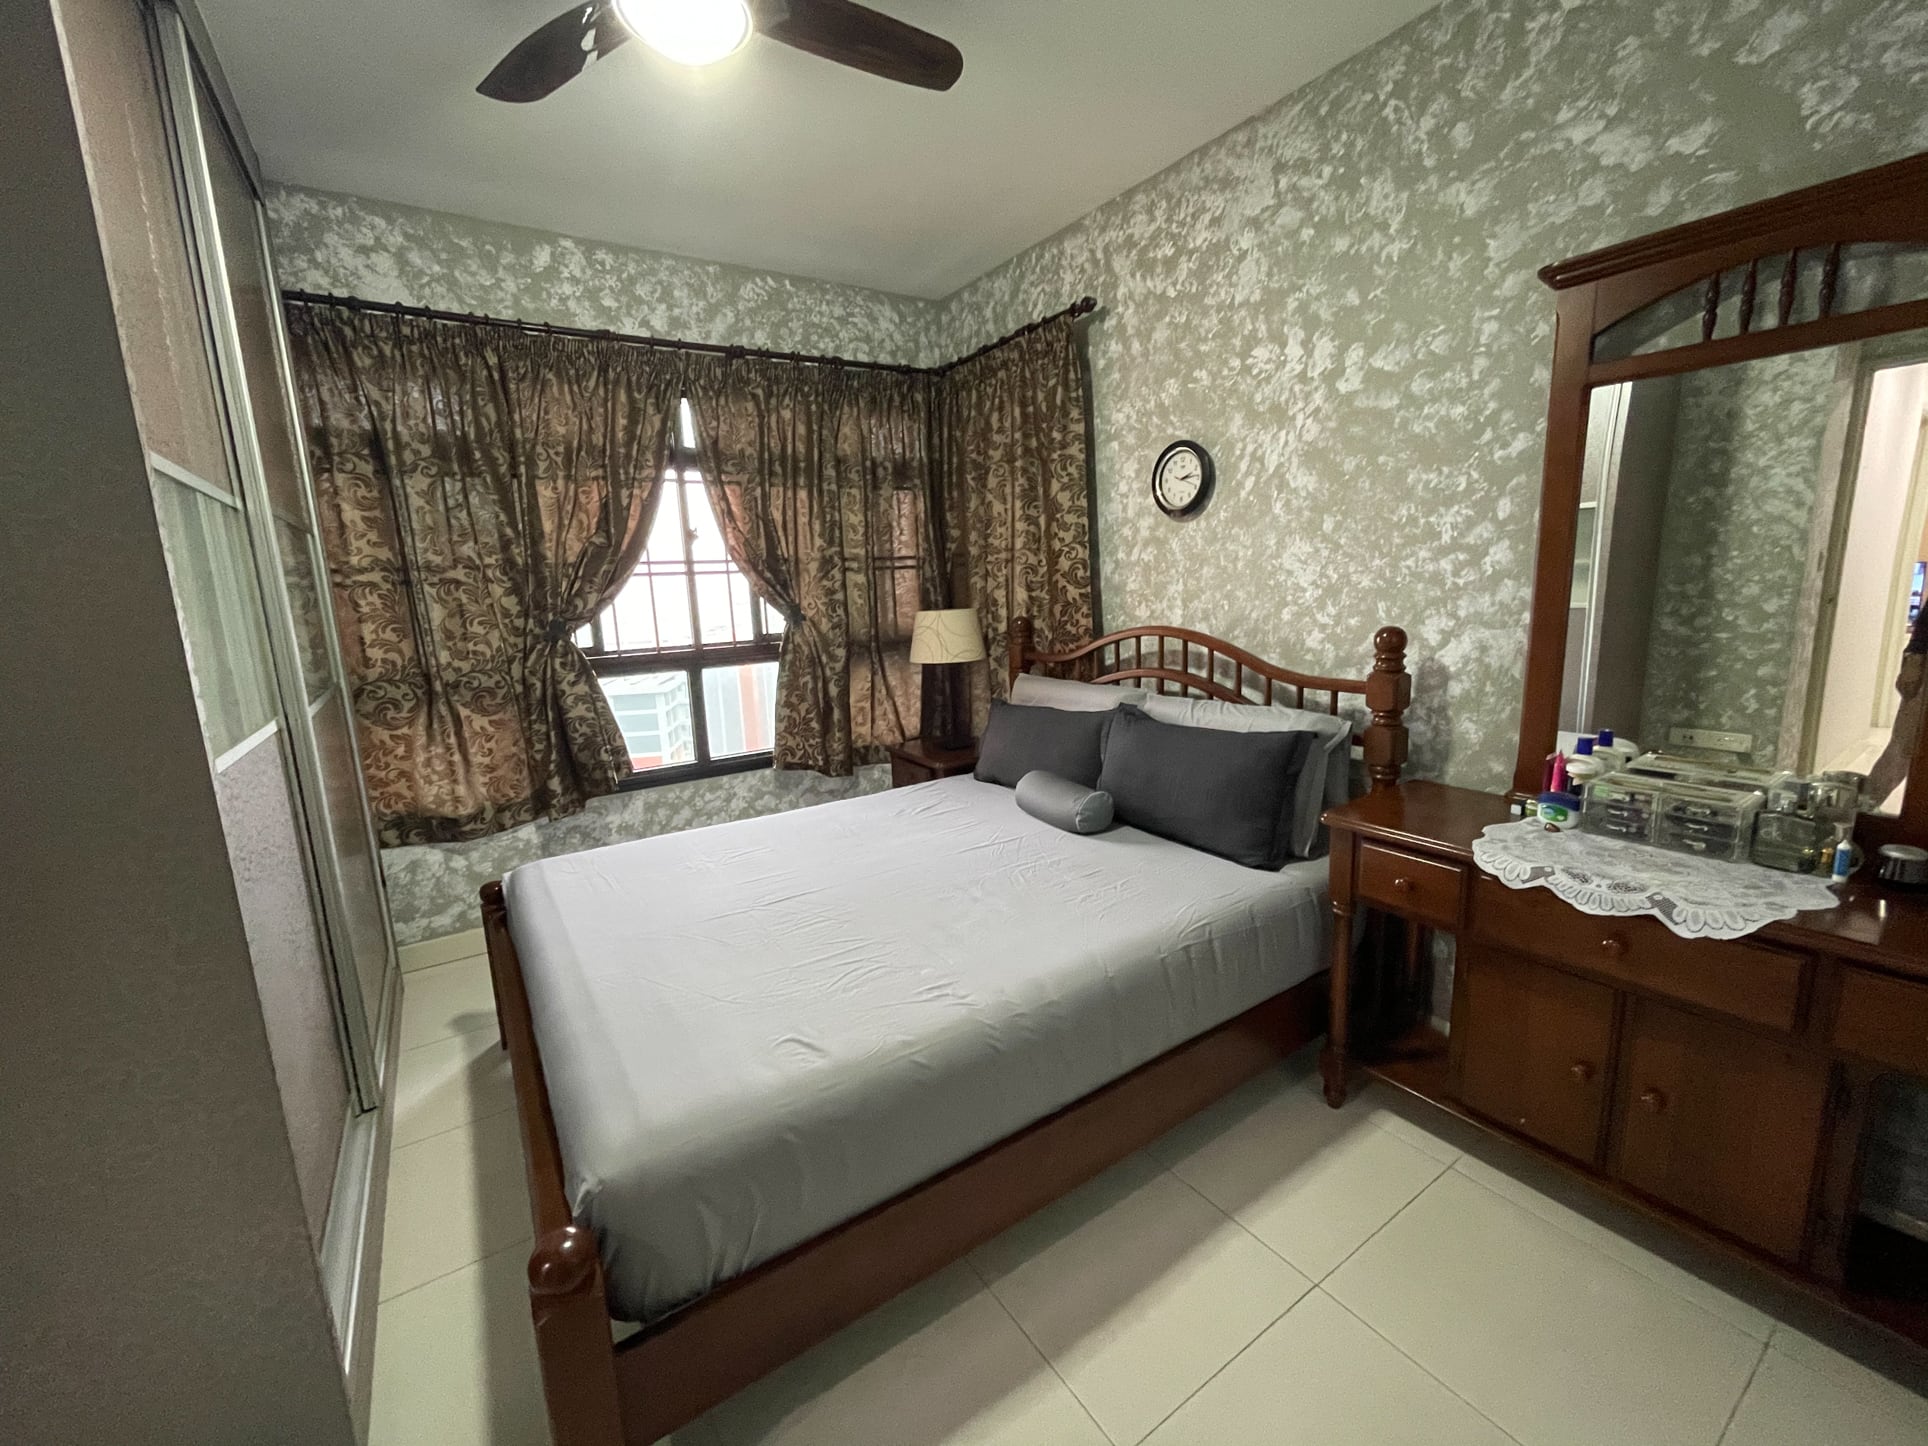
Previously, a medium olive green wallpaper – designed to look like a decorative plaster texture – covered the entire bedroom walls. However, the overall effect made the room look outdated. And the furniture in the room, which included a ceiling fan with light, a dresser, and a large sliding cabinet, didn’t help matters. Combining these elements with the two-post spindle bed made the room even more suffocating.
After the reno work, the bedroom has considerably improved. The walls, now painted with a gorgeous sandy cream colour, make the room appear larger because of the heightened perception of space. The ceiling, free from the large fan with light, now has flush-mounted lights in the corners.
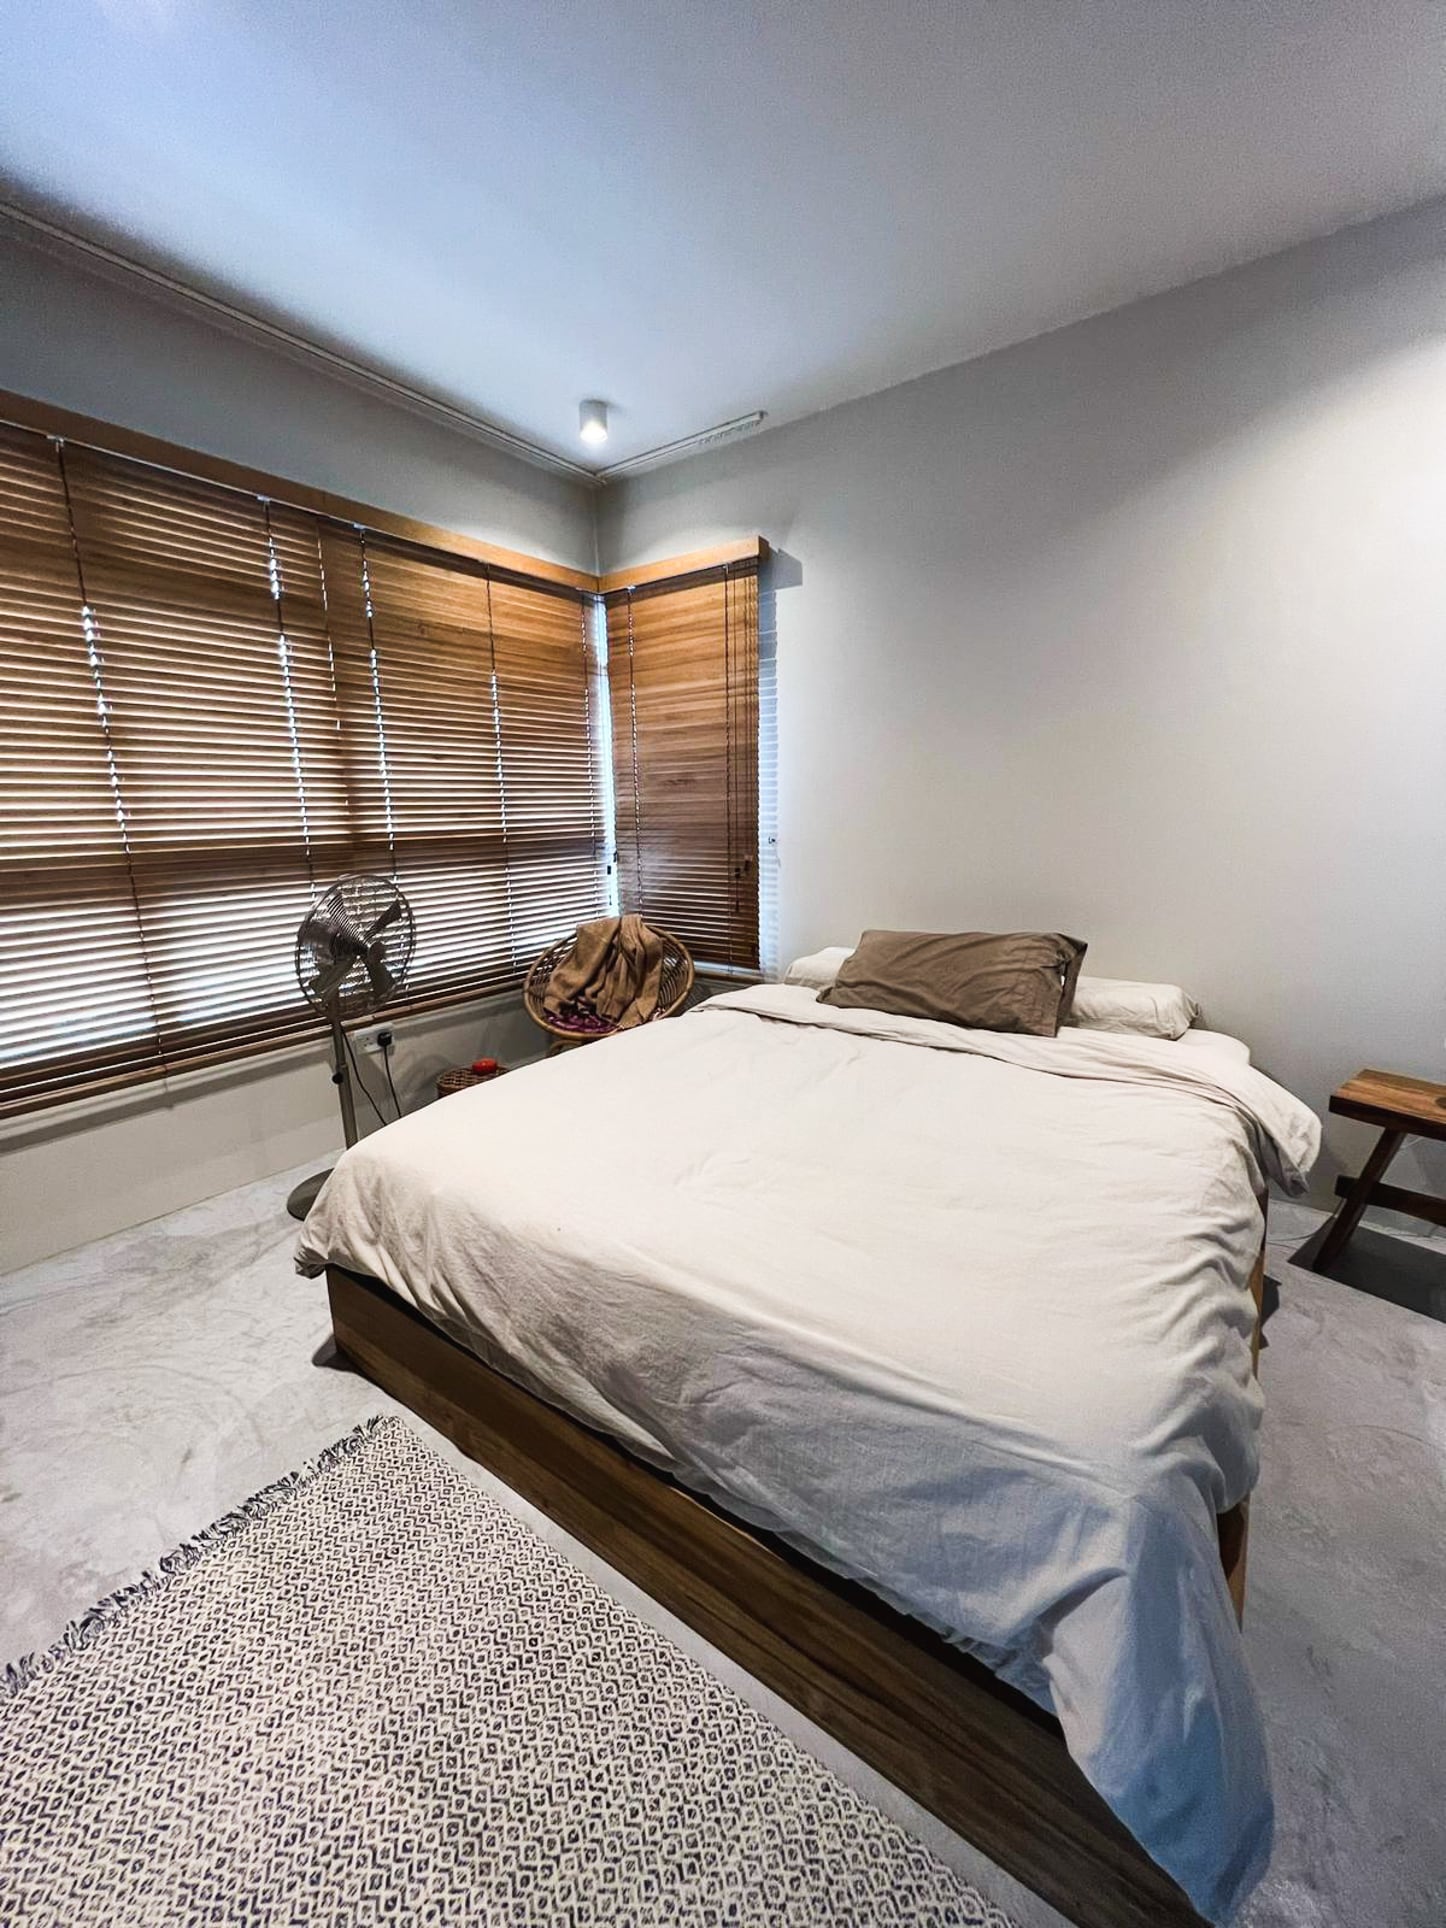
Just as with the great room, the bedroom renovation gave the couple another reason to switch out the old furnishings with ones that match the new design.
First off, Jessica and her fiancé removed the old dresser and cabinet. Then, they replaced the bed with a simpler, custom-designed frame from the same Indonesian furniture supplier where they got their dining table. The bedside table with natural wood design further accentuates the room’s simplicity.
Kitchen
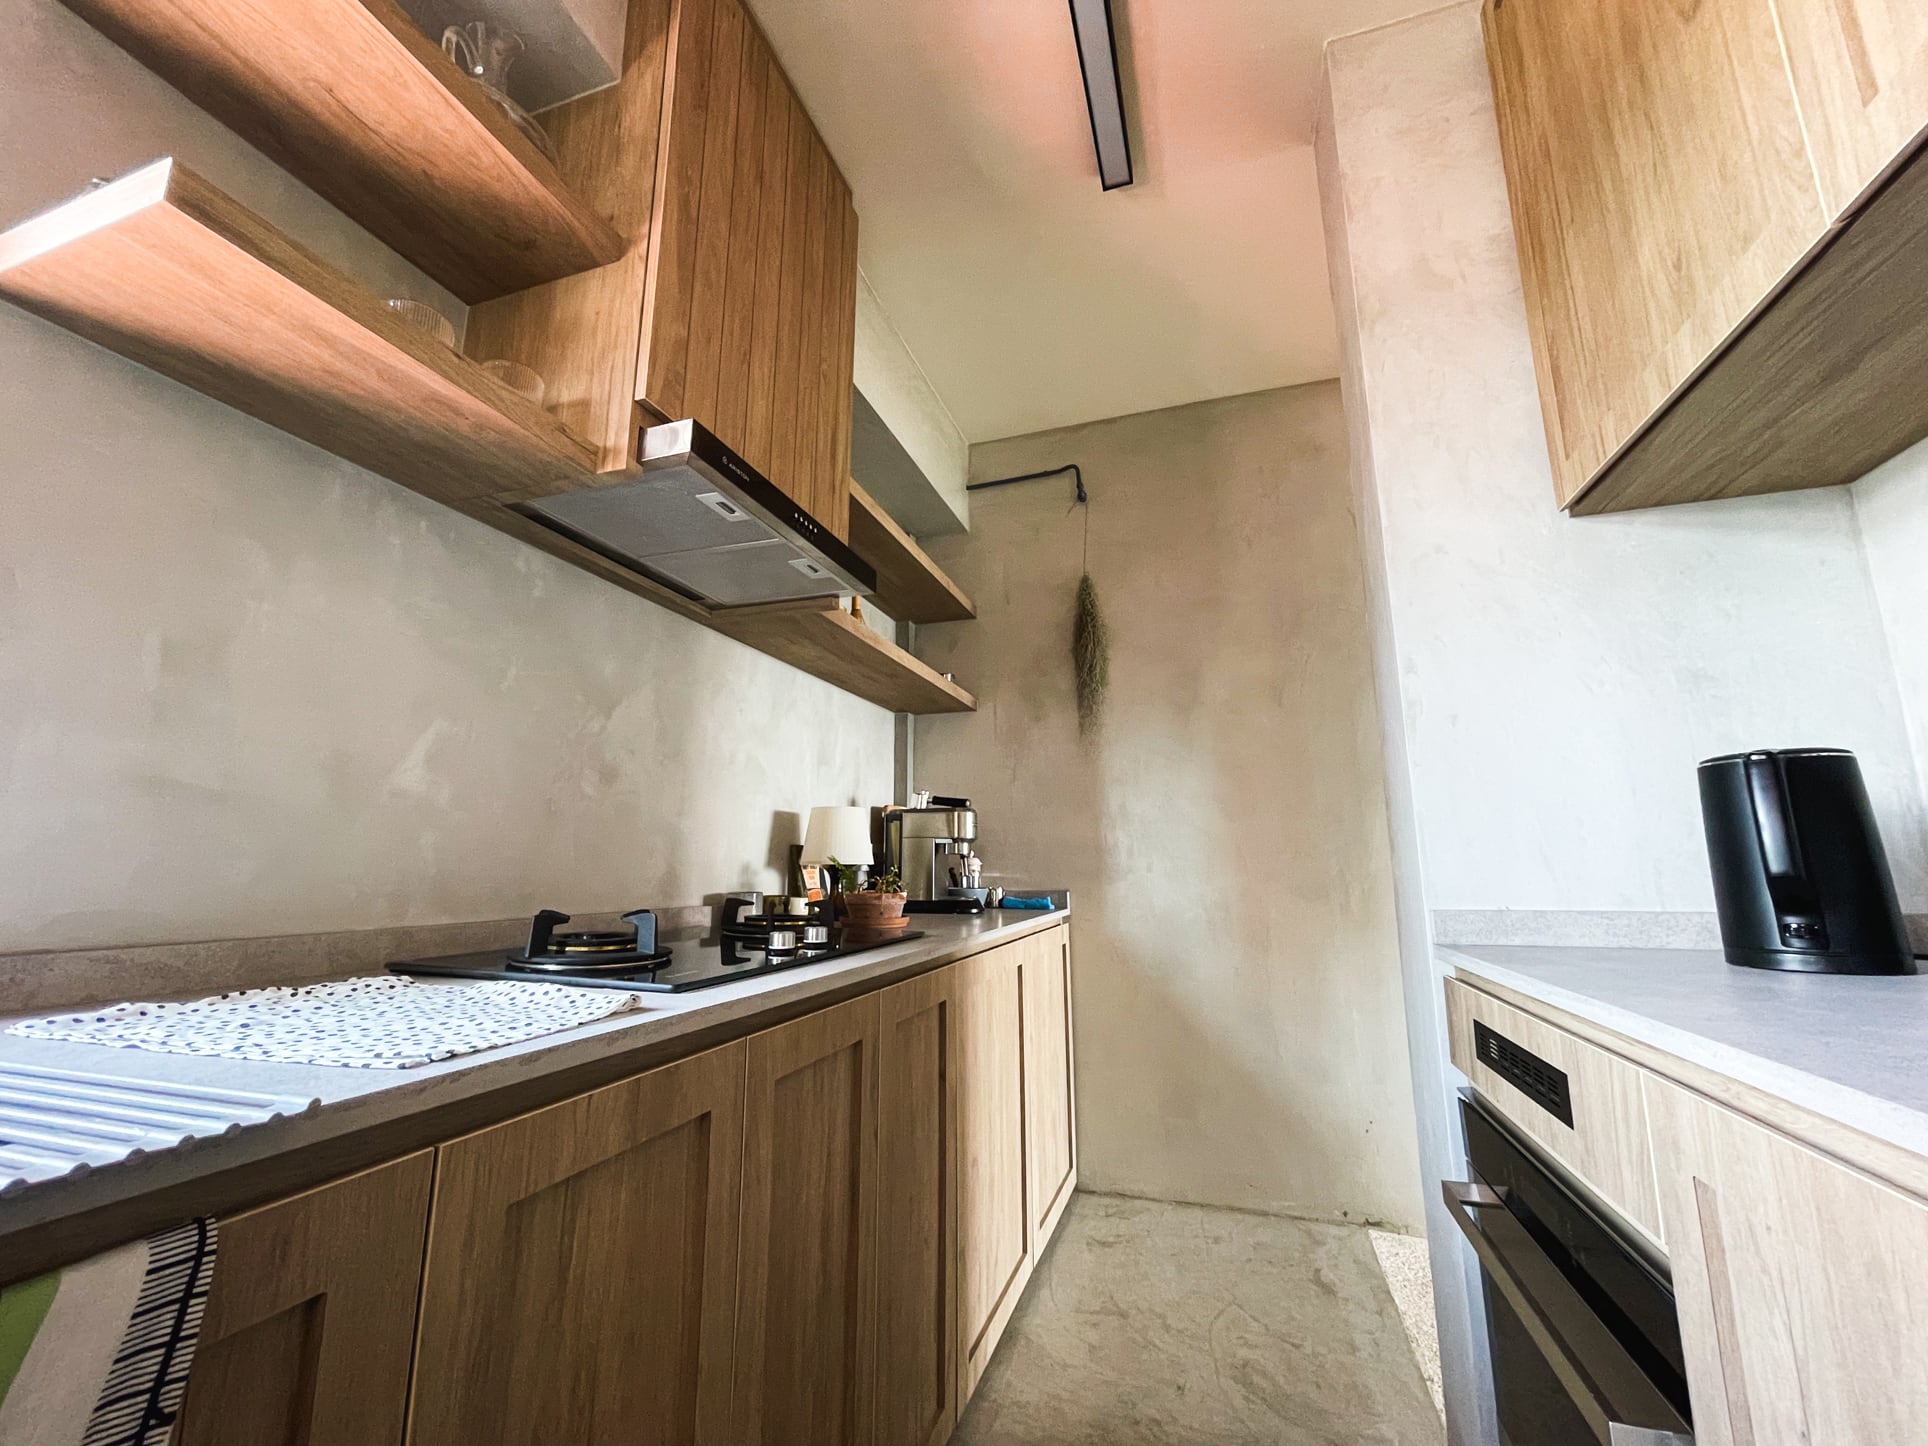
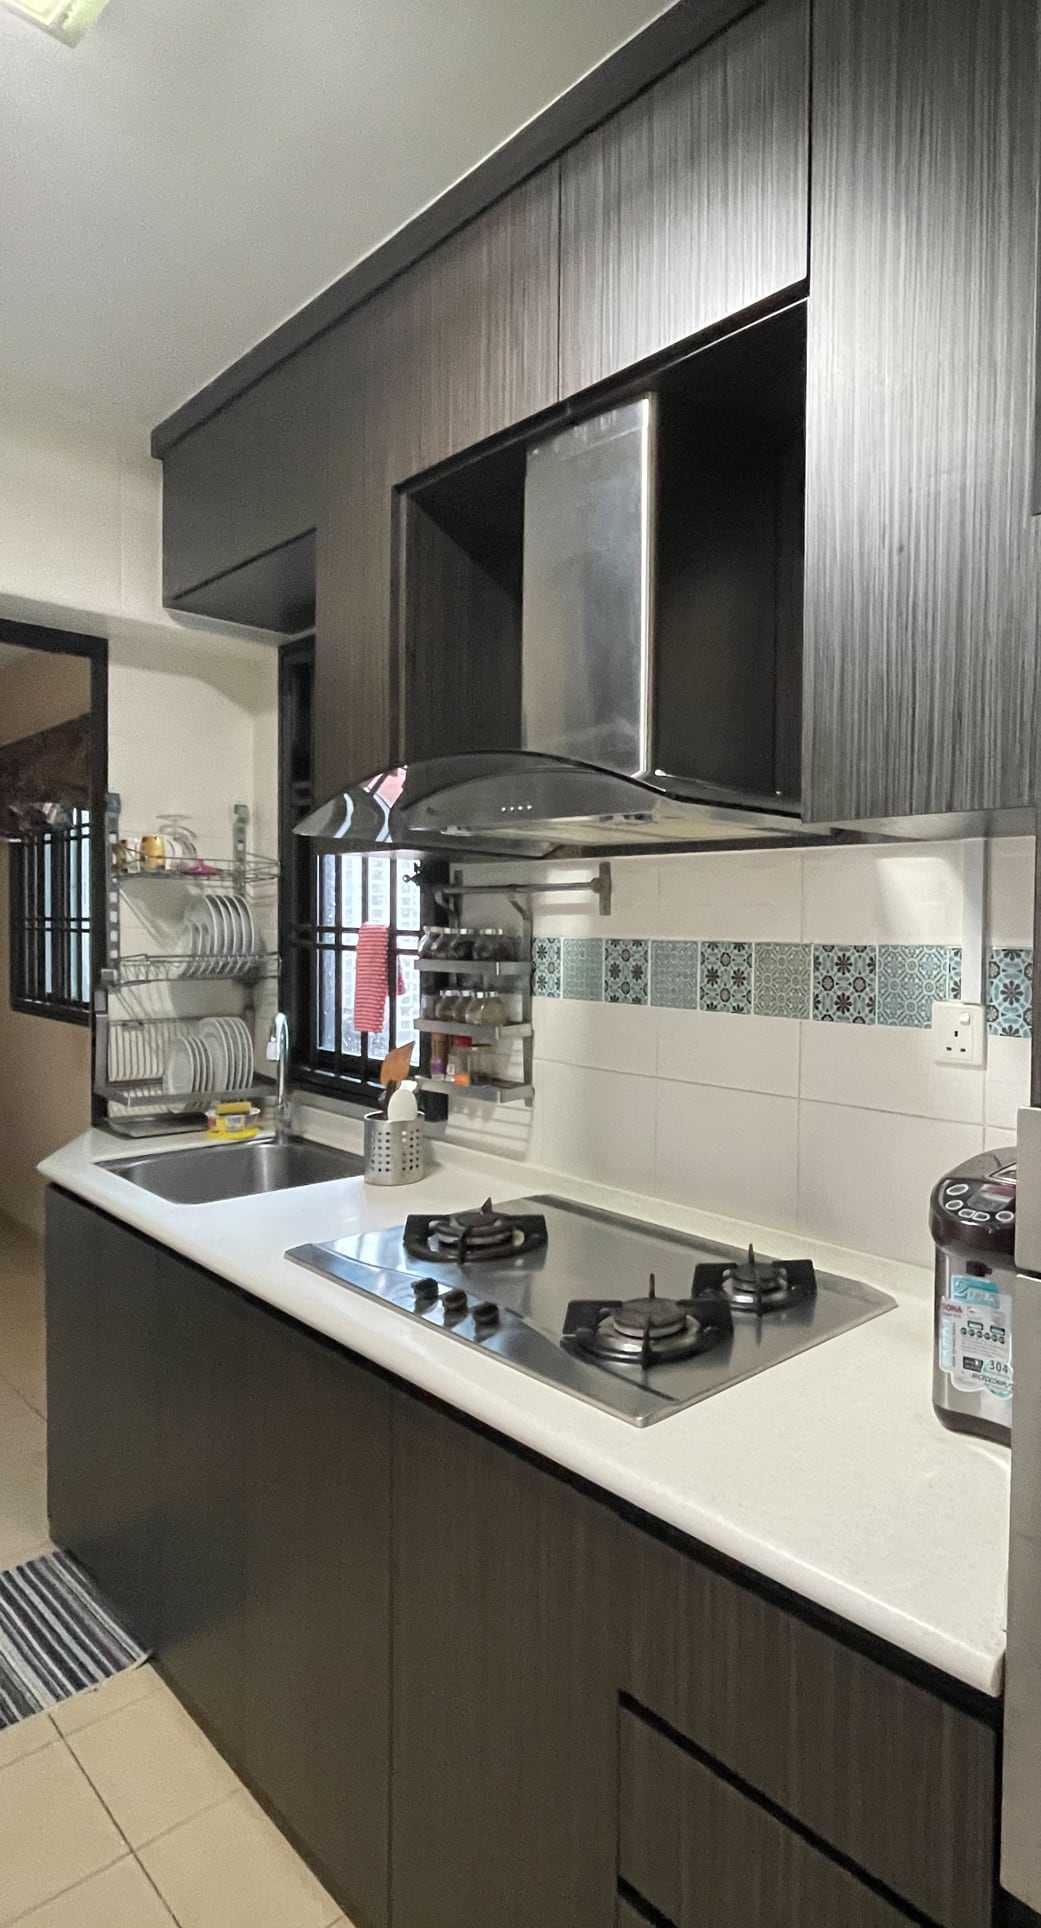
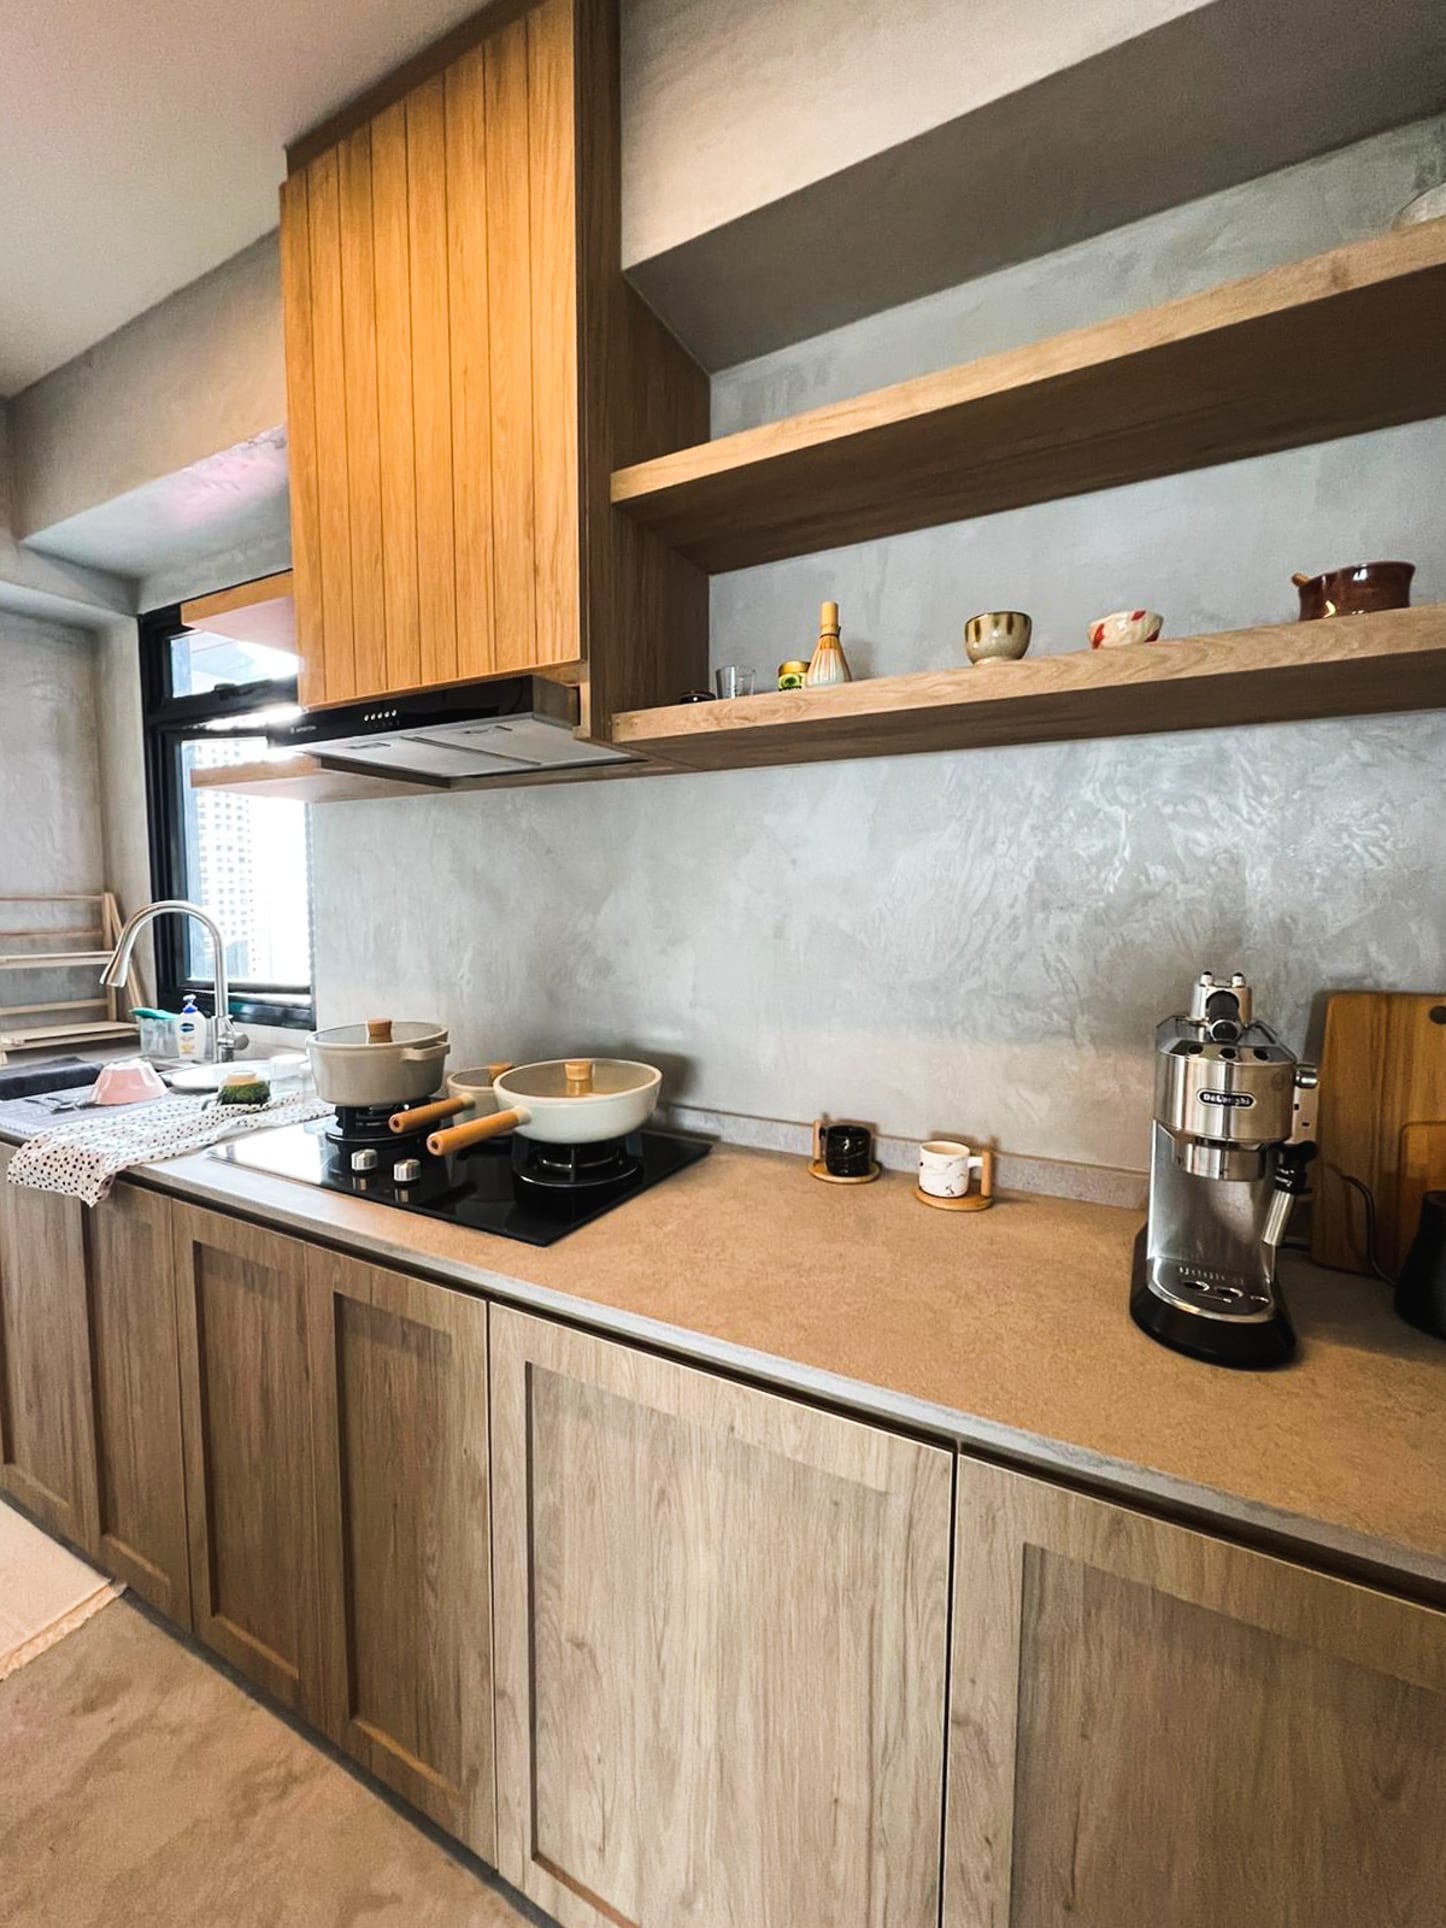
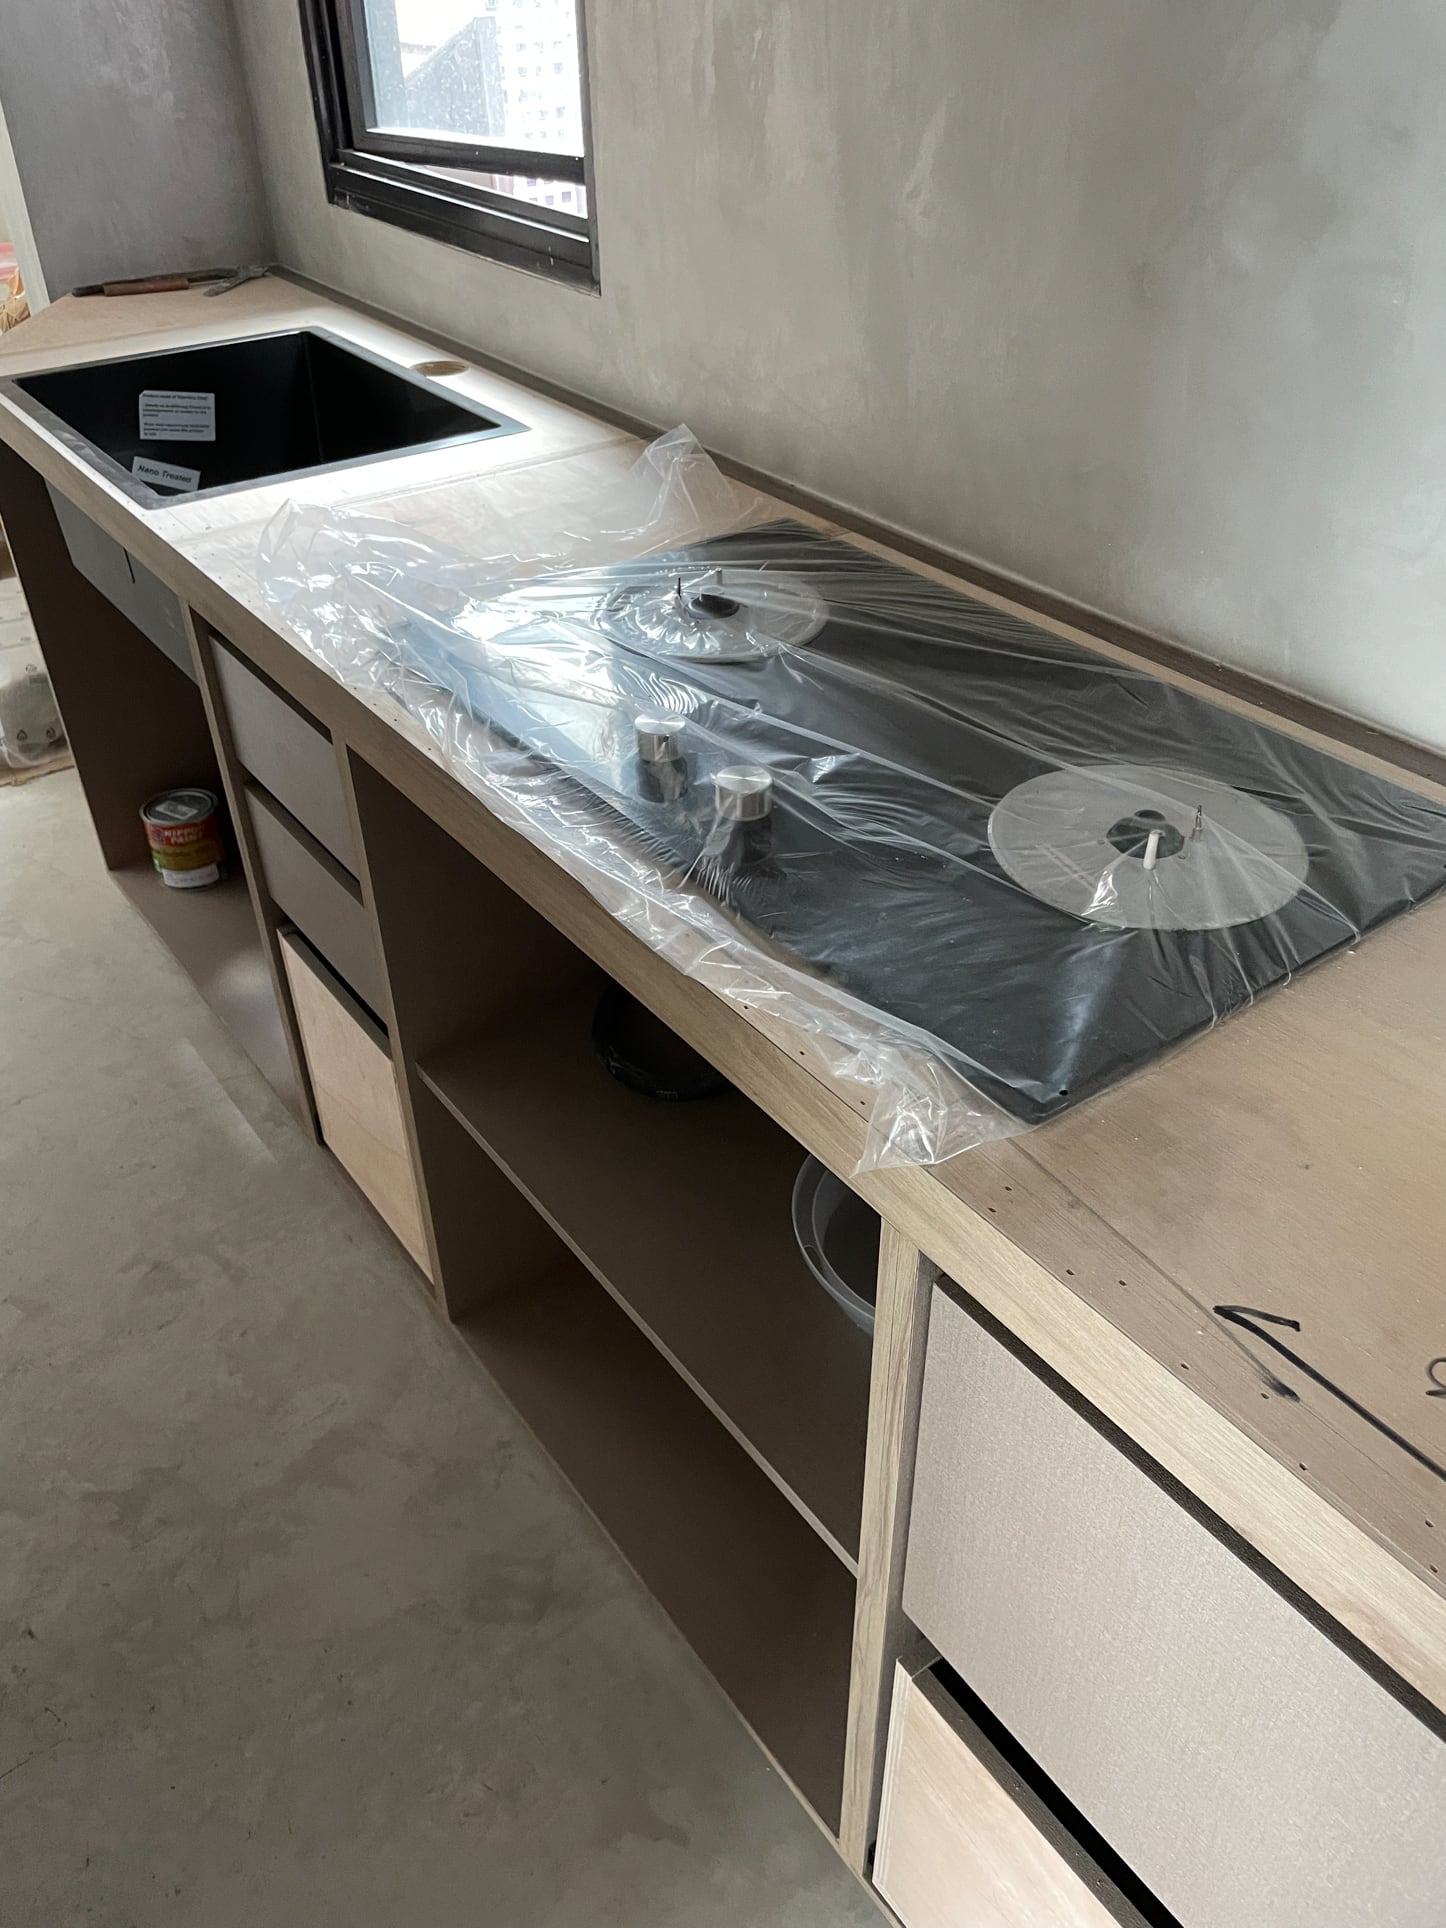
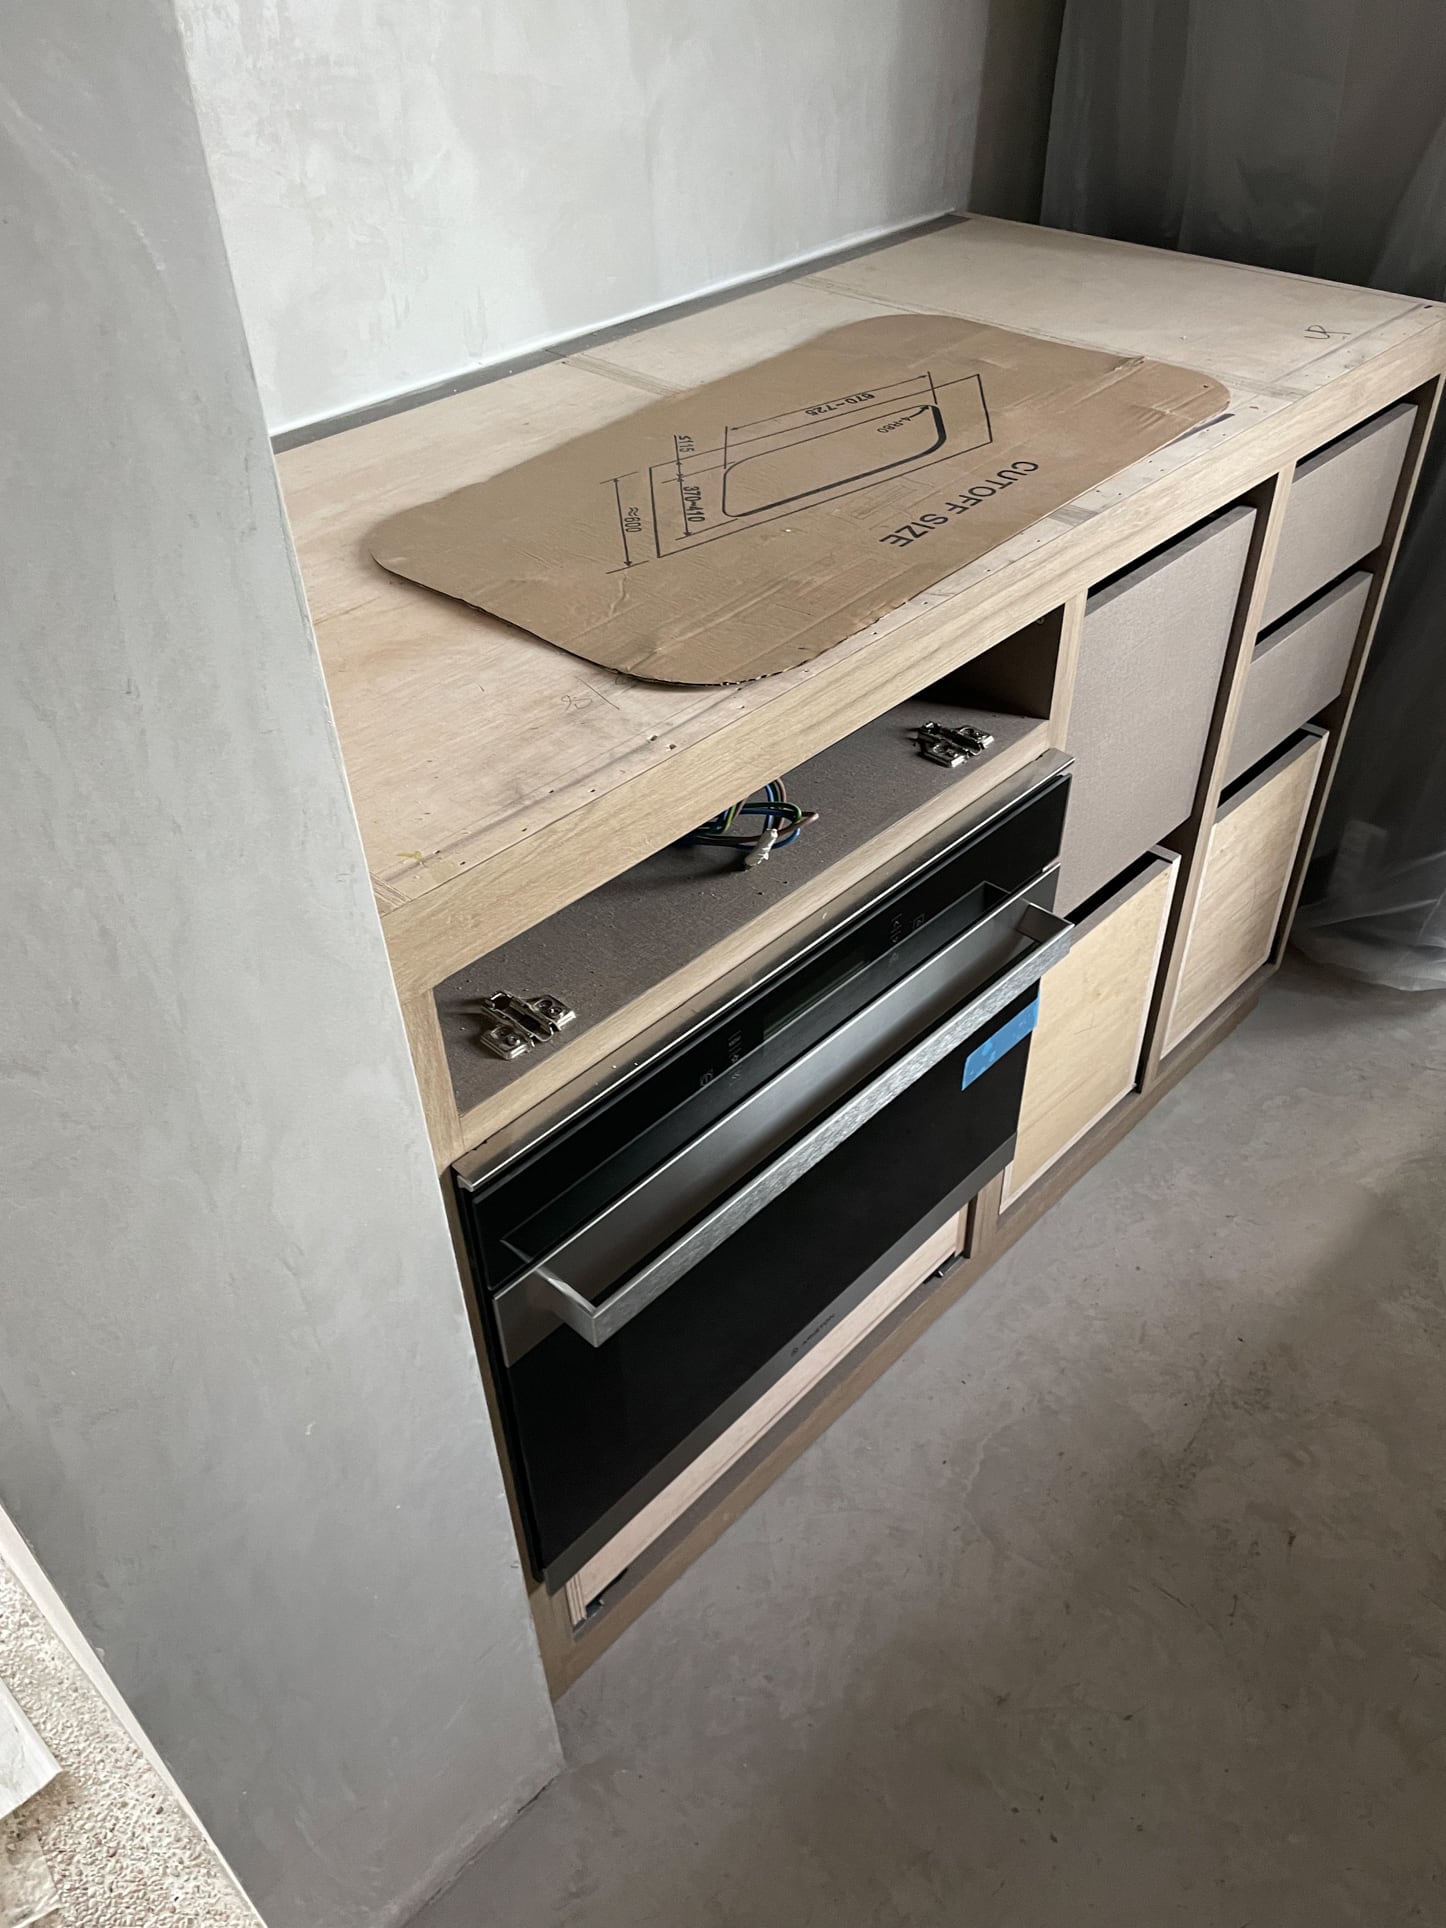
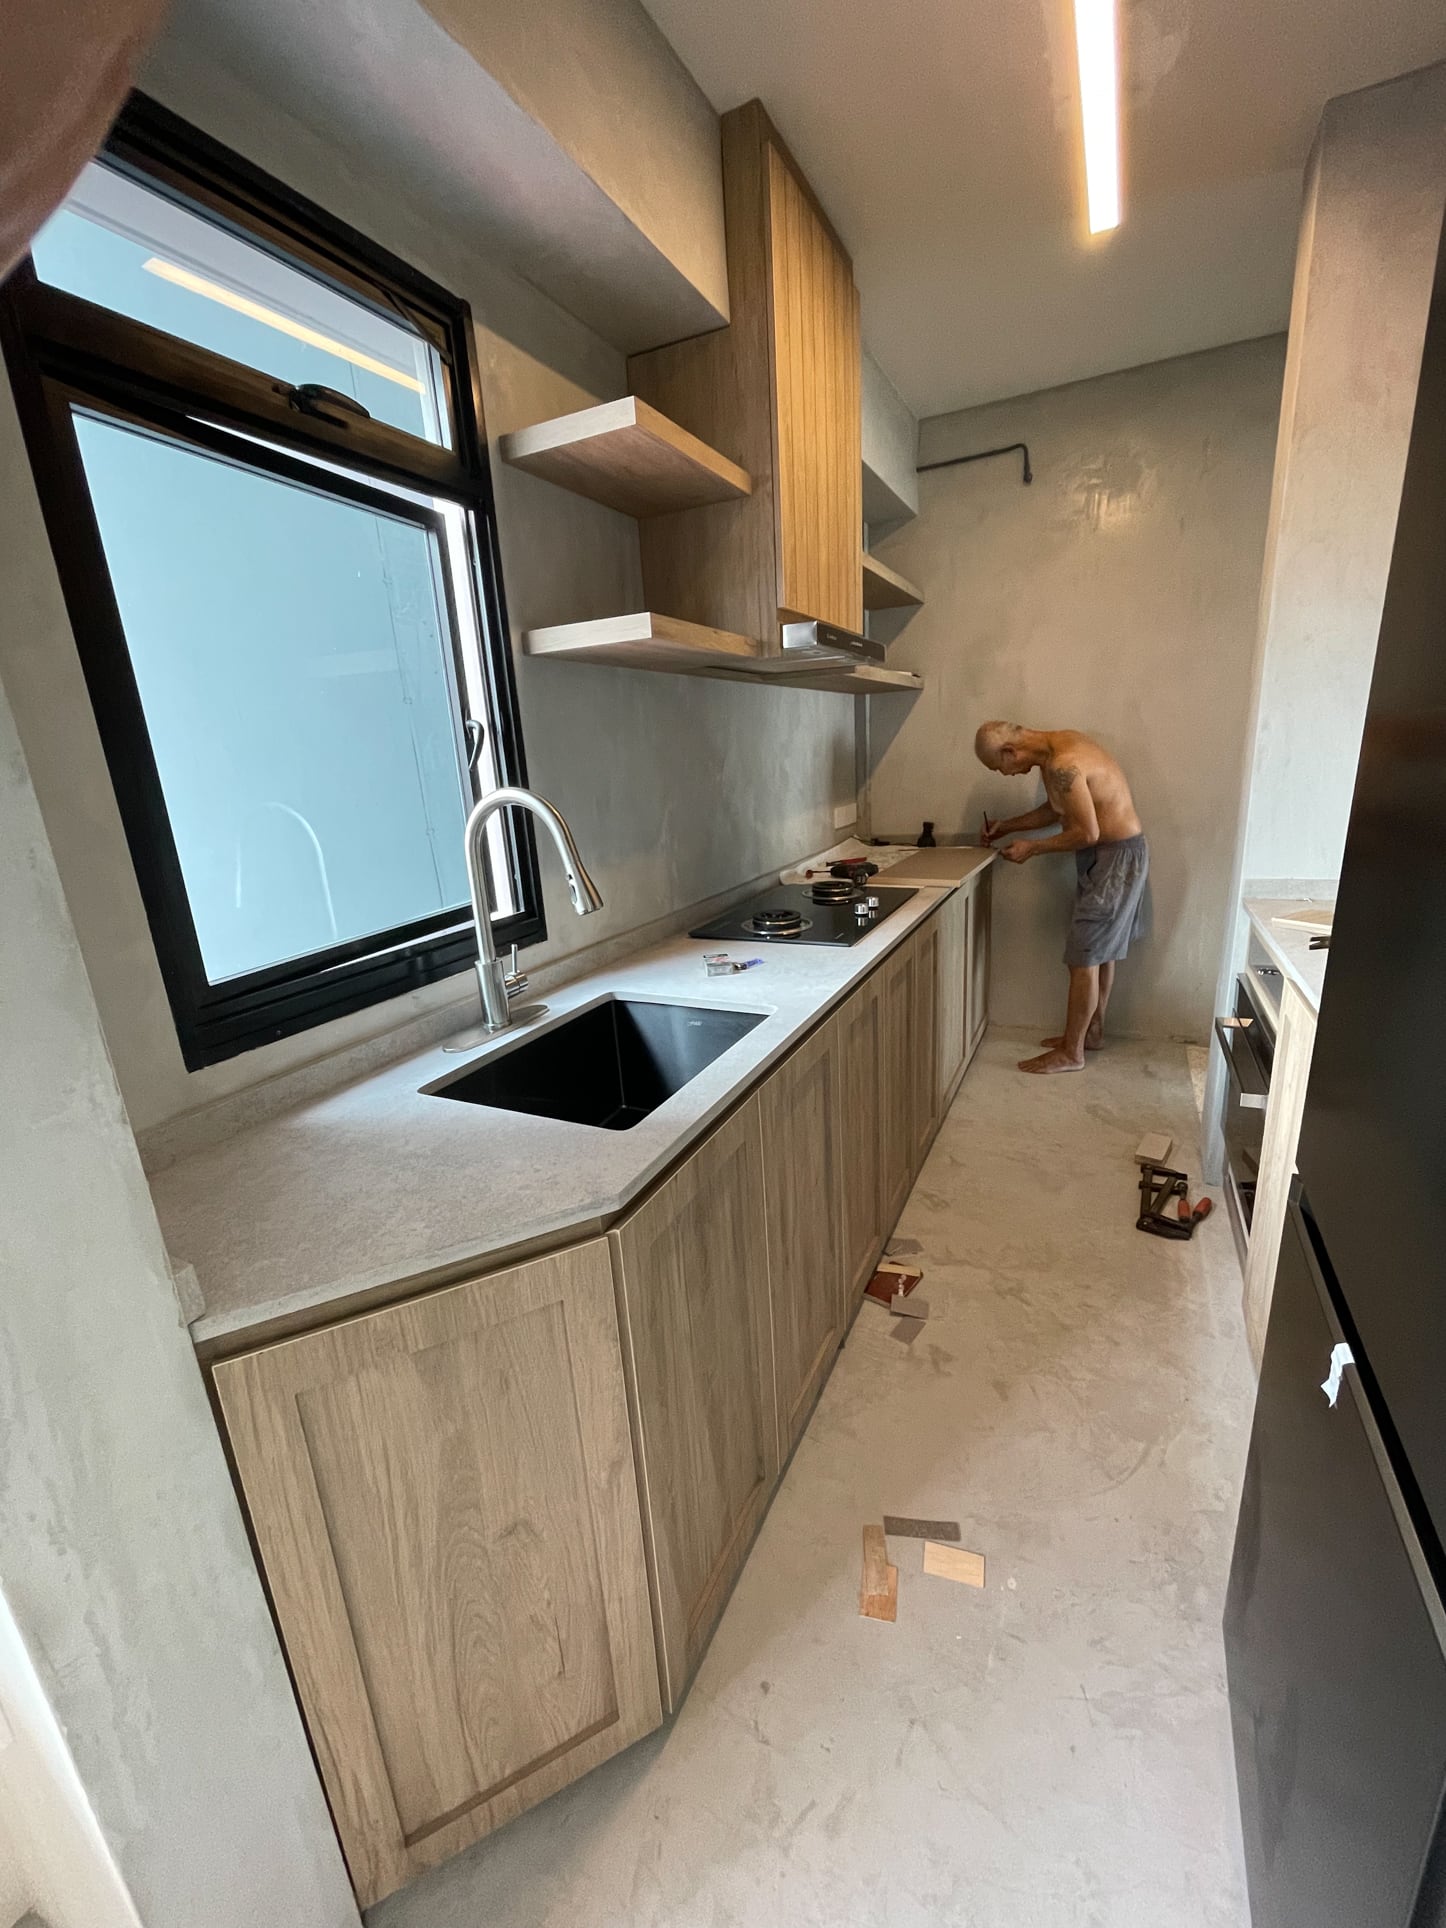
The kitchen retained its layout even after renovation. Yet, the changes made in the room created the same openness as the great room. Overall, it didn’t involve breaking down any walls. Instead, it was all about tearing down the built-in kitchen cabinets.
The old cabinets had a dark brown hue, making the already limited space even more overbearing. While Jessica could have just chosen to reface these with a new and lighter colour, it would only affect the visual level. So instead, she and her fiancé agreed to replace them completely with open shelving.
They also removed the tiled kitchen walls and floors because, while durable in their own right, they don’t blend well with the overall design of the house. Instead of tiles, they had their contractors apply authentic decorative plaster texture on the wall – and not just wallpaper.
Some of the major kitchen appliances the couple replaced include the fridge, oven, and hood.
Even if the kitchen is only a little more than three meters long and two meters wide, the renovation made it look more spacious than it used to.
Bathrooms
The design of the old bathrooms was like plain old Jane. It was the usual tiled bathroom, both walls, and floors, and pretty much served its functional purpose. But that was it.
Despite the often high costs of bathroom construction, Jessica knew she had to do it.
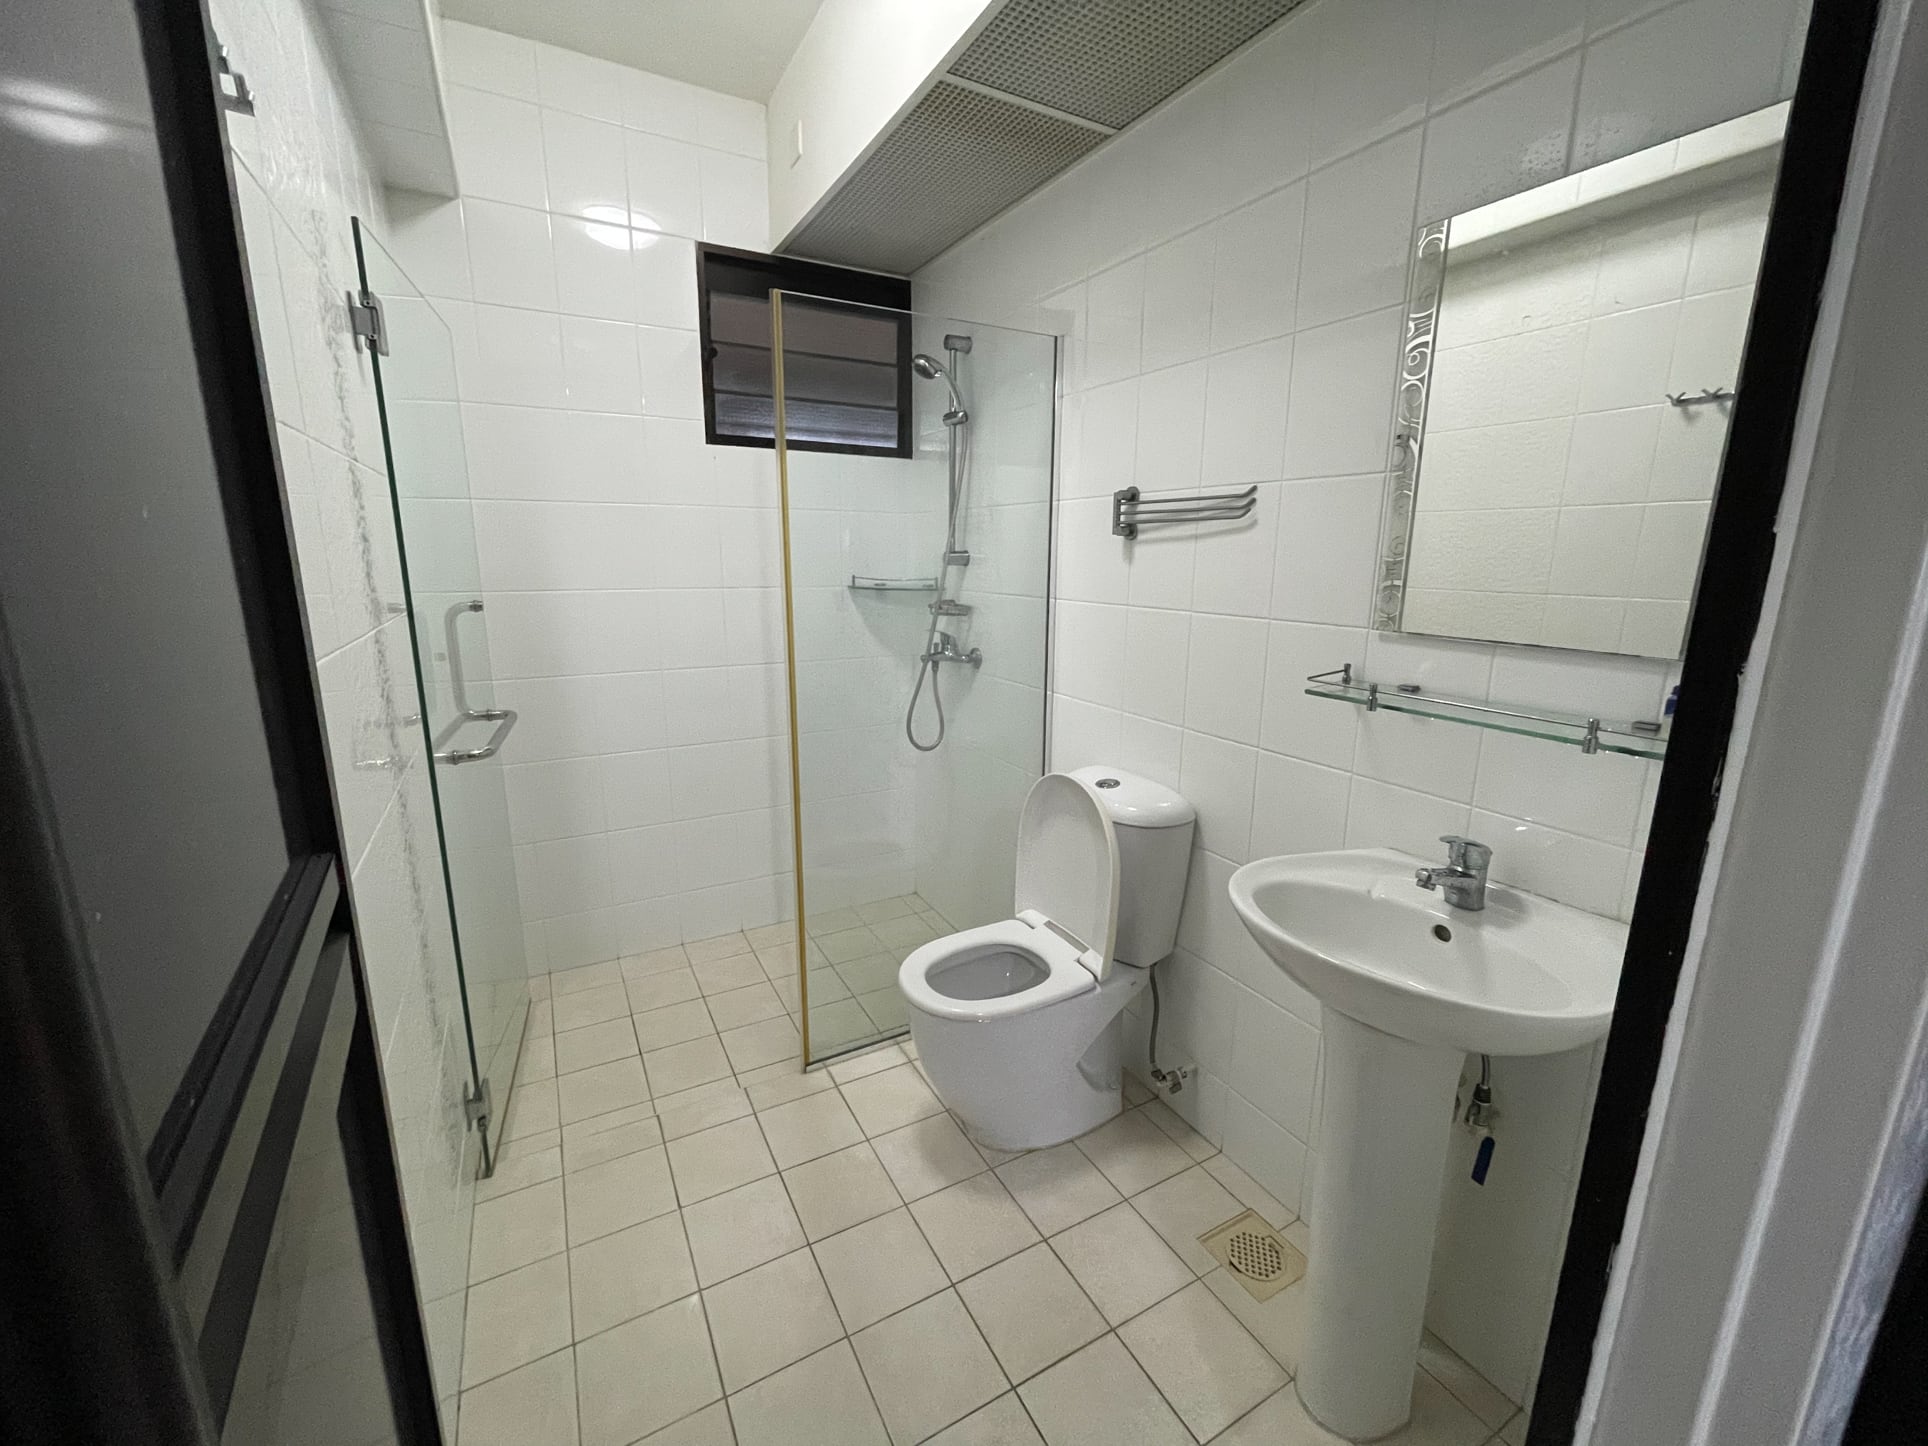
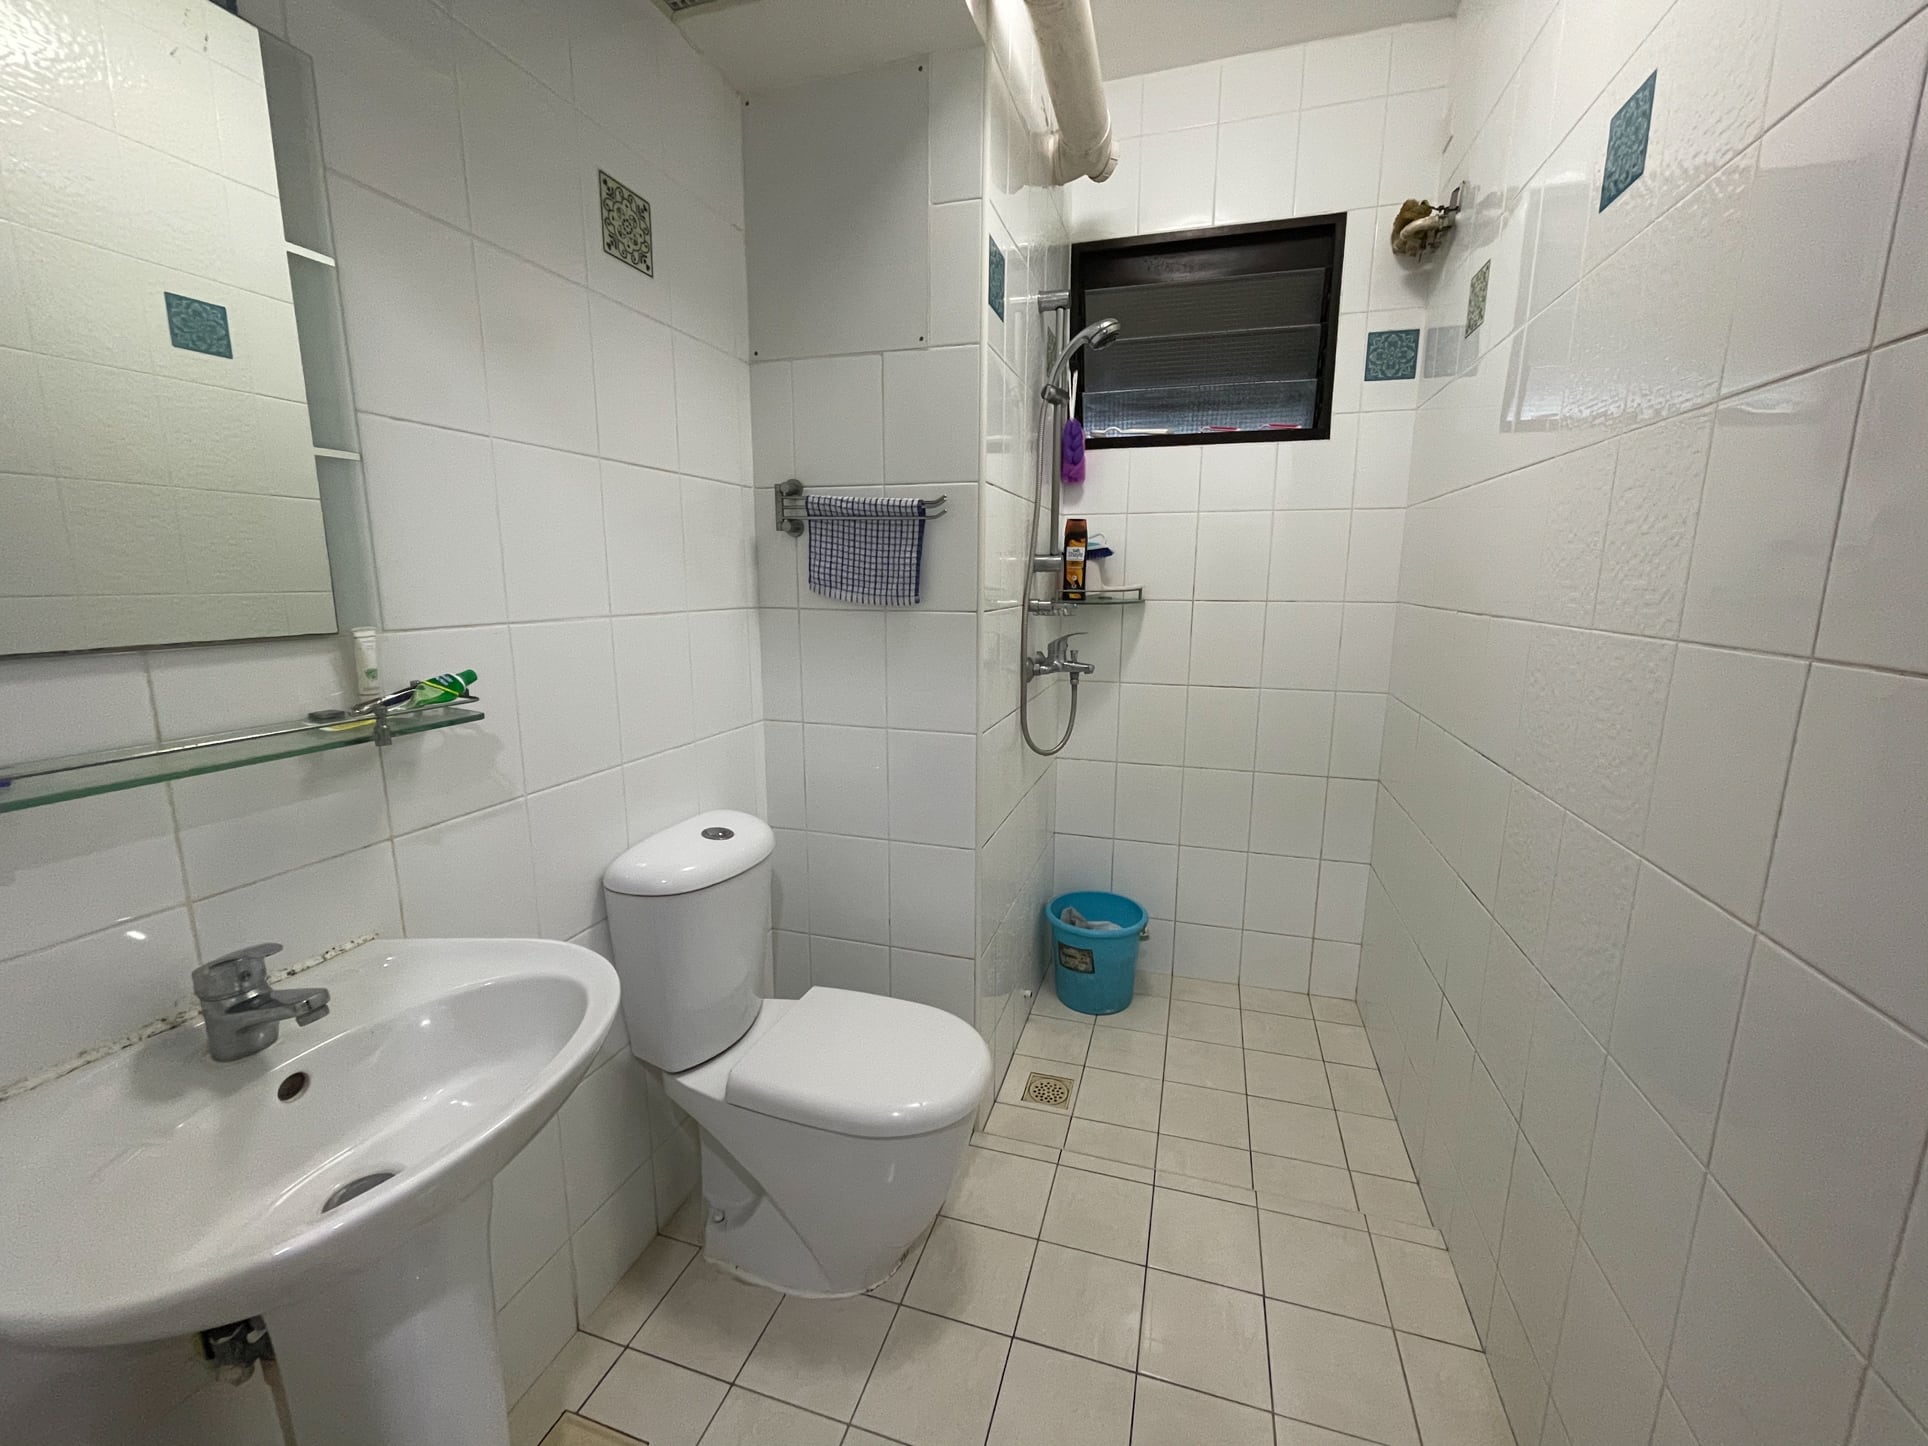
So, she decided to do away with the tiled walls and replaced the floor with epoxy flake coating. Aside from being durable and slip-resistant, this type of floor finishing also offers a great degree of flexibility in terms of design. Jessica chose a sand texture to bring out a more natural ambience.
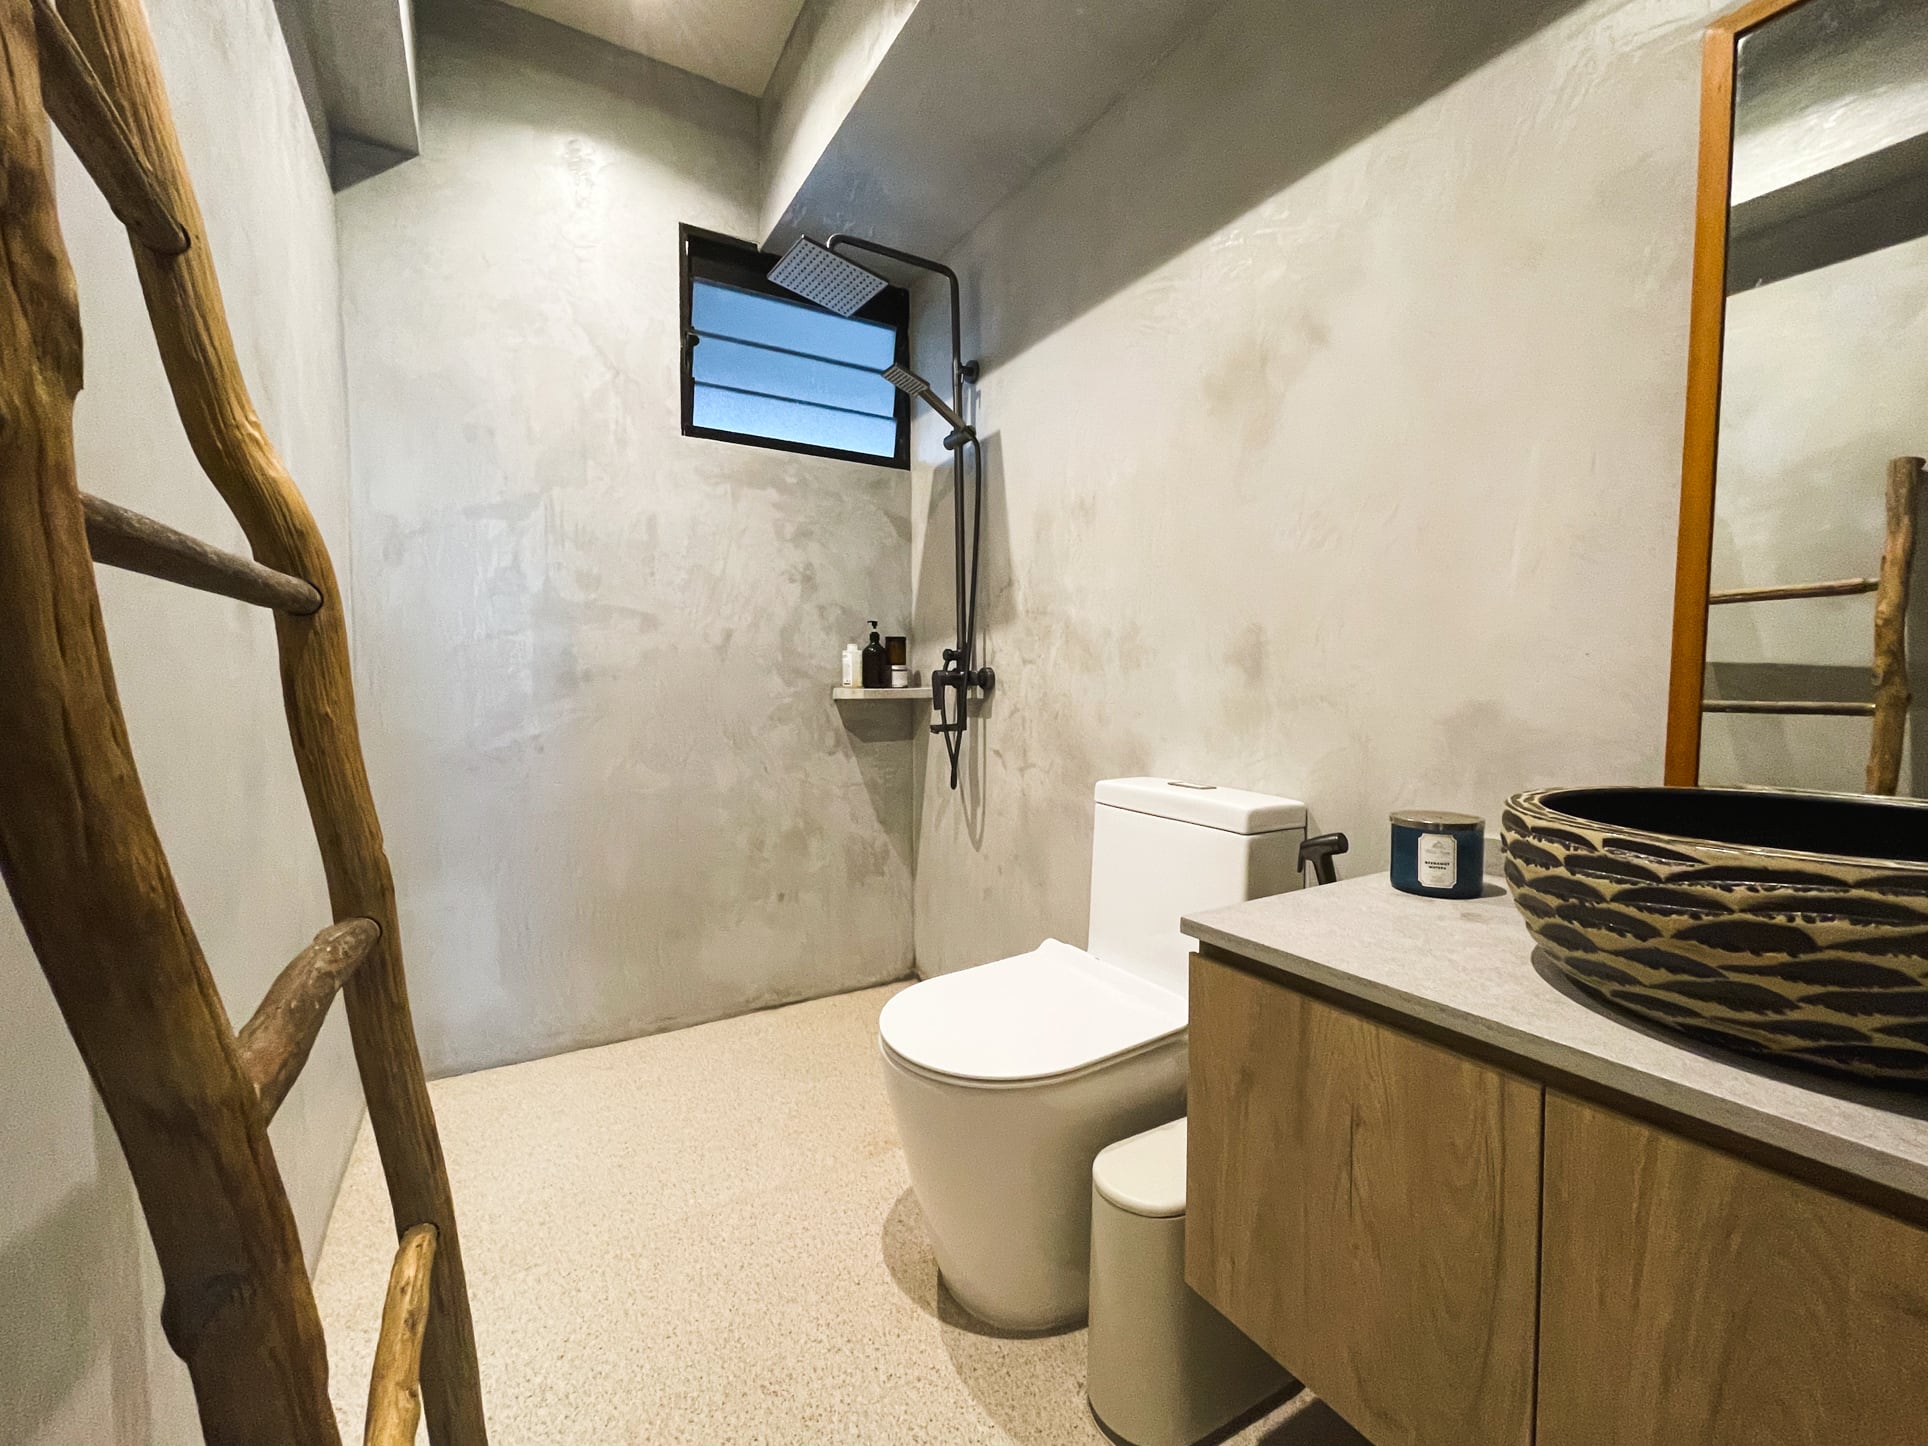
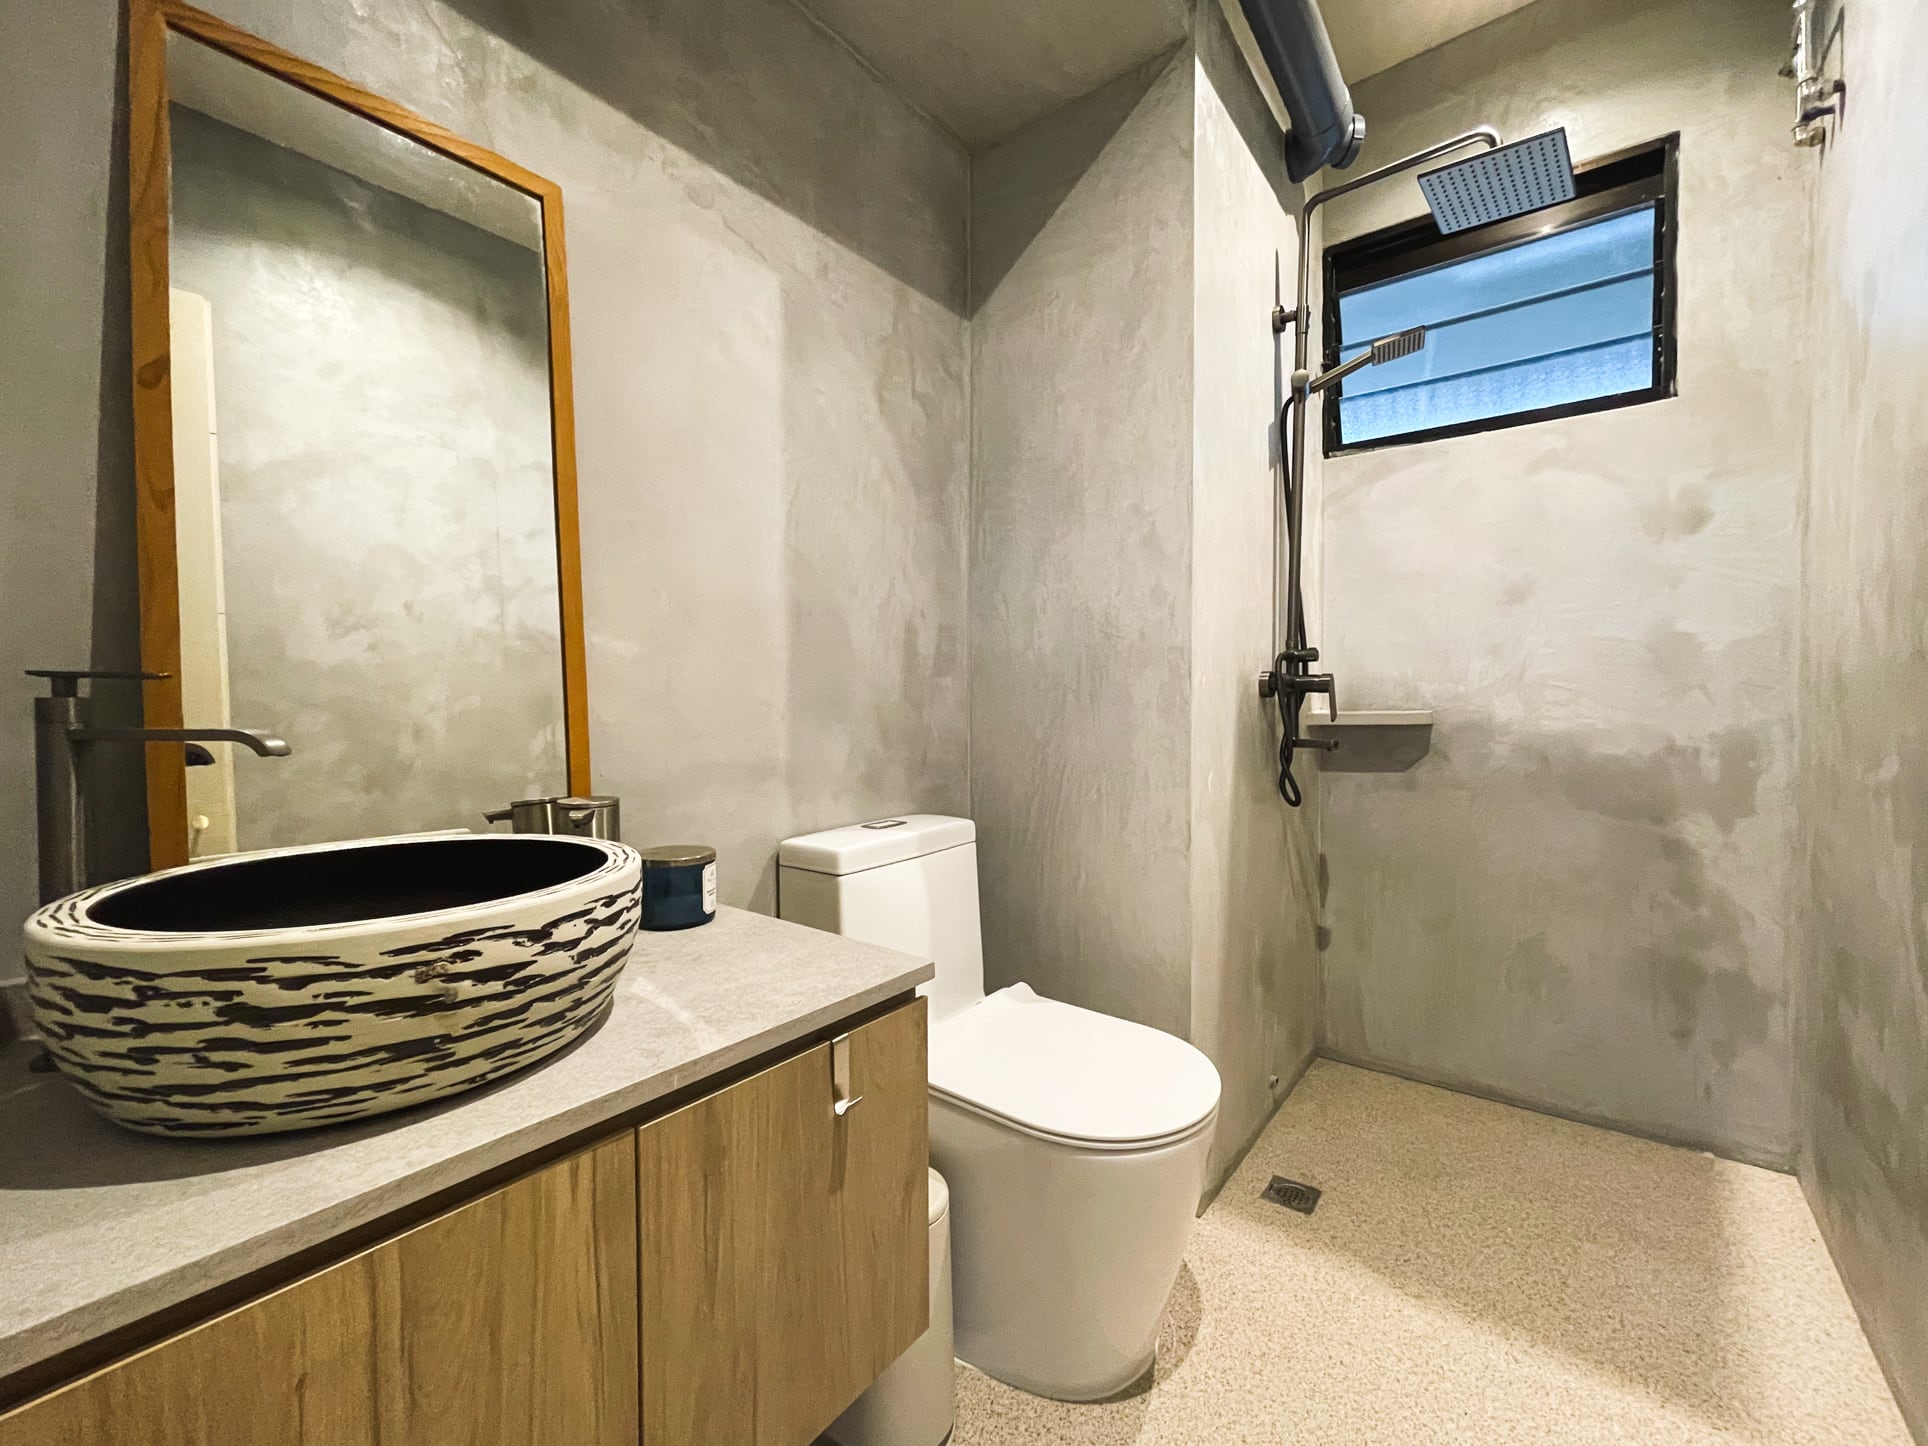
While all of the bathroom fixtures went through a complete changeover, the new toilet basin is what takes the spotlight. Its tribal-style design added a bit more complexity to the neutral colour swatch of the bathroom.
Believing that it’s best to always go for something a little different, the couple opted for a standing mirror instead of the usual wall mirror. Jessica bought the pieces (one for each bathroom) at a bargain price of $20 on Carousell!
More from Stacked
A Wave Of New HDB Resale Supply Is Coming In 2026: Here’s Where To Find Them
With the prices of some two-bedders in new launch projects this year priced from $1.8 million, it’s unsurprising that more…
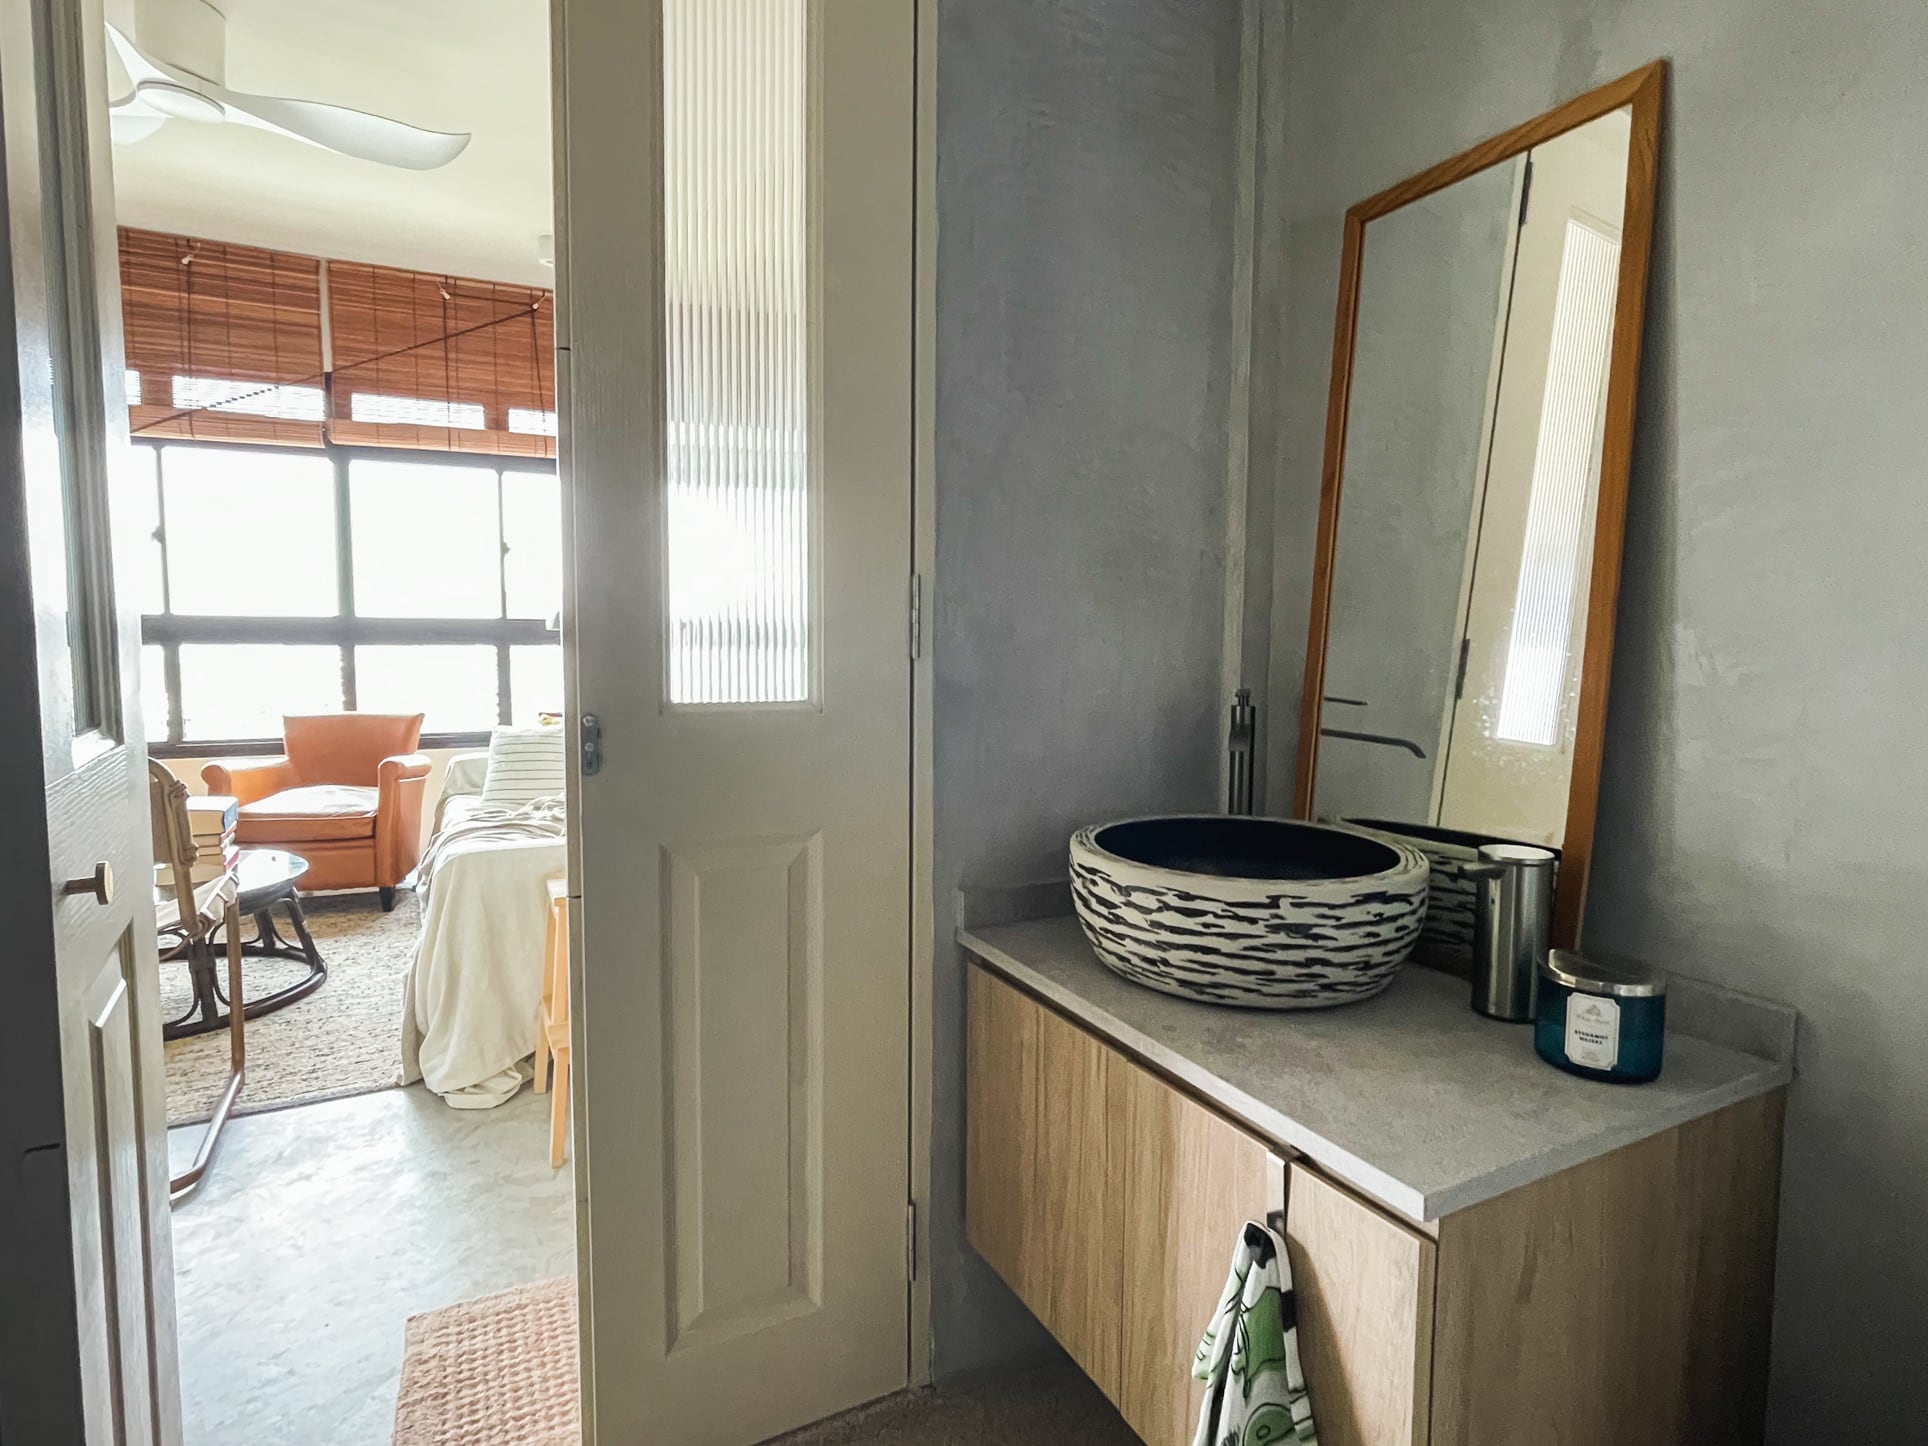
Leaving the common bathroom through its french doors adds a dramatic effect to the beautiful view of the living room and the cityscape.
Renovation Lowdown
So how did Jessica and her fiancé bring their vision into reality? First, they needed to choose the right contractor that could accommodate their requirements for the project.
“I think trust and mutual respect with the project lead are the most important as, without it, the renovation journey will not be a pleasant one,” Jessica said.
The renovation work and interior design performed by W.Interiors is divided into seven parts – grouping together related costs and providing a better understanding of the project’s scope.
Homeowner StoriesMy Home Renovation Journey: How I Transformed An Old Resale Condo With Odd Corners + Pet Friendly
by Ryan J. Ong1. Hacking
Total Cost: $4,400
| Hacking Work | Unit | Price |
| To supply labour & materials following works: | ||
| Hacking Permit | L. Sum | |
| To hack all bedroom walls and door frame | 18 sqft | |
| To hack toilet vanities | L. Sum | $ 4,400.00 |
| To dismantle and dispose of sanitary wares and bathroom accessories | ||
| To hack kitchen cabinetry | ||
| To hack entryway flooring | ||
| To dismantle and dispose of all window grills |
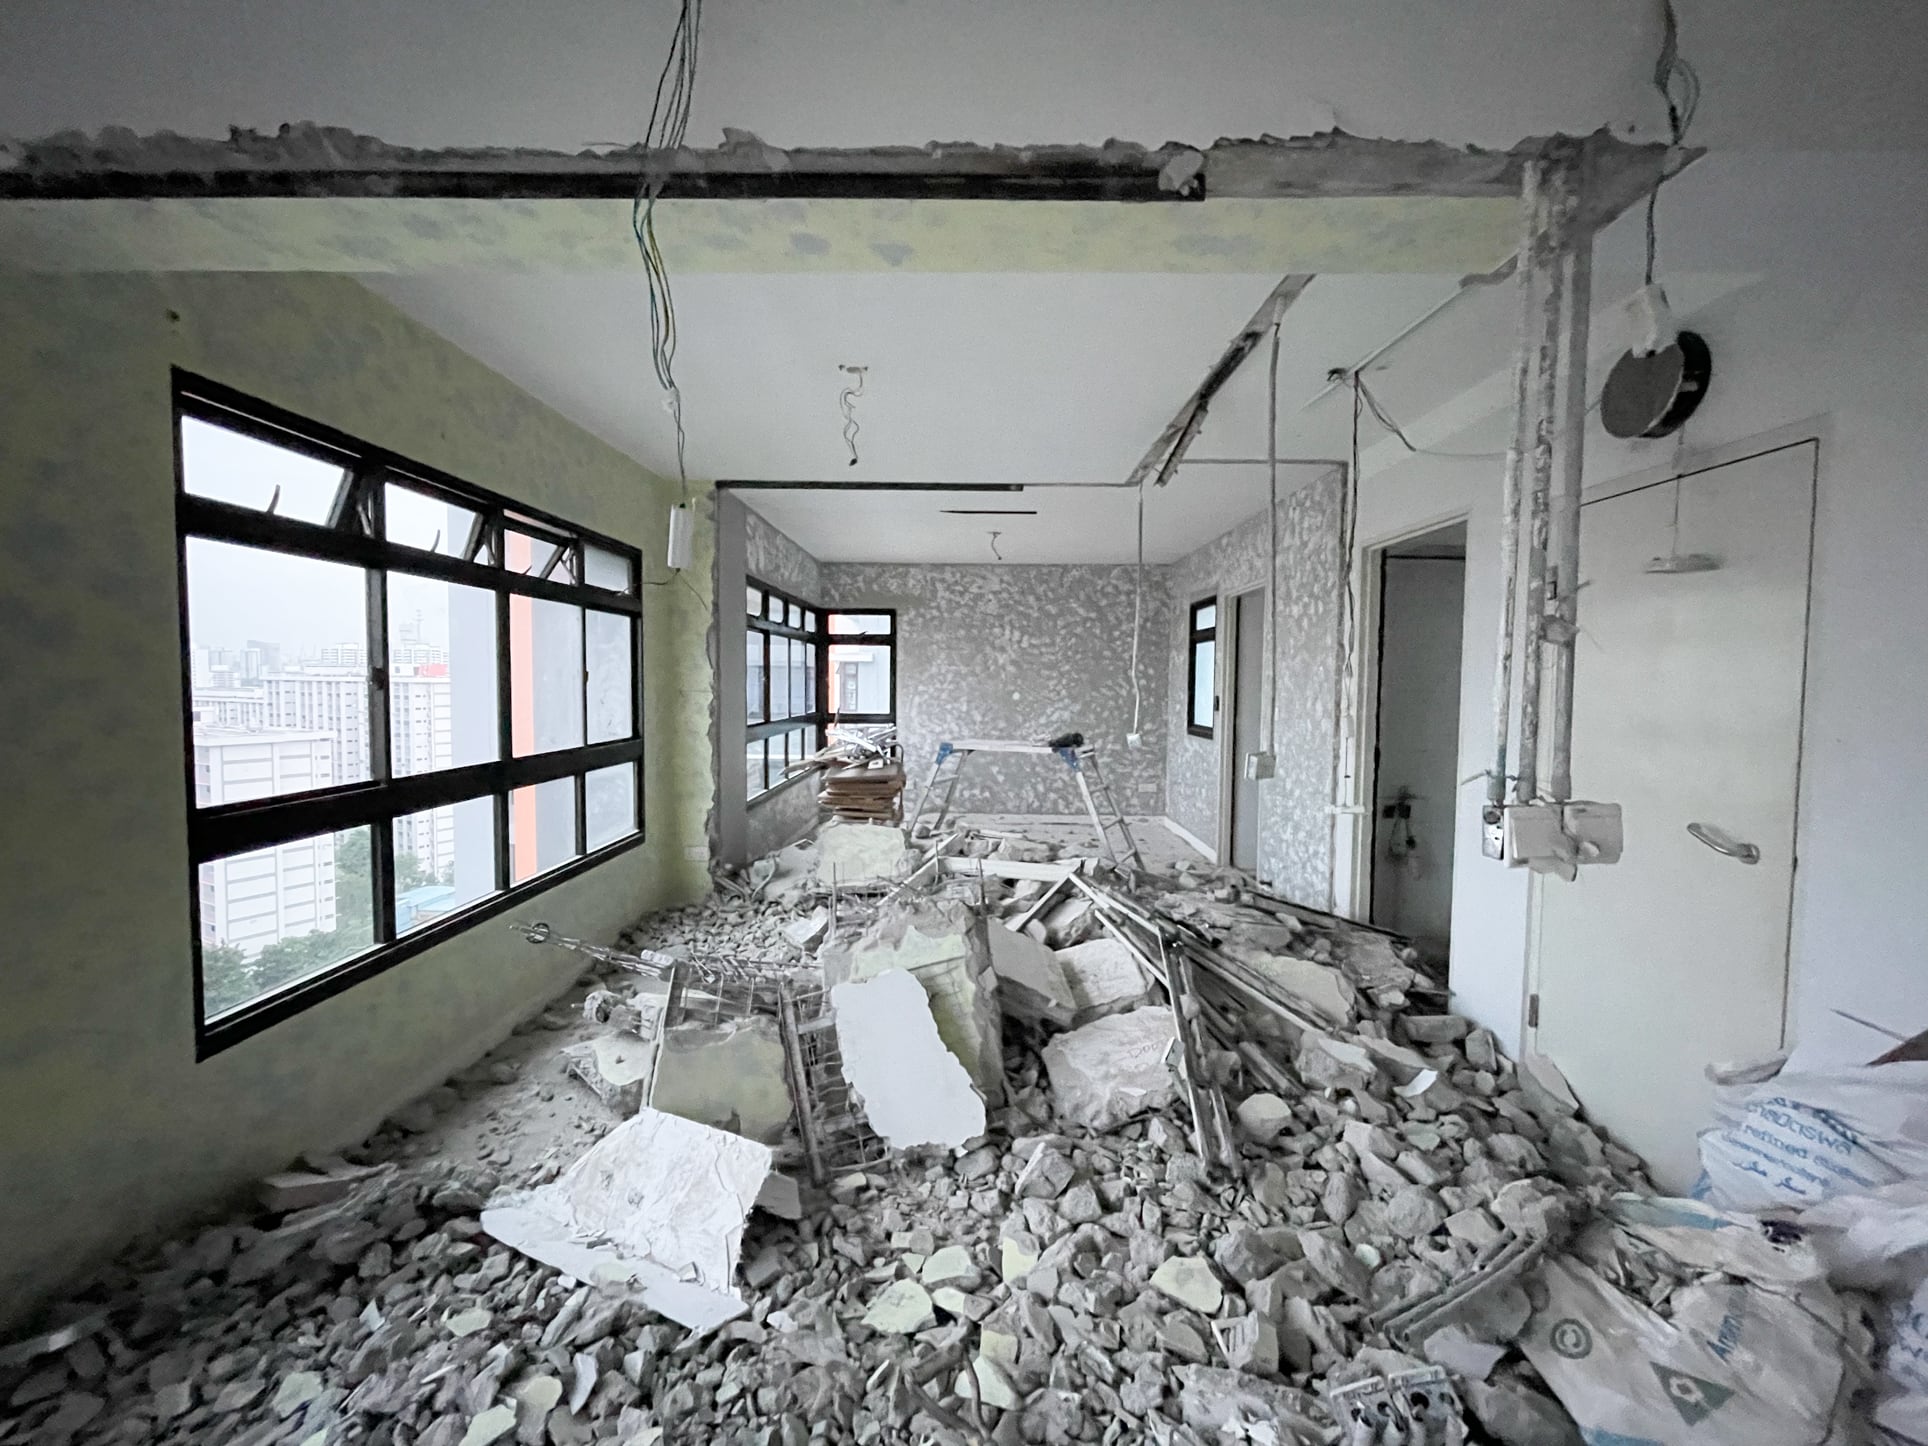
Aside from the actual labour cost of hacking bedroom walls, doorframes, kitchen cabinetry, etc., this group of tasks collectively included other work involving clearing away the old space. It also covered obtaining a hacking permit, dismantling and disposal of sanitary wares and bathroom accessories, and removing window grills.
2. Masonry
Total Cost: $11,843.20
| Mansory Work | Unit | Price |
| To supply labour & materials following works: | ||
| Standard of tiling levelling 1 – 2 mm height different is acceptable (no 100% level due to workmanship) | ||
| To apply cement screed for living room and master bedroom floor | 529 sqft | $9,313.20 |
| To apply cement screed for kitchen floor and walls | 85 sqft | |
| To apply cement screed for master bathroom walls | 45 sqft | |
| To apply cement screed for common bathroom walls | 90 sqft | |
| To apply cement screed to service yard floor | 90 sqft | |
| To apply pebble wash to the entryway and epoxy flake to both bathroom floors | L. Sum | $2,530.00 |
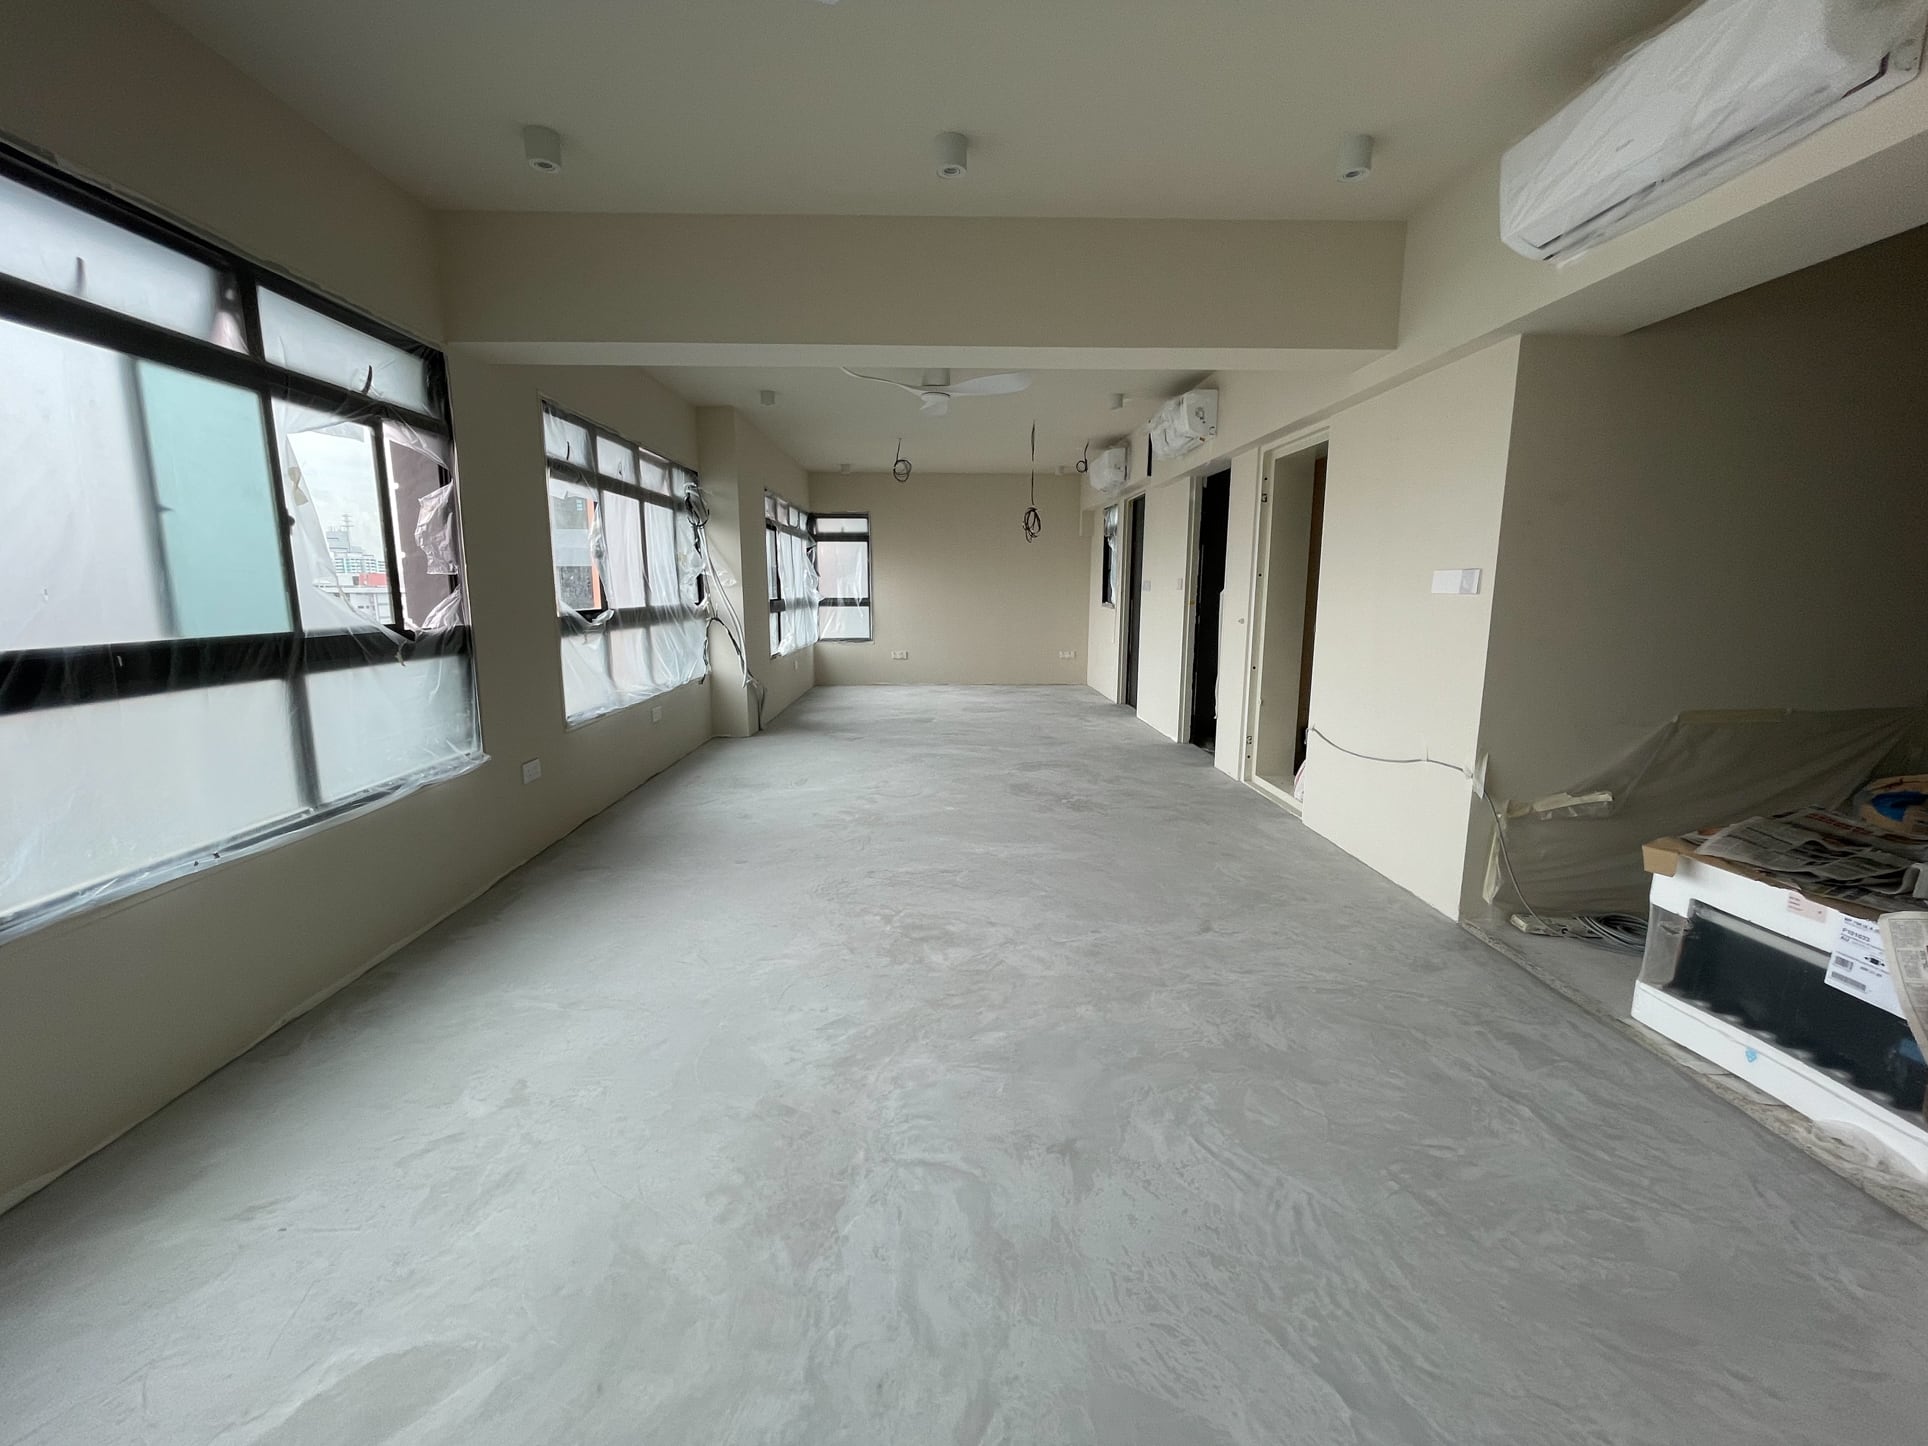
Right from the onset, the contractor declared that tiling levelling will never be 100% accurate – having a difference between one to two millimetres only – since the masonry is done manually. Jessica found this acceptable and agreed to the terms.
A big chunk of the cost, $9,313.20, went to the cement screed application on both the floors and walls of the living room, master’s bedroom, and kitchen. The rest of the cost went to applying pebble wash in the entryway, cement screed on bathroom walls and floors, and epoxy flake to both bathroom floors.
3. Carpentry
Total Cost: $12,375.00
| Carpentry Work | Unit | Price |
| To supply labour & materials following works: | ||
| Selected laminate finish up to $70 (any item above will need to top up ) | ||
| All carpentry work c/w inter PVC finish | ||
| All hinges and drawer c/w with soft closing – 1-year warranty by excel | ||
| Any laminate selection out of the selected range will be charged to V/O | ||
| 12 drawer | 14 nos | |
| Kitchen wet area – To design and fabricate bottom cabinet c/w 3 x drawer and selected laminate finish | 16.5ft | |
| Kitchen wet area – To design and fabricate top cabinet c/w selected laminate finish | 3ft | |
| Kitchen wet area – To design and fabricate top shelving 40mm thickness c/w selected laminate finish | 31ft | |
| Master bedroom – to design and fabricate a full casement height wardrobe | 12ft | |
| Common toilet -To design and fabricate bottom vanity cabinet c/w selected laminate finish | 2.5ft | |
| Master toilet -To design and fabricate bottom vanity cabinet c/w selected laminate finish | 2.5ft | |
| Service yard – To design and fabricate bottom with tabletop support c/w selected laminate finish | 5ft | $12,375.00 |
This set of tasks took the biggest slice of the reno budget. It involved all carpentry work together with the installation of hinges and drawers with soft closing and PVC finishing. The cost also covered the design and fabrication tasks for the following components:
- The bottom kitchen cabinet combined with five sets of 3-tier drawers
- Top kitchen cabinet
- Top kitchen open shelving with a thickness of 40 millimetres
- Full casement height wardrobe in the bedroom (inclusive of concealed make-up vanity counter)
- Bottom vanity cabinets for both bathrooms
- Bottom service yard cabinet with tabletop support counter
They also applied the laminate finish previously selected by Jessica and her fiancé during the planning phase.
4. Tabletop
Total Cost: $3,158.40
| Table Top – 30mm profile + 50mm backsplash | Unit | Price |
| Any quartz selection out of the selected range will be charged to V/O | ||
| To supply labour & materials following works: | ||
| Kitchen – To supply & fabricate bottom cabinet tabletop | 16.5ft | $3,158.40 |
| Service yard – To supply & fabricate bottom cabinet table top | 5ft | |
| Common toilet – To supply & fabricate bottom cabinet table top | 3ft | |
| Master toilet – To supply & fabricate bottom cabinet tabletop | 3ft |
The tasks included labour, supply, and fabrication of tabletops for the bottom cabinets in the kitchen, service yard, and both bathrooms.
5. Plumbing
Total Cost: $1,175
| Plumbing Work | Unit | Price |
| To supply labour only for the following works: | ||
| To install Kitchen sink cold water tap | 1 job | $ – |
| To install common toilet basin and cold water tap | 1 job | $ – |
| To install common toilet basin and cold water tap | 1 job | $ – |
| To relay whole house new water pipes | L.sum | $ 935.00 |
| To install toilet bowl, bidet spray | 2 toilet | $ 240.00 |
Plumbing work involved labour for relaying the whole house with new water pipes and installing cold water taps in the kitchen and bathrooms. It also included the installation of toilet basins, toilet bowls, and bidet sprays for the common and master’s toilets.
6. ACMV
Total Cost: $2,799
The ACMV work fulfilled by the contractors included both the supply and installation of GREE System-3 (12k x 3 with 28k Compressor).
7. Miscellaneous
Total Cost: $11,837
| To supply labour & materials following works: | Price |
| To lay PVC protection for the whole house | $100.00 |
| To general cleaning upon handover condition | $618.00 |
| To do painting for the entire house (4 colors + white) | $1,881.00 |
| Box up Exposed Piping and Trunking | $1,308.00 |
| French Doors – with fluted glass and painted finish | $3,520.00 |
| Electrical services – inclusive of relocation of DB, installation of lighting points, switches and powerpoints | $4,410.00 |
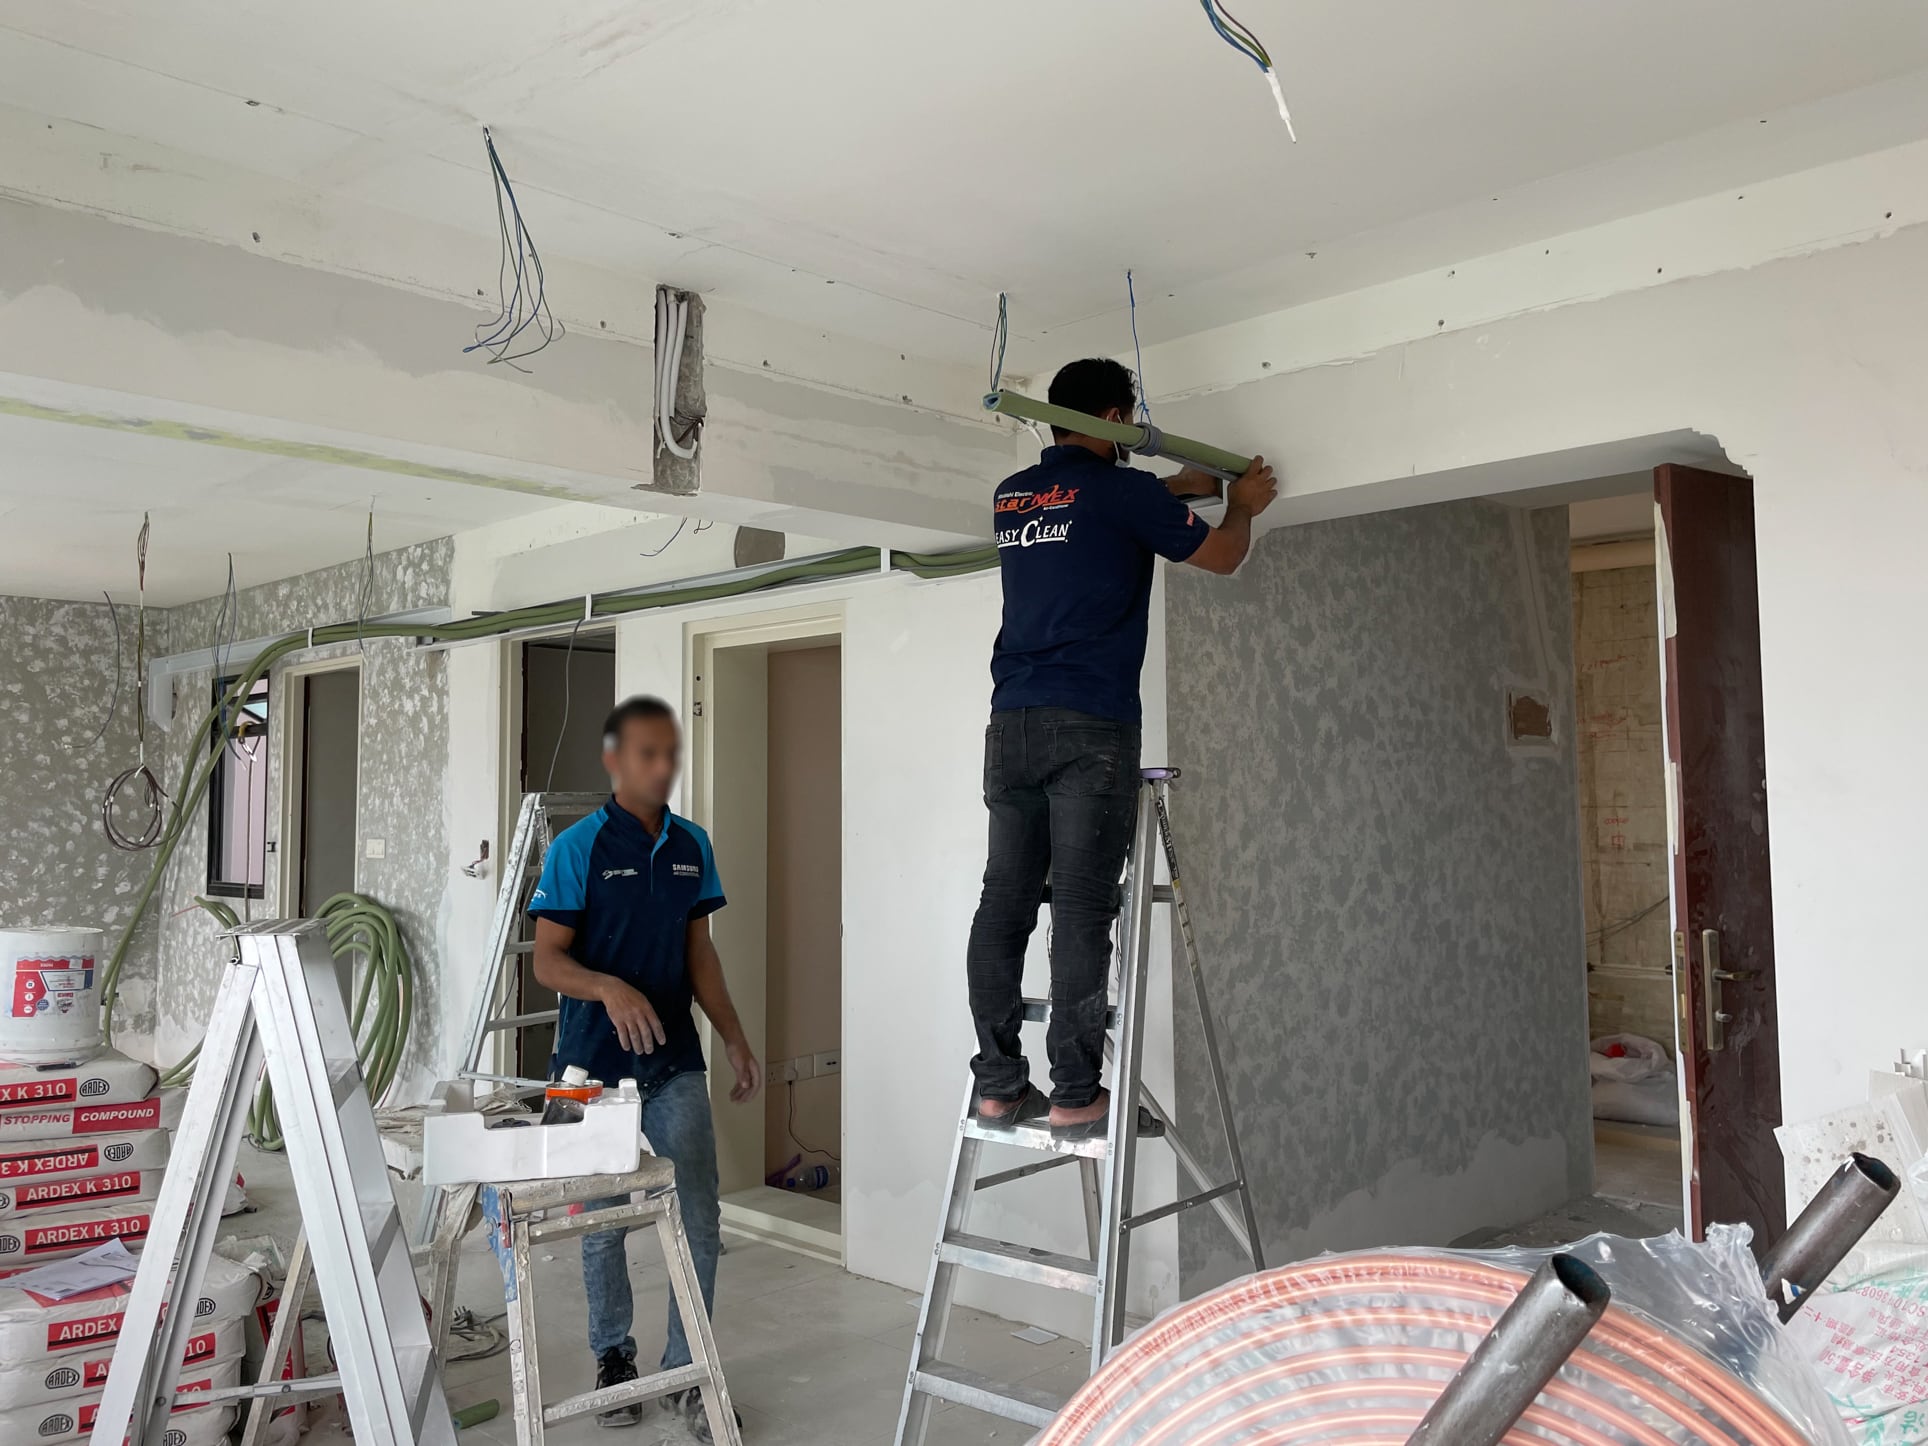
Miscellaneous costs can quickly add up. That’s why it’s essential to keep track of them all the time – just as Jessica did throughout the project. Laying down PVC protection for the whole house and general cleaning upon handover are parts of this work.
This work also covers hiding exposed piping and trunking, house painting, and French doors installation. The electrical services, such as relocation of DB and installation of lighting points, switches, and powerpoints, were the most costly, amounting to $4,410.
Jumping Over Renovation Hurdles
With so many moving parts involved during a reno, it’s natural to encounter challenges along the way. Aside from having an extra budget to shoulder any sudden costs that might pop out, it’s also crucial to have a general sense of what hurdles to go through.
Luckily, Jessica has a few pointers to share for those who want to spruce up their homes.
“Set boundaries with the contractors and their subcontractors early on,” Jessica advised. This includes expectations for general housekeeping while the renovation is in progress. She also recommends requesting and emphasising site protections, which is more critical if you’re expecting delivery of furniture and appliances while the reno is ongoing.
Another piece of advice Jessica gave was all about communicating clearly with the contractors. “While it’s normal to expect interior designers and contractors to be experts at what they do, it doesn’t necessarily mean they have a firm grasp of their client’s expectations. Thus, you should always be specific in your instructions,” she pointed out.
Lastly, a vital yet often neglected necessity is to consider the basic needs of your contractors. “Leave one toilet bowl for the contractors or subcontractors even if you’re replacing it,” shared Jessica.
Learning From a Successful Renovation Journey
House renovation is a major milestone in life, and the experience becomes even sweeter if the journey is smooth sailing. While each reno project is unique, you can greatly benefit from reading up on various experiences encountered by homeowners who went through the same adventure. They can serve as guideposts or map markers for your own journey.
For instance, installing built-in furniture provides a great way of integrating storage space into any Singaporean home. But sometimes, it can be very restricting as well. “Opt for loose furniture whenever possible,” Jessica pointed out, “It gives you the flexibility to change your layout in the future if there is a need to.”
She also offered several tips when it comes to procuring pieces of furniture. “Don’t rush,” she emphasised, “Take your time. Move and settle in first. And once you have a sense of your space and how to use it, then slowly start sourcing.”
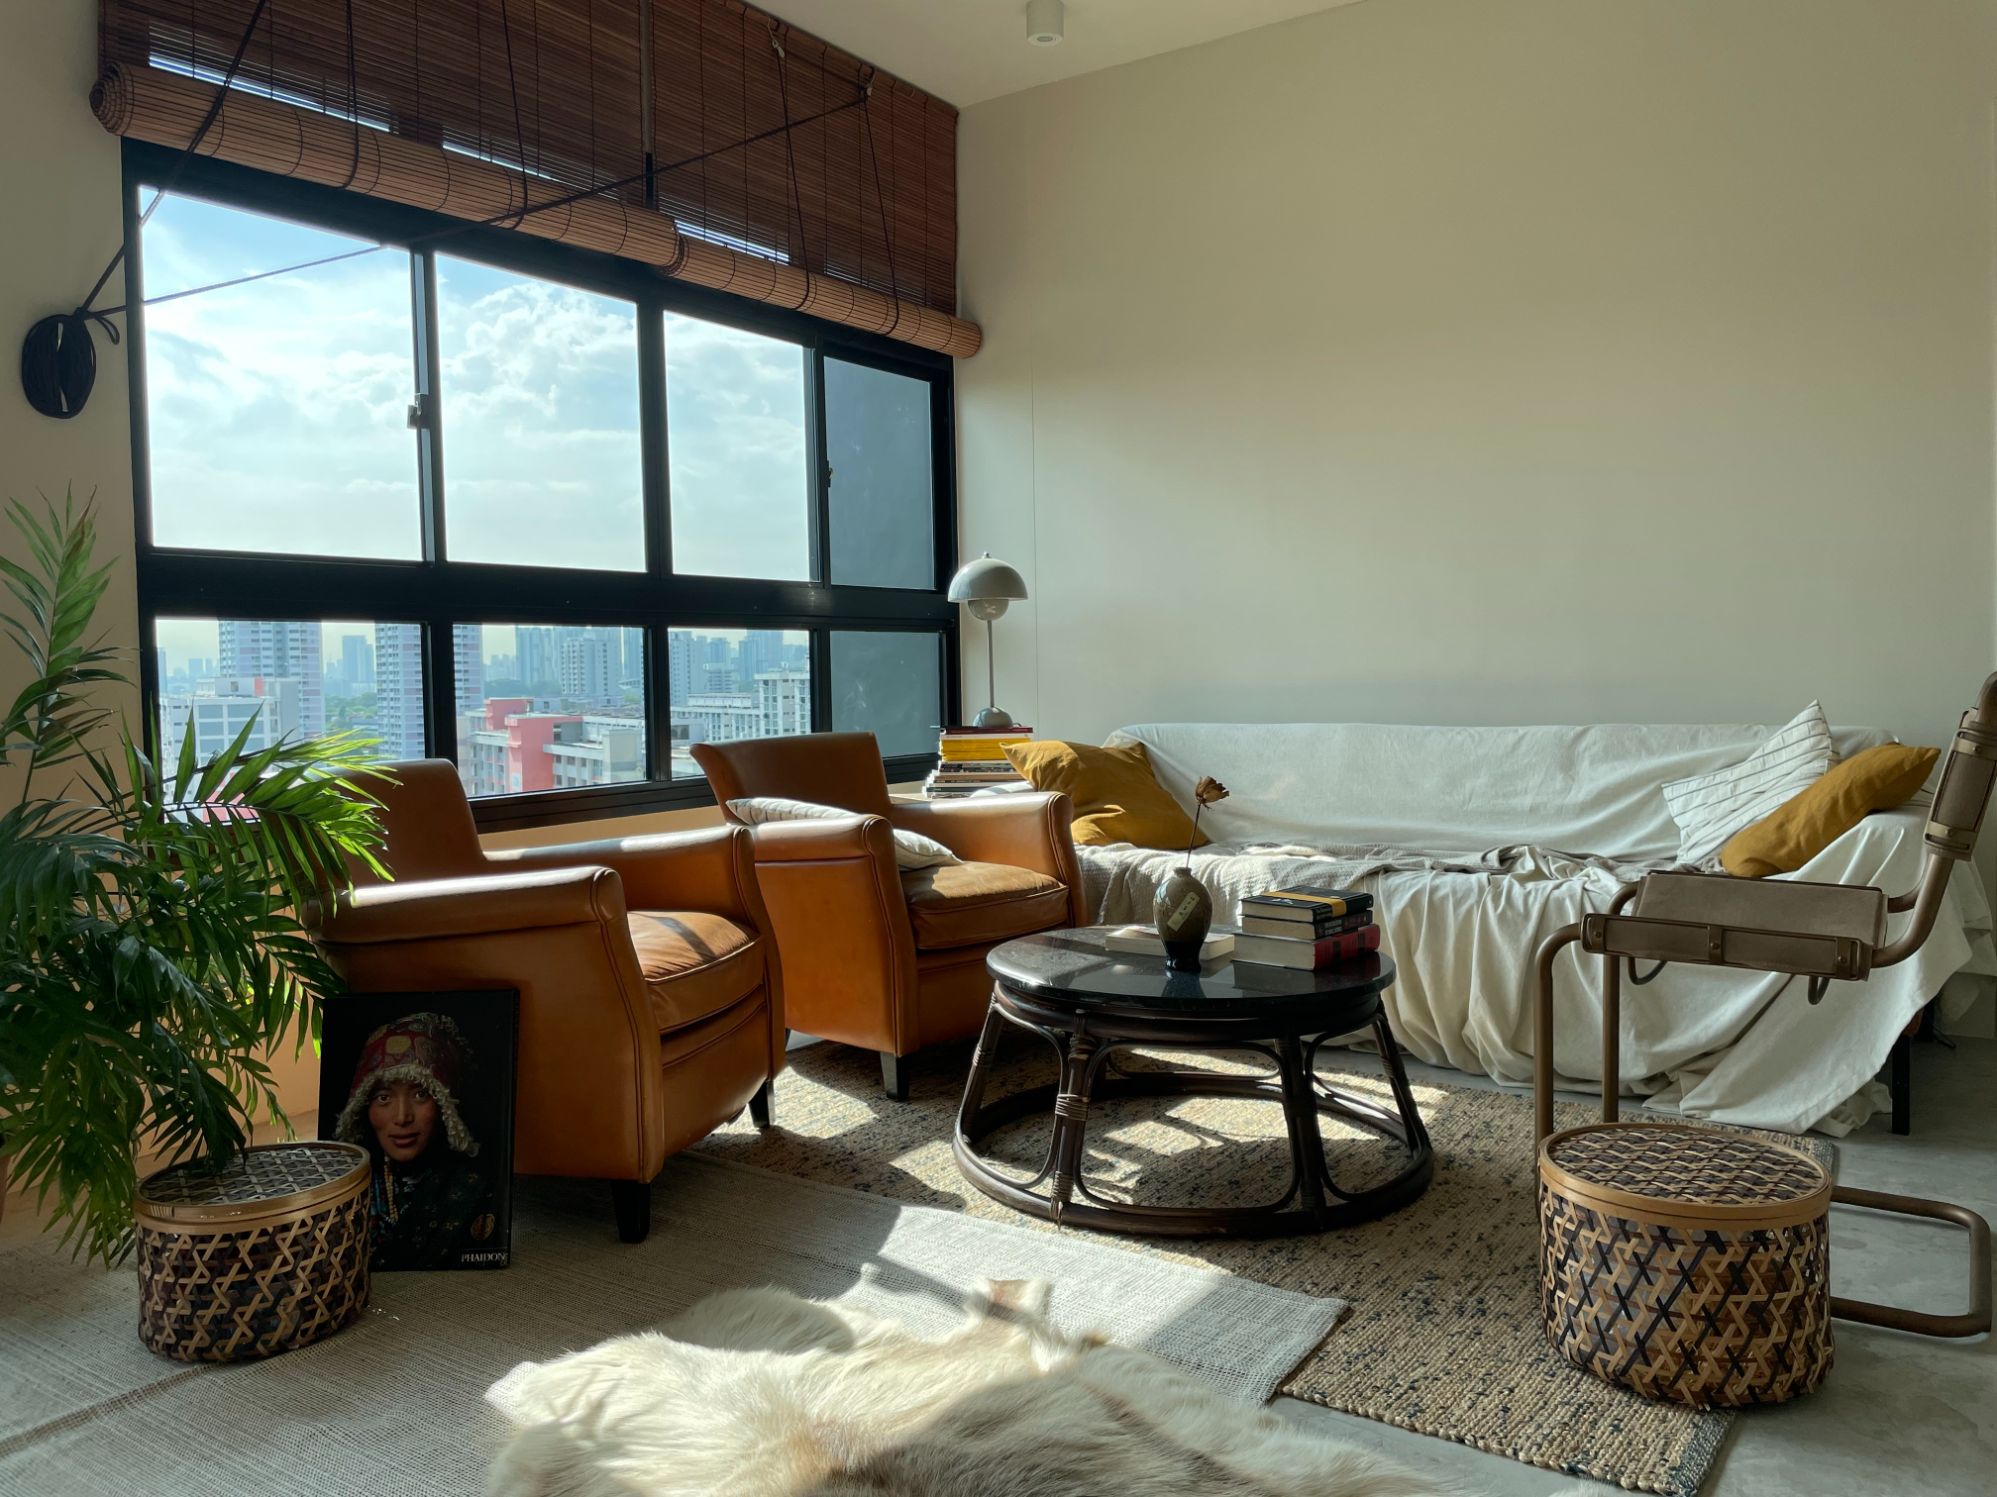
On the same subject of sourcing, she advised not to get too hung up on a specific theme only. Let the creative juices flow and be flexible with the choices. “At the end of the day, just ensure everything comes together in terms of colour, textures, etc.,” she added.
It’s also crucial to give consideration to any future plans. So if you’re planning to have a pet anytime soon, don’t get rid of your window grills.
After setting your priorities straight and sticking to them, you can adjust your home to fit your preferences. As Jessica said, “Let your house suit your lifestyle, not the other way around.
At Stacked, we like to look beyond the headlines and surface-level numbers, and focus on how things play out in the real world.
If you’d like to discuss how this applies to your own circumstances, you can reach out for a one-to-one consultation here.
And if you simply have a question or want to share a thought, feel free to write to us at stories@stackedhomes.com — we read every message.
Need help with a property decision?
Speak to our team →Read next from Homeowner Stories

Homeowner Stories We Could Walk Away With $460,000 In Cash From Our EC. Here’s Why We Didn’t Upgrade.

Homeowner Stories What I Only Learned After My First Year Of Homeownership In Singapore

Homeowner Stories I Gave My Parents My Condo and Moved Into Their HDB — Here’s Why It Made Sense.

Homeowner Stories “I Thought I Could Wait for a Better New Launch Condo” How One Buyer’s Fear Ended Up Costing Him $358K
Latest Posts

Property Market Commentary We Review 7 Of The June 2026 BTO Launch Sites – Which Is The Best Option For You?

Singapore Property News The Most Expensive Resale Flat Just Sold for $1.7M in Queenstown — Is There No Limit to What Buyers Will Pay?
On The Market Here Are The Cheapest 4-Room HDB Flats Near An MRT You Can Still Buy From $450K










1 Comments
I wonder whose the owner?