


A $13k Condo Renovation Breakdown: How This Creative Homeowner Self-Designed & Decorated Their 732 Sqft Home
Renovating a relatively small space can be quite challenging. You have to be creative with your design choices in order to really make the most of the space.
The approaches vary, but probably the most important at the top of the list is about making sure the home doesn’t end up claustrophobic. As such, the layout, colour options, and furniture choices are paramount to achieving this.
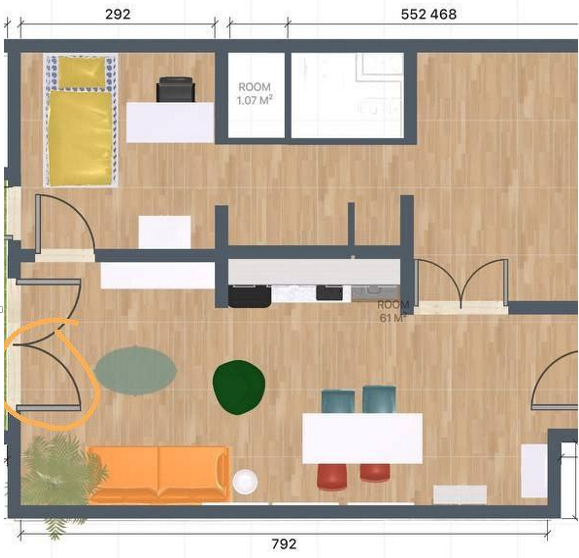
That’s exactly what Q and her housemate, Z, did for the renovation of their 732-square feet condominium unit. It’s a 2-bedroom home at Upper Serangoon View – near Hougang MRT station.
The project is currently five years old and sits near two major parks, namely Serangoon Park PCN and Punggol Park. It’s actually a boon for Q and Z since they both love nature. Other basic amenities are also in proximity, such as a supermarket, coffee shops, health clinics, a dental clinic, and a hardware shop.
Q said they’re actually the second owners of the house. They were looking at resale apartments that fit their budget, which was around $750k. With houses in OCR being more affordable, their agent recommended they check District 19.
So what made them pick this particular unit over others in the district?
“The ceiling gave a bigger sense of space. Also, the rectangular layout of the house made it easier for us to furnish it. It allowed efficient space usage as there are no awkward corners and unused space.”
In fact, one of the rooms has a loft which allowed them to have a dual purpose for the space – a sleeping area and a work lounge. Plus right from the onset, the unit already had ample built-in storage space to store unused items such as winter clothing and luggage.
The condominium also has several interesting common facilities – as Q puts it. There’s a lazy pool, a mini aqua gym, and a poolside BBQ pit.
Let’s go ahead and discover in detail on their renovation journey for their 2-bedder home.
How The Renovation Journey Turned Out
“We spent a total of $23k,” Q answered when we asked her about the cost. In fact, she said that only $13K went to the actual renovation cost. The remaining $10K was for furnishings.
“We realised that the existing flooring and wall tiles are suitable for overlaying. Hence, no hacking was involved.” They also retained all the existing built-in fittings and cabinets because they were in good condition.
So instead of spending more on built-in carpentry, they’ve decided to focus more on furniture.
“This not only helps to save costs, but makes it modular and easy to reconfigure for our changing needs,” she added. With more built-ins, they believe it will be harder to maintain because it will require more time and effort to replace in the future.
Another factor that brought down their reno cost was their decision not to hire an ID.
“We chose to approach contractors directly and sourced our bathroom accessories such as basin, taps, and toilet bowls ourselves.”
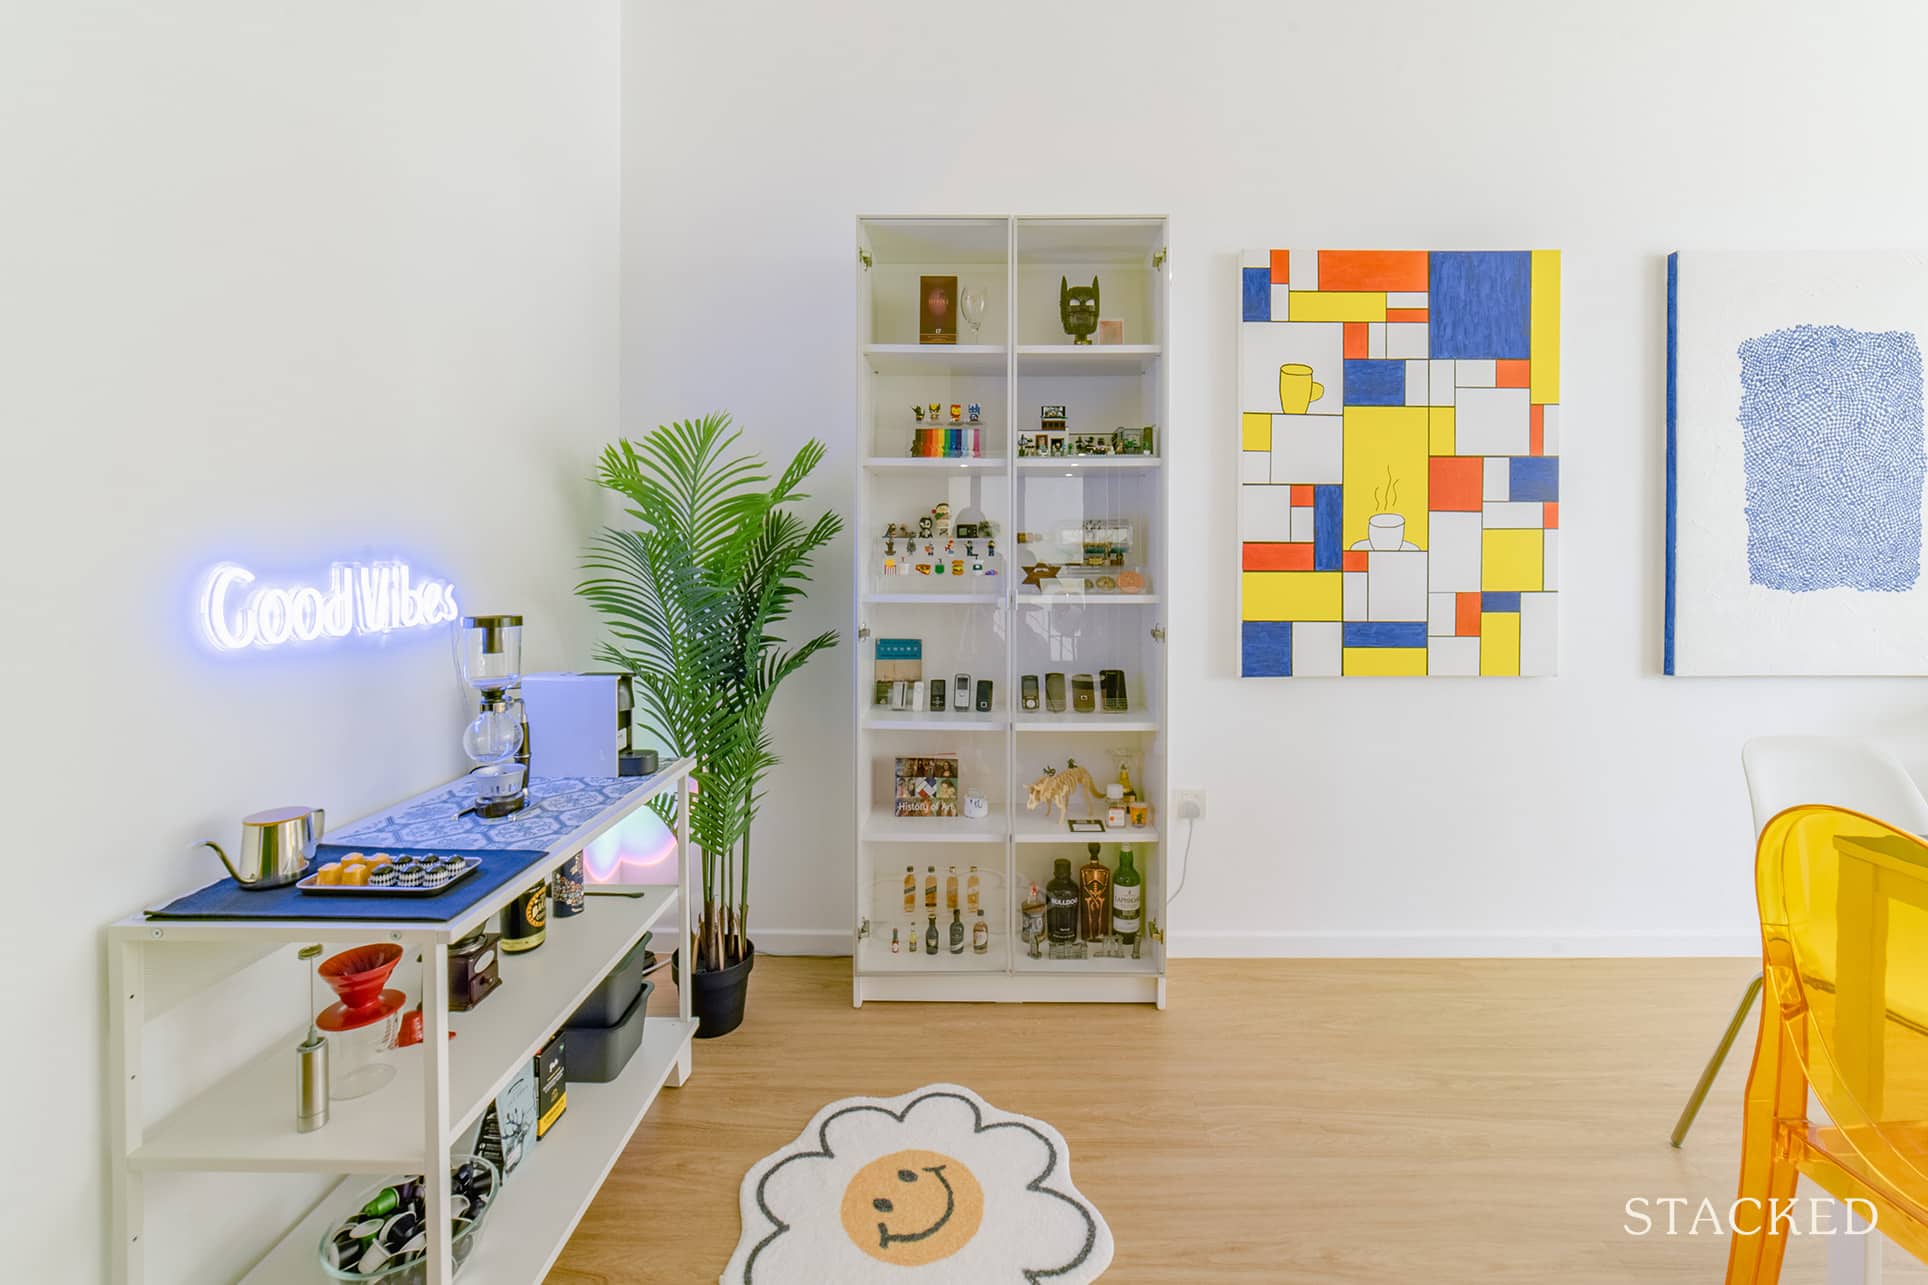
Q was very definite about the style of their home right from the start. She said she always knew she was going to implement the colour-blocking element in the house. They both loved fun, vibrant contrasting colours, so they decided the colours would be one of the key factors for their decor.
“I went online and binge-watched interior design videos every single day. I came upon this video where the designer had almost everything in white. Then, he added a few statement pieces that had fun shapes and popping loud colours.” She said that it instantly created a visual hierarchy and an art gallery vibe – exactly the kind of effect that Q was looking for.
And so, they decided the rooms would be blank canvases. They wanted the walls to be mostly white, including the tables and shelves. “That way, the furniture will be the first pieces our eyes will land on when we enter,” she added.
Q shares some of the specific inspiration she found online.
If you’re looking for tips on decorating small apartments and rooms, Harper’s Bazaar Korea, Vogue Korea, and Living Sense Korea offer great inspiration.
And of course, Never Too Small is an interesting YouTube channel for shoe-box houses with foldable and collapsible furniture:
Artist’s Tiny Beach Shack Australia – 30sqm/323sqf
Shaker Style Compact Apartment Auckland – 27sqm/291sqft
Sci-Fi Apartment Hong Kong – 59sqm/635sqft
Hong Kong Small Treehouse Loft Apartment – 33sqm/355sqft
For inspiration on western luxury houses, House and Homes, The Local Project, Vogue France, and The Modern House are excellent sources. Do you want something more local, more relatable? Q recommends videos from our channel as well, such as the ones below:
Inside A Mid-Century Modern Eclectic 1,001 Sqft Resale HDB In Tiong Bahru
Inside A Cosy Yet Stylish Mid-Century Modern HDB Home In Queenstown
Inside A European-Inspired Canberra HDB BTO Flat With A Cosy Dining Nook
Inside A Stunning Transformation Of A 1,580 Sqft Executive HDB
Q and Z started off by deciding on the three main colours for their furniture. These are blue, yellow, and orange. Then, they searched for statement pieces that caught their eyes. “I picked out the blue transparent Series 7 armchair and yellow elephant chair,” Q said.
Why don’t we try to get a more visual sense of how their renovation turned out? Let’s go ahead and tour their place.
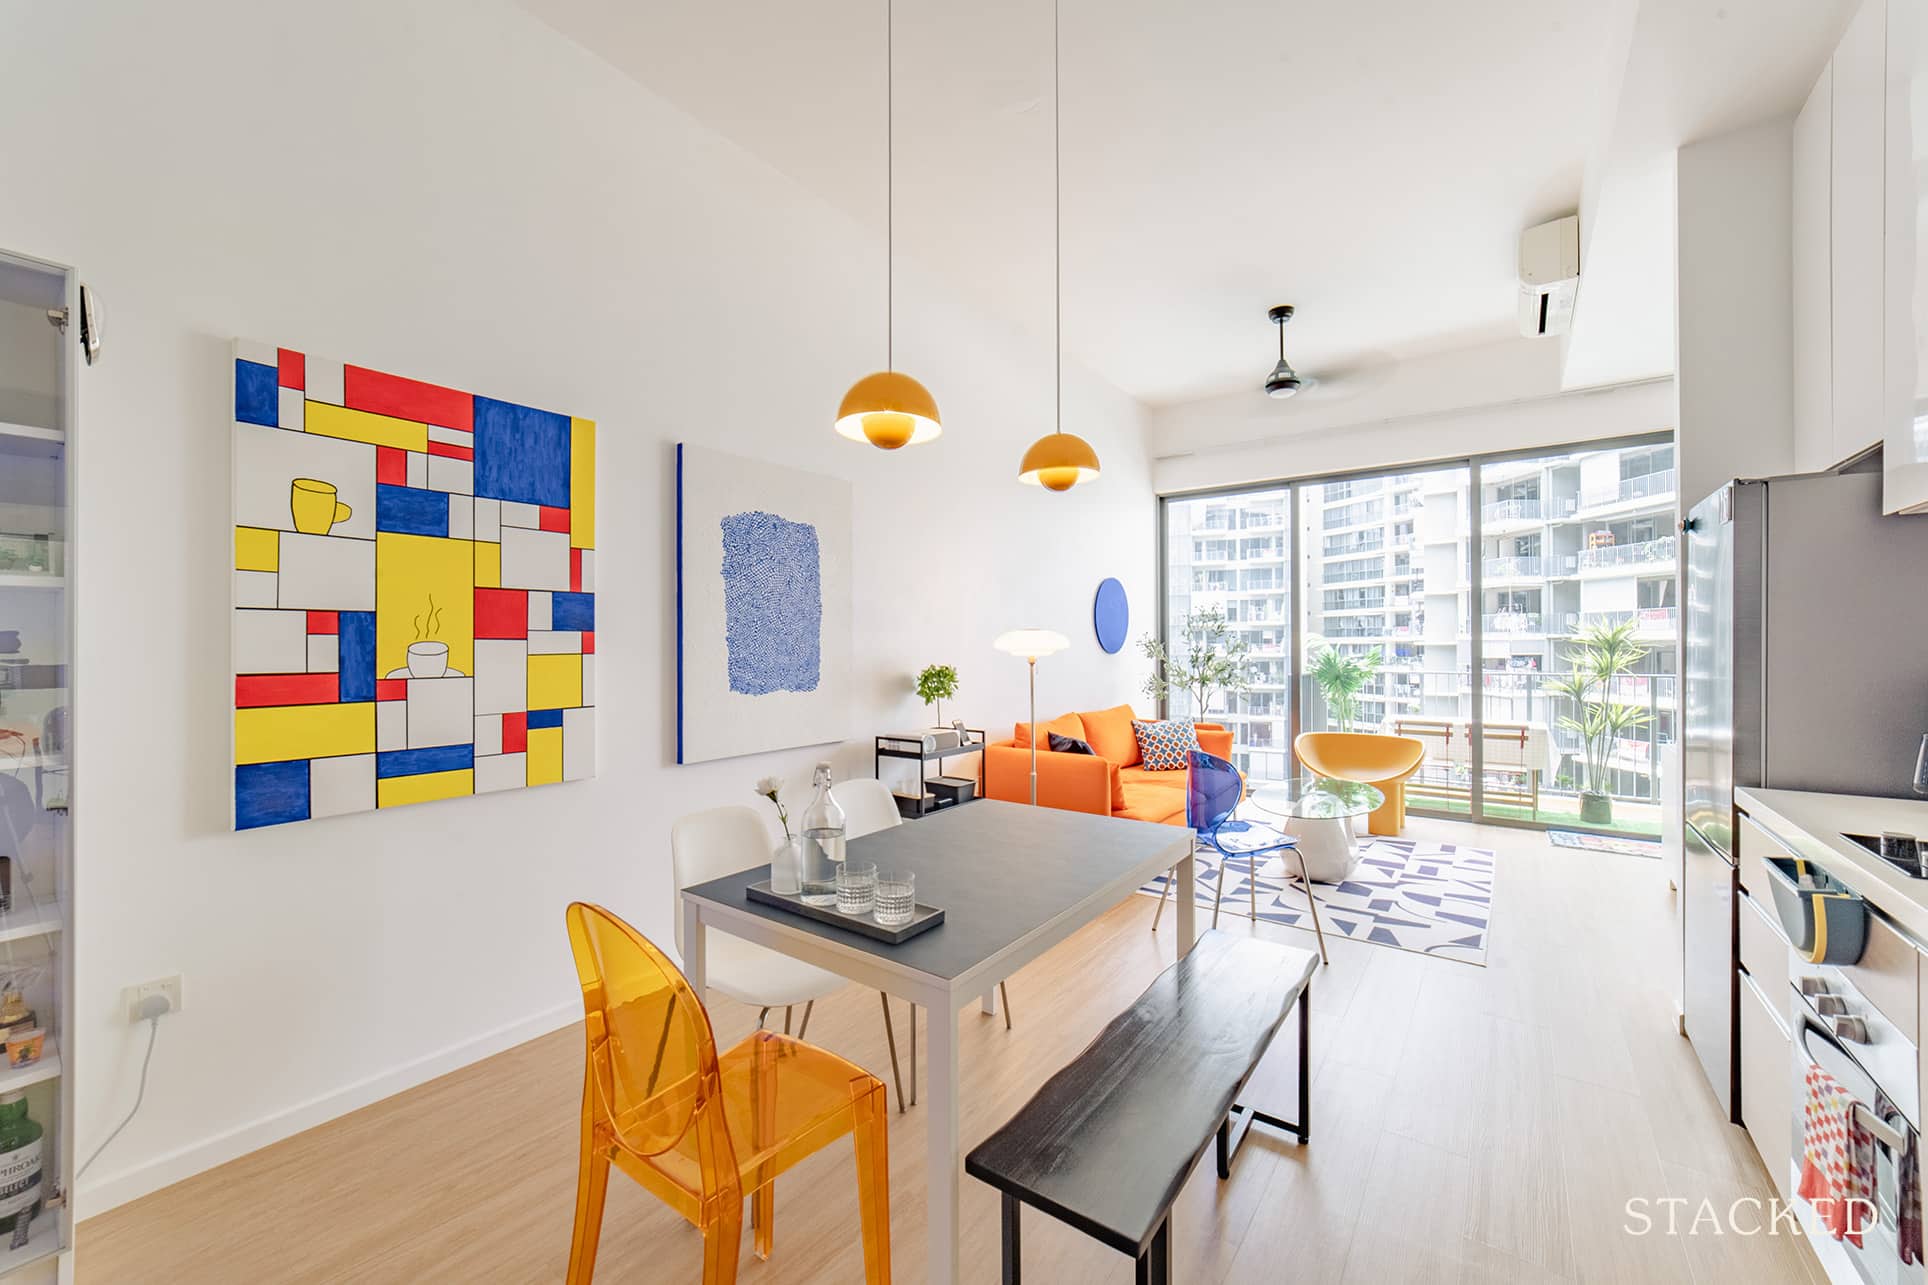
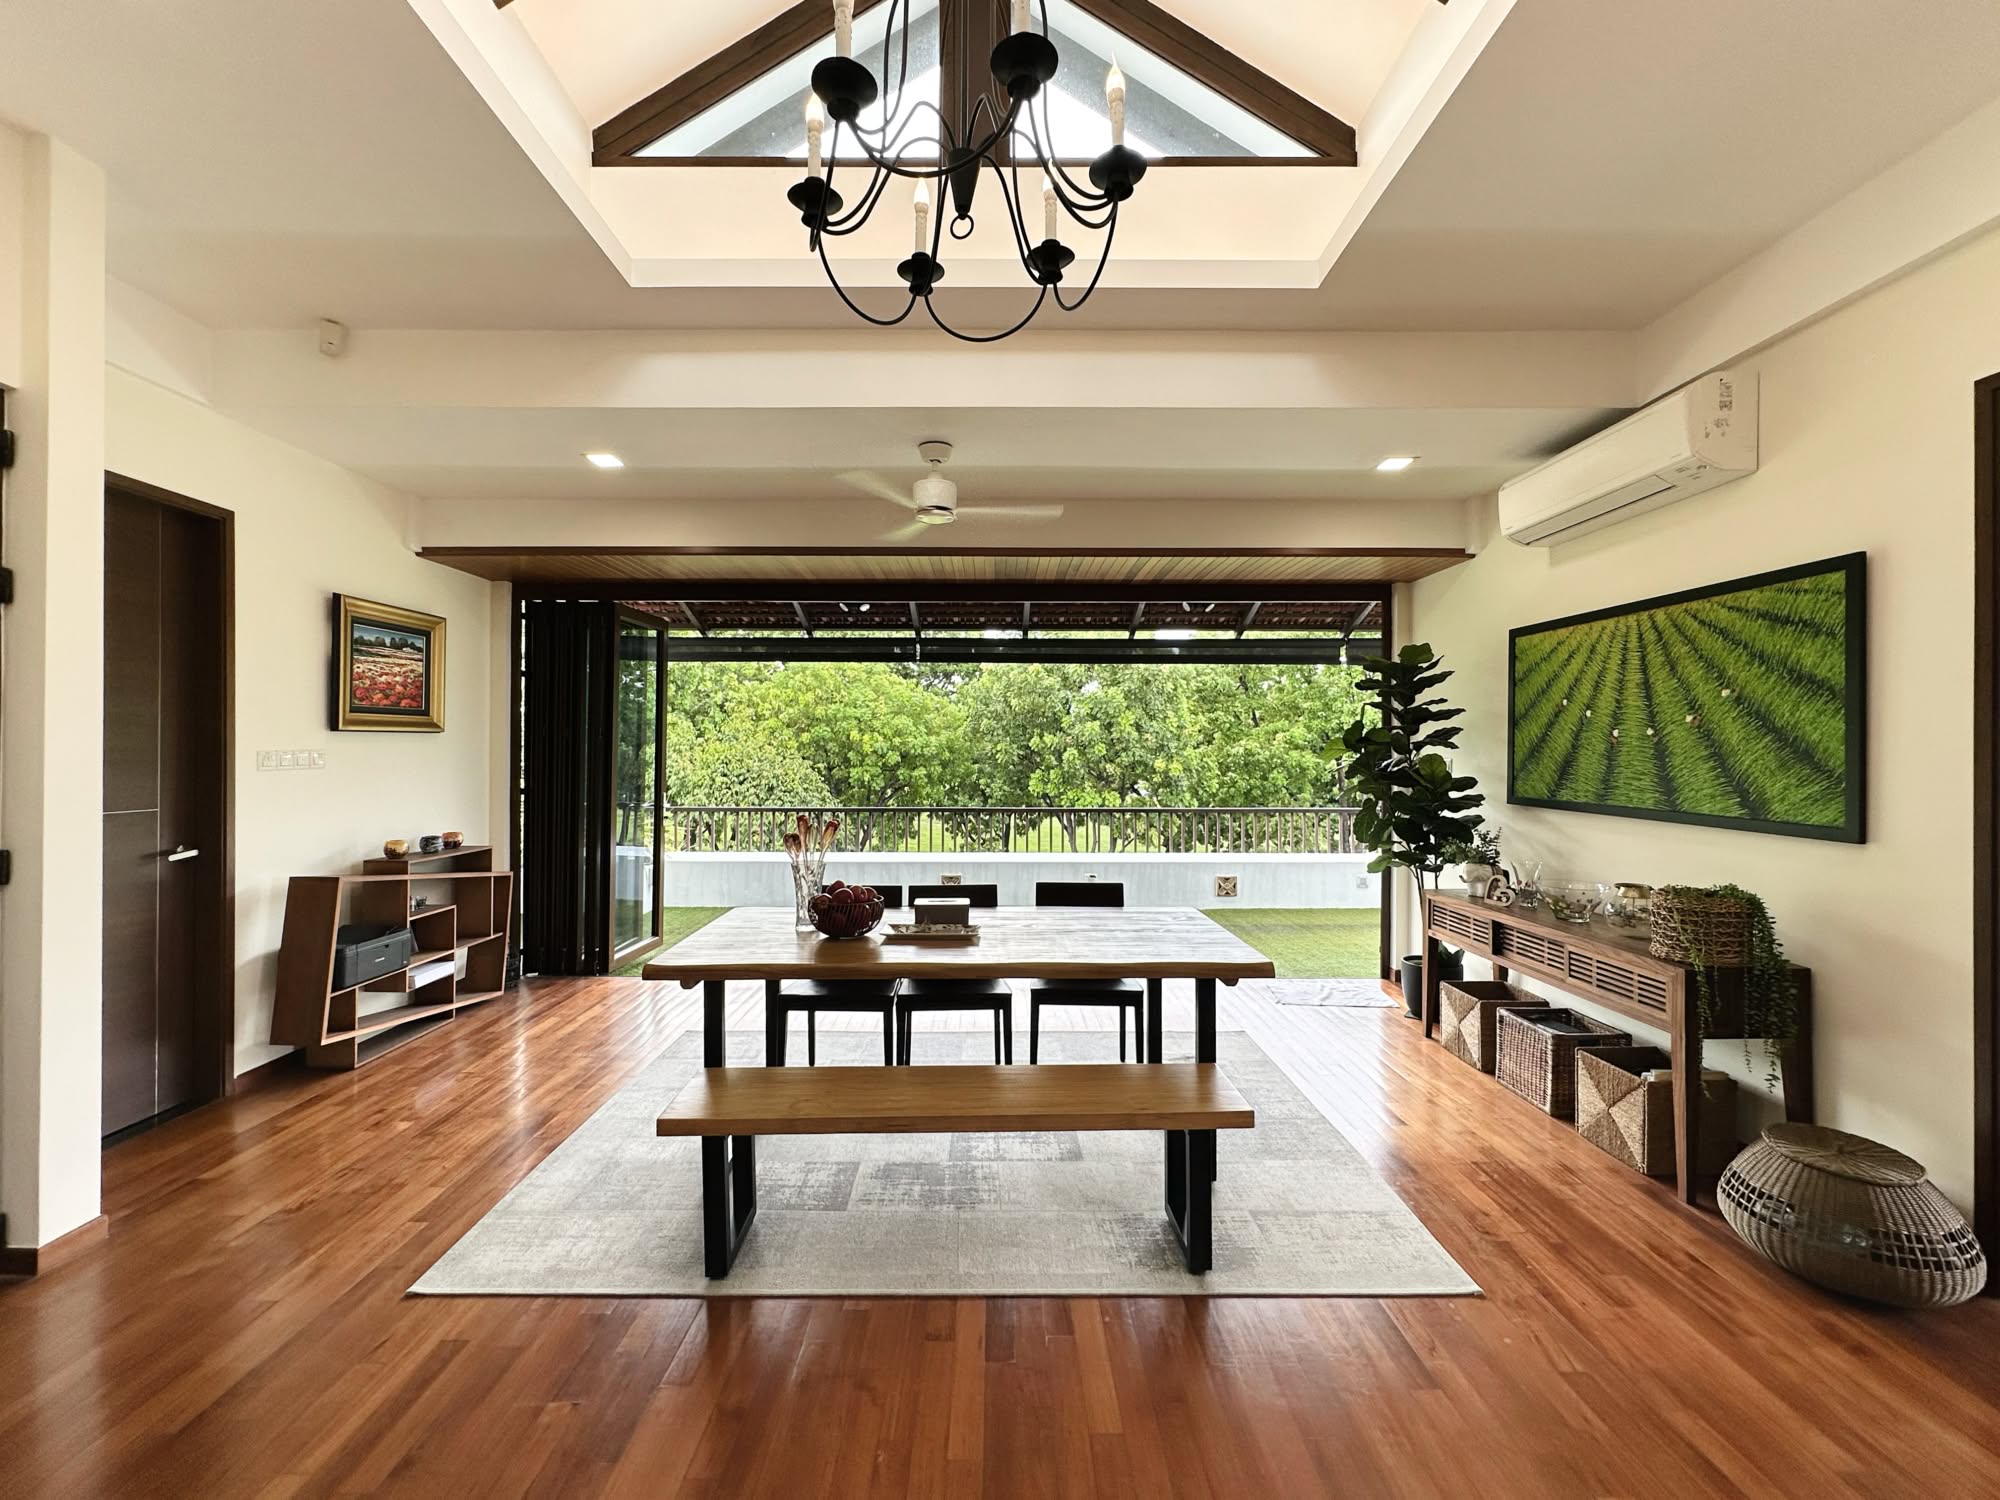
Living Room
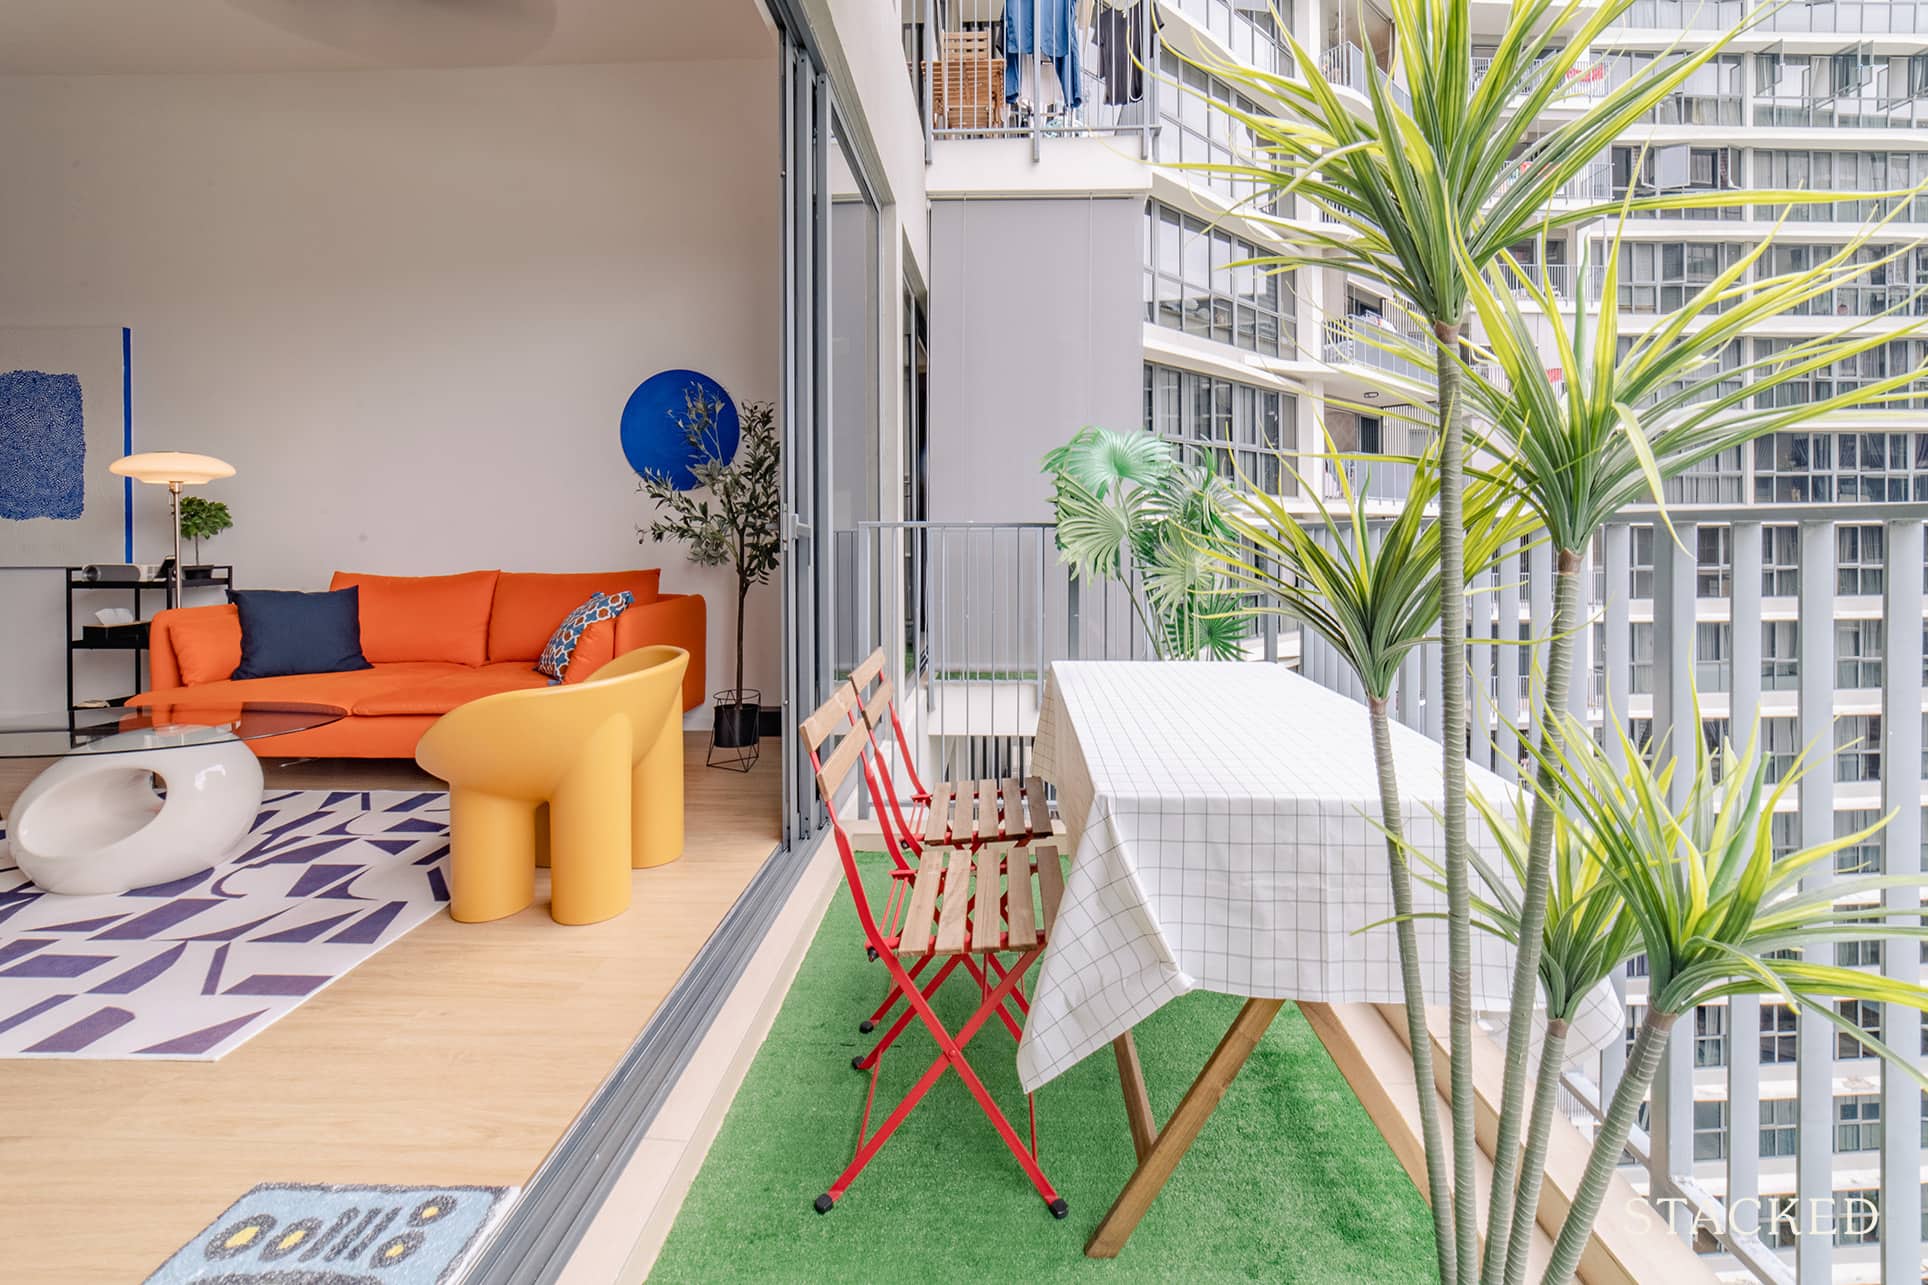
In the living room, you’ll see the statement pieces Q described earlier. Can you spot the elephant chair? She said they initially wanted to purchase a velvet material for their sofa but had to forego this due to practicality and Singapore’s hot weather.
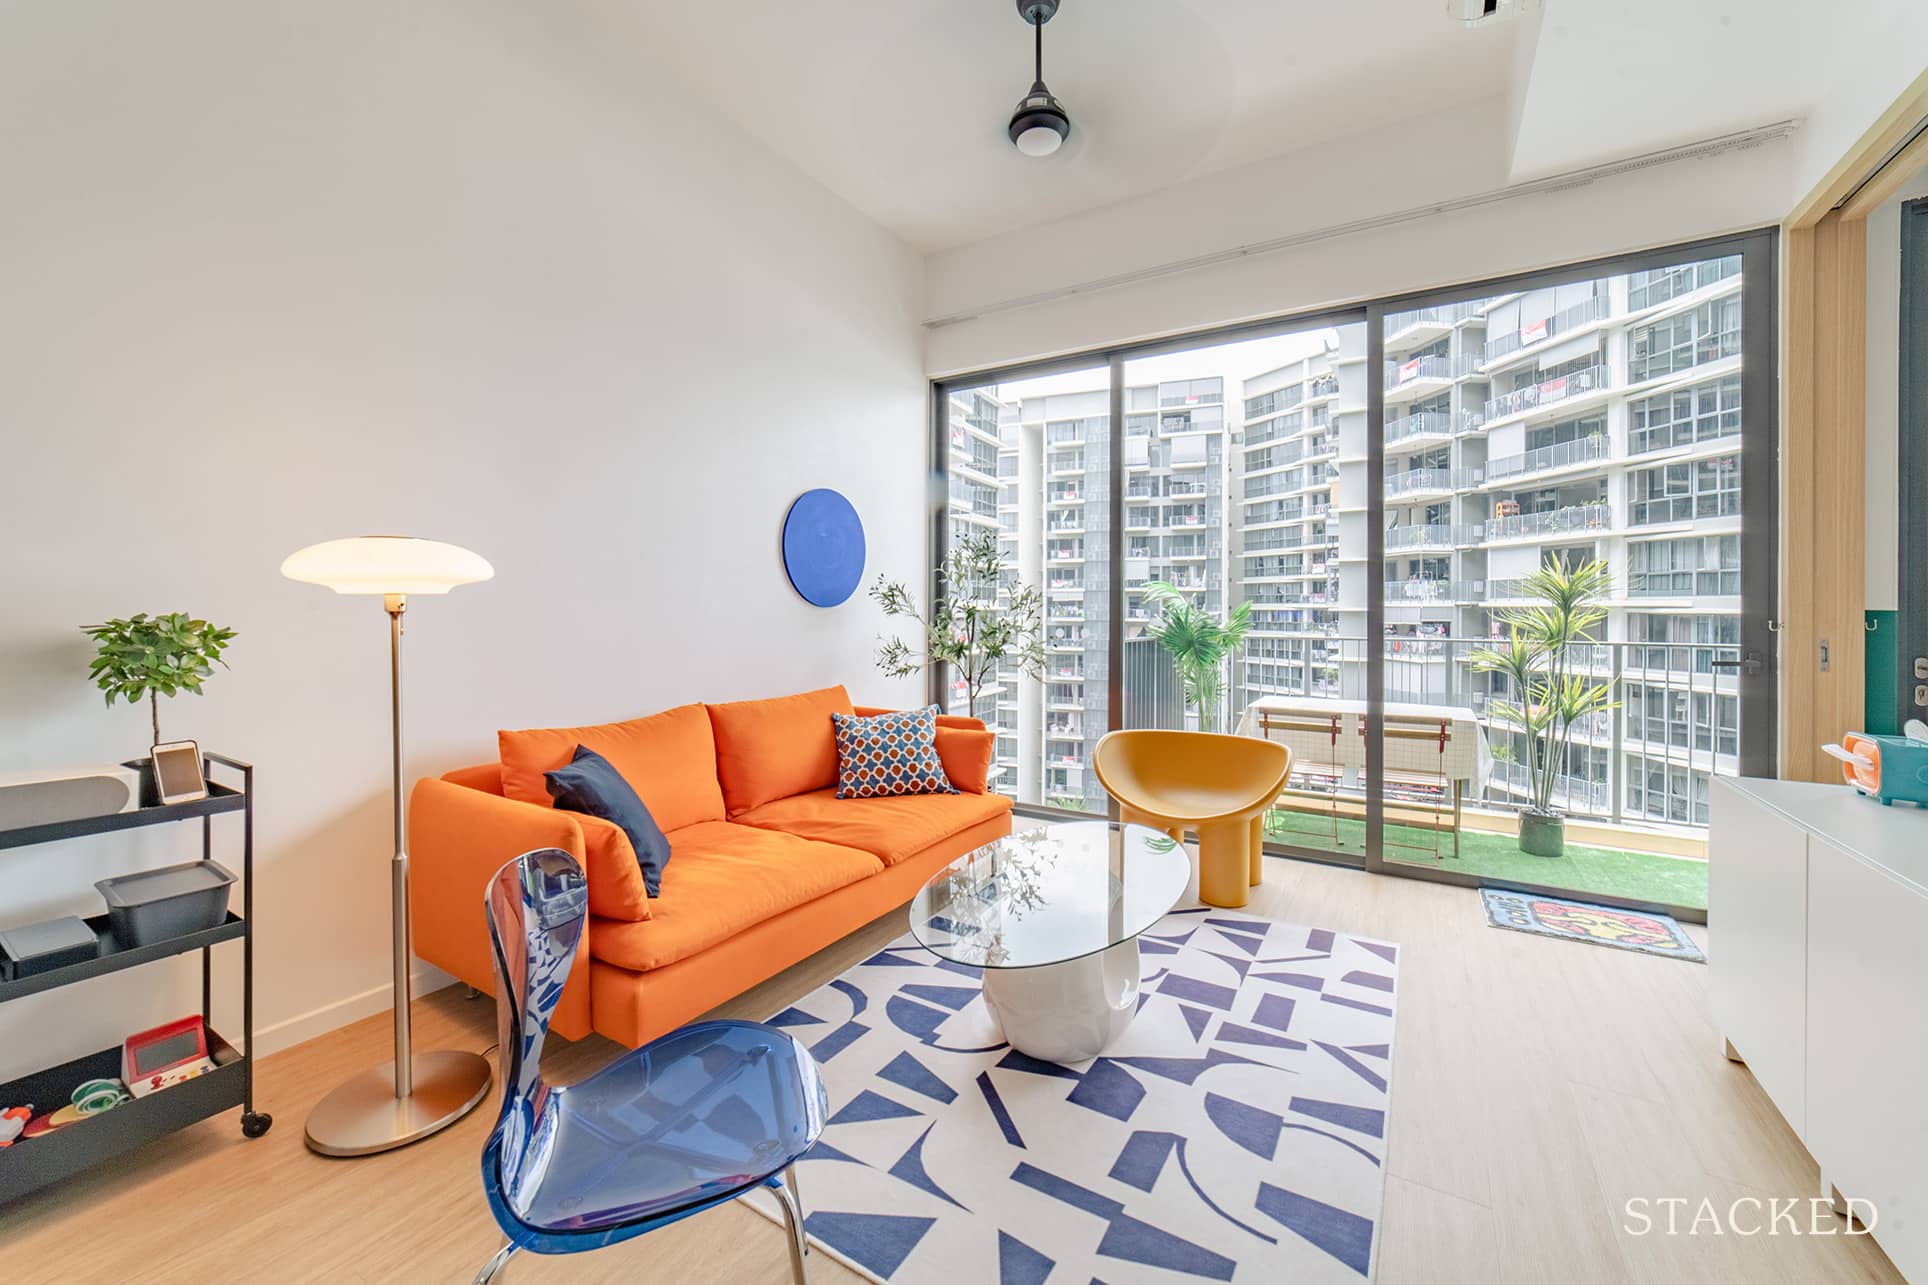
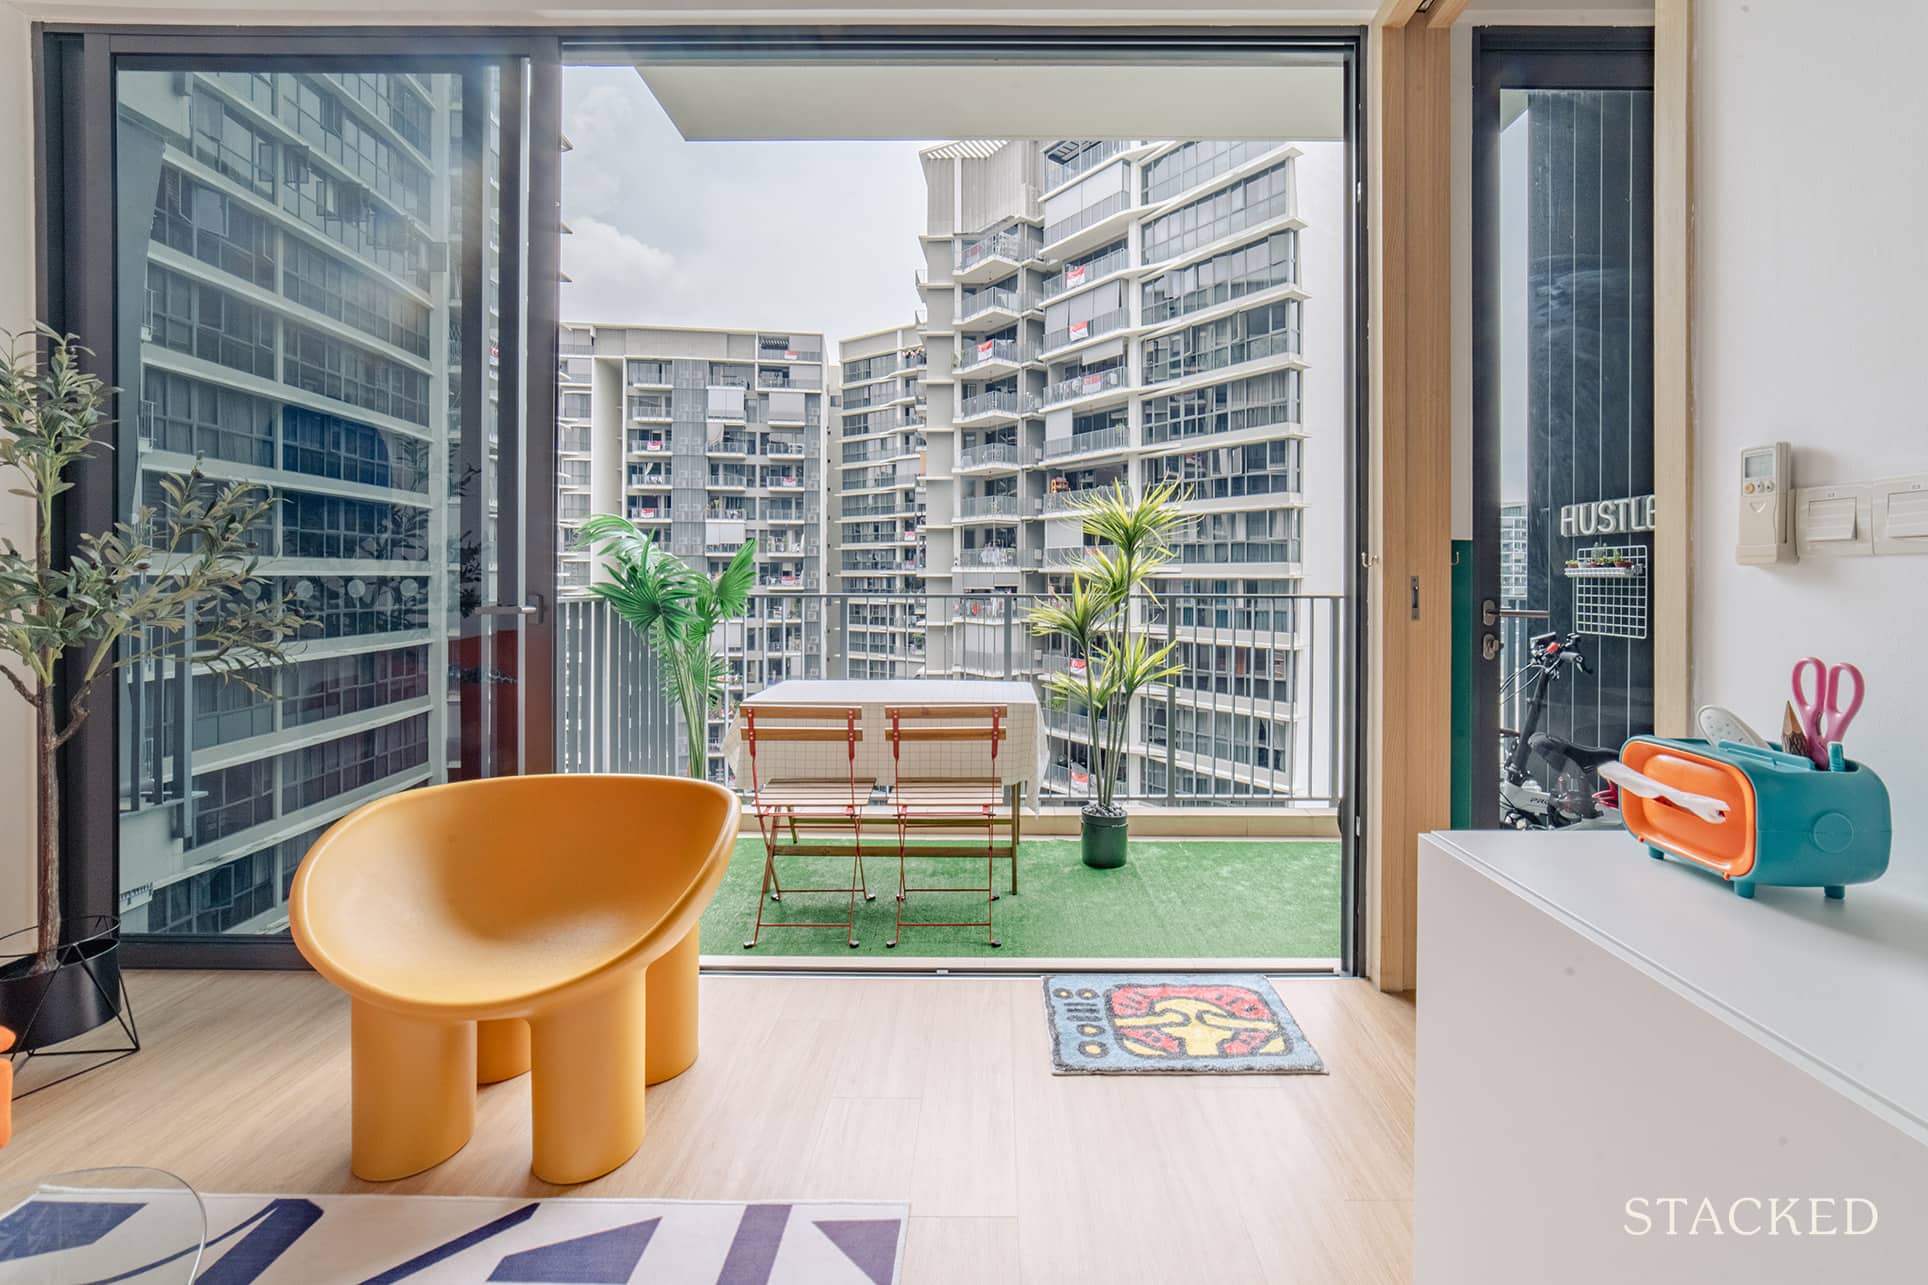
They decided to go with the fabric-wrapped IKEA sofa, SODERHAMN, in orange, which goes really well with their theme. For their coffee table, they picked one with a glass table top to make it seem almost invisible (just like one of our tips here to make your space look bigger).
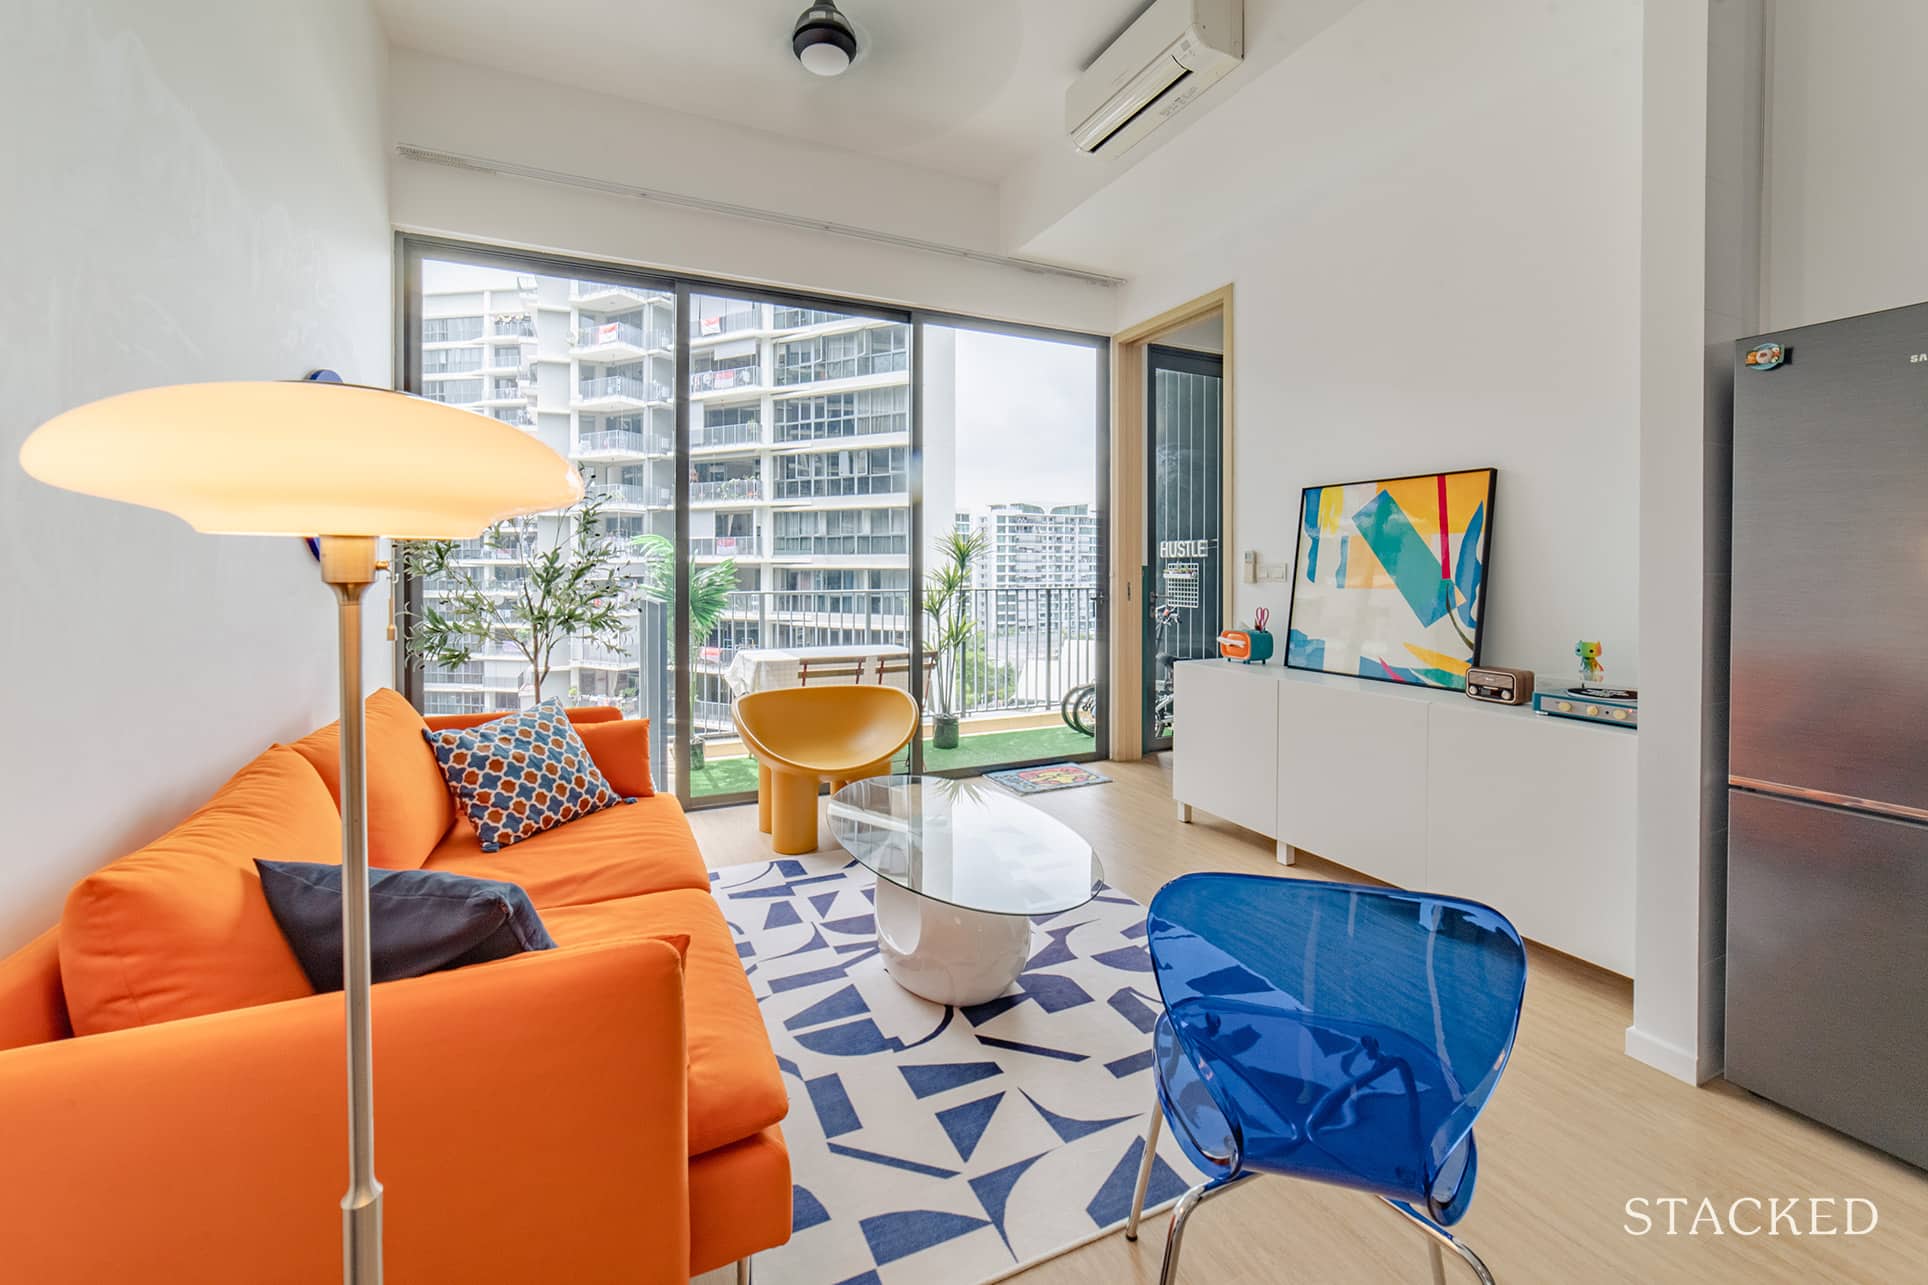
This glass table top, together with their low profile furniture pieces and the glass partition that leads to the balcony, all contributed to making the living room appear visually larger.
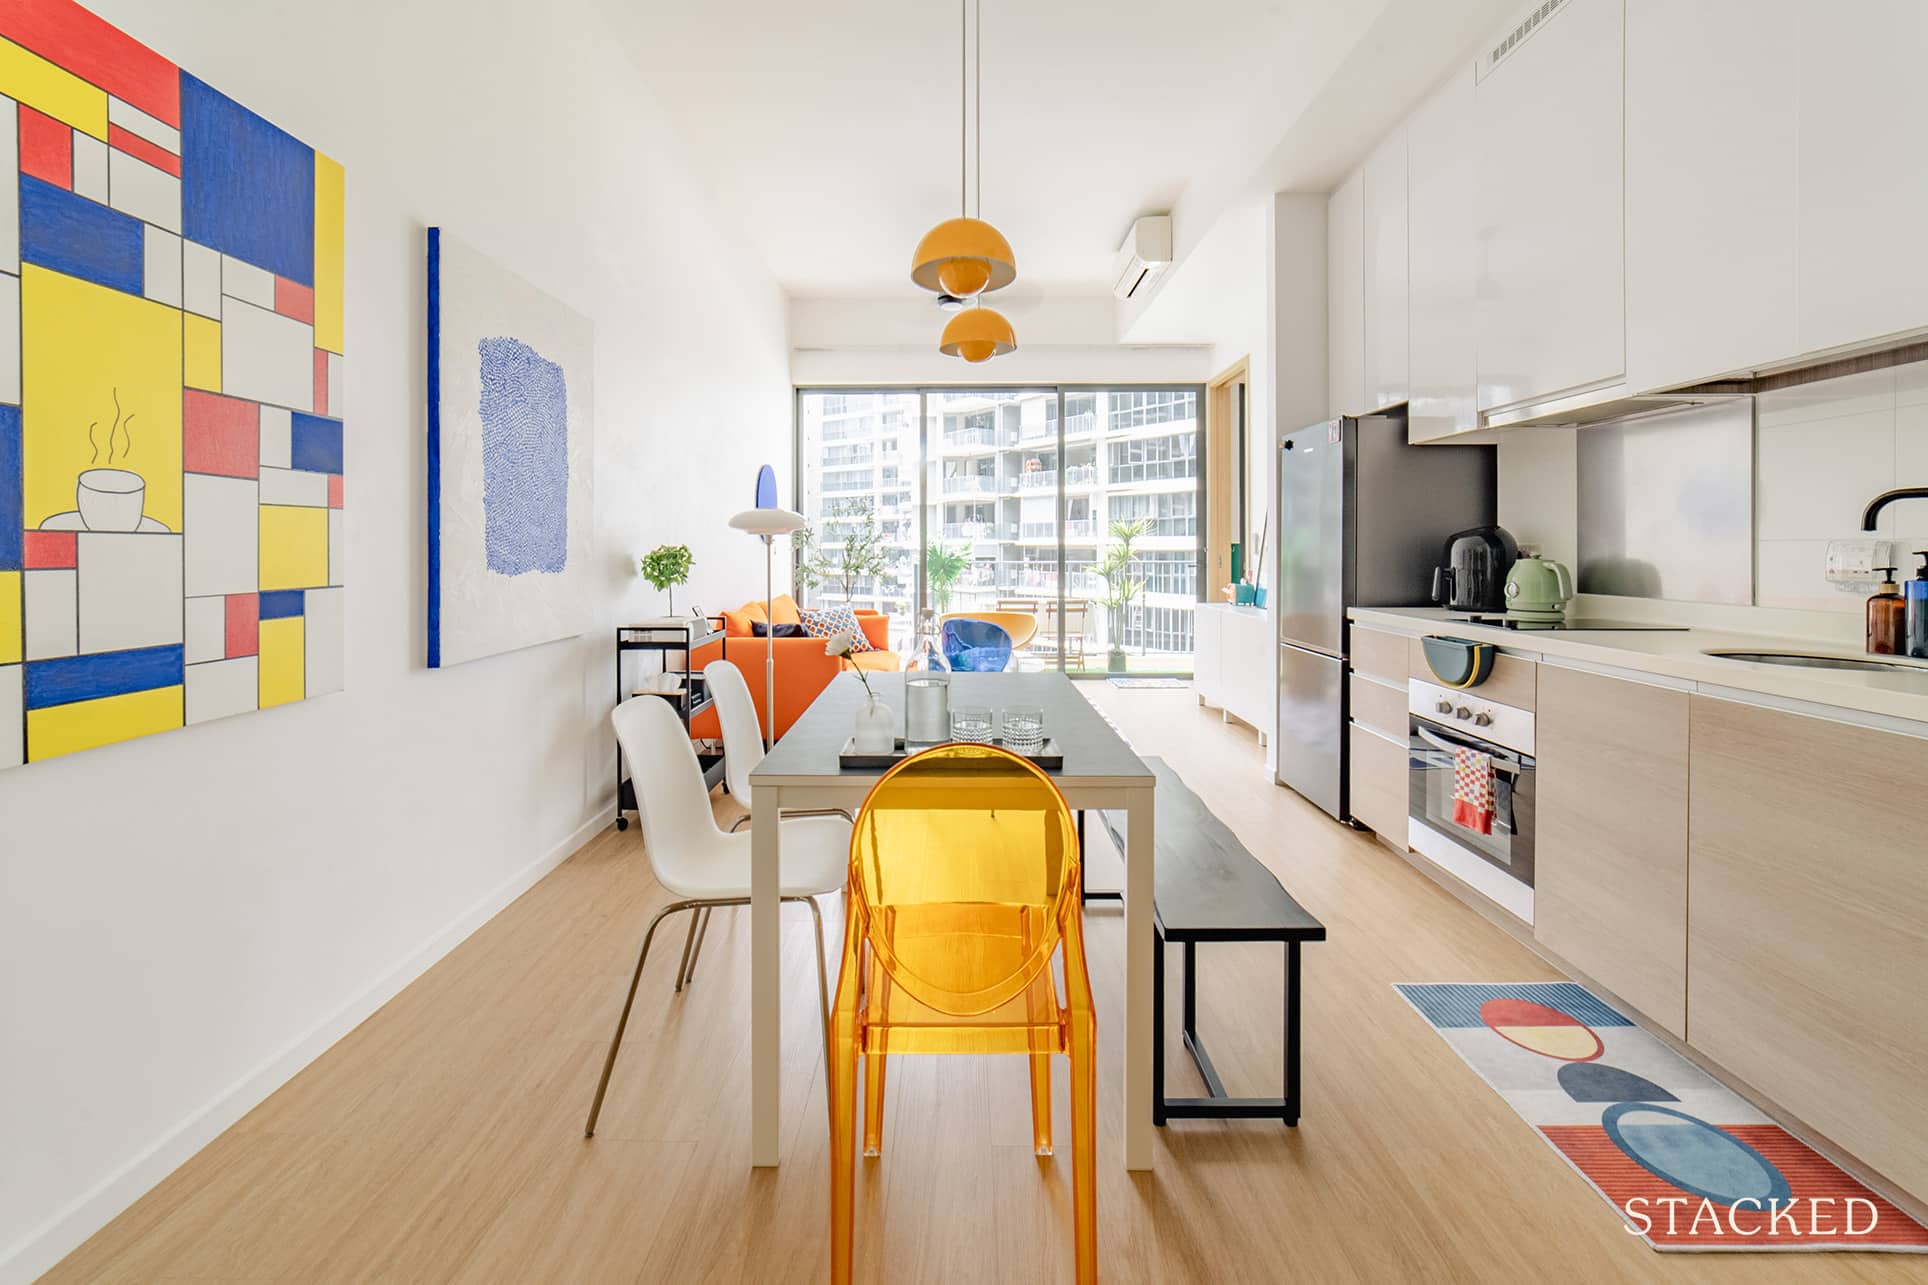
Dining Room
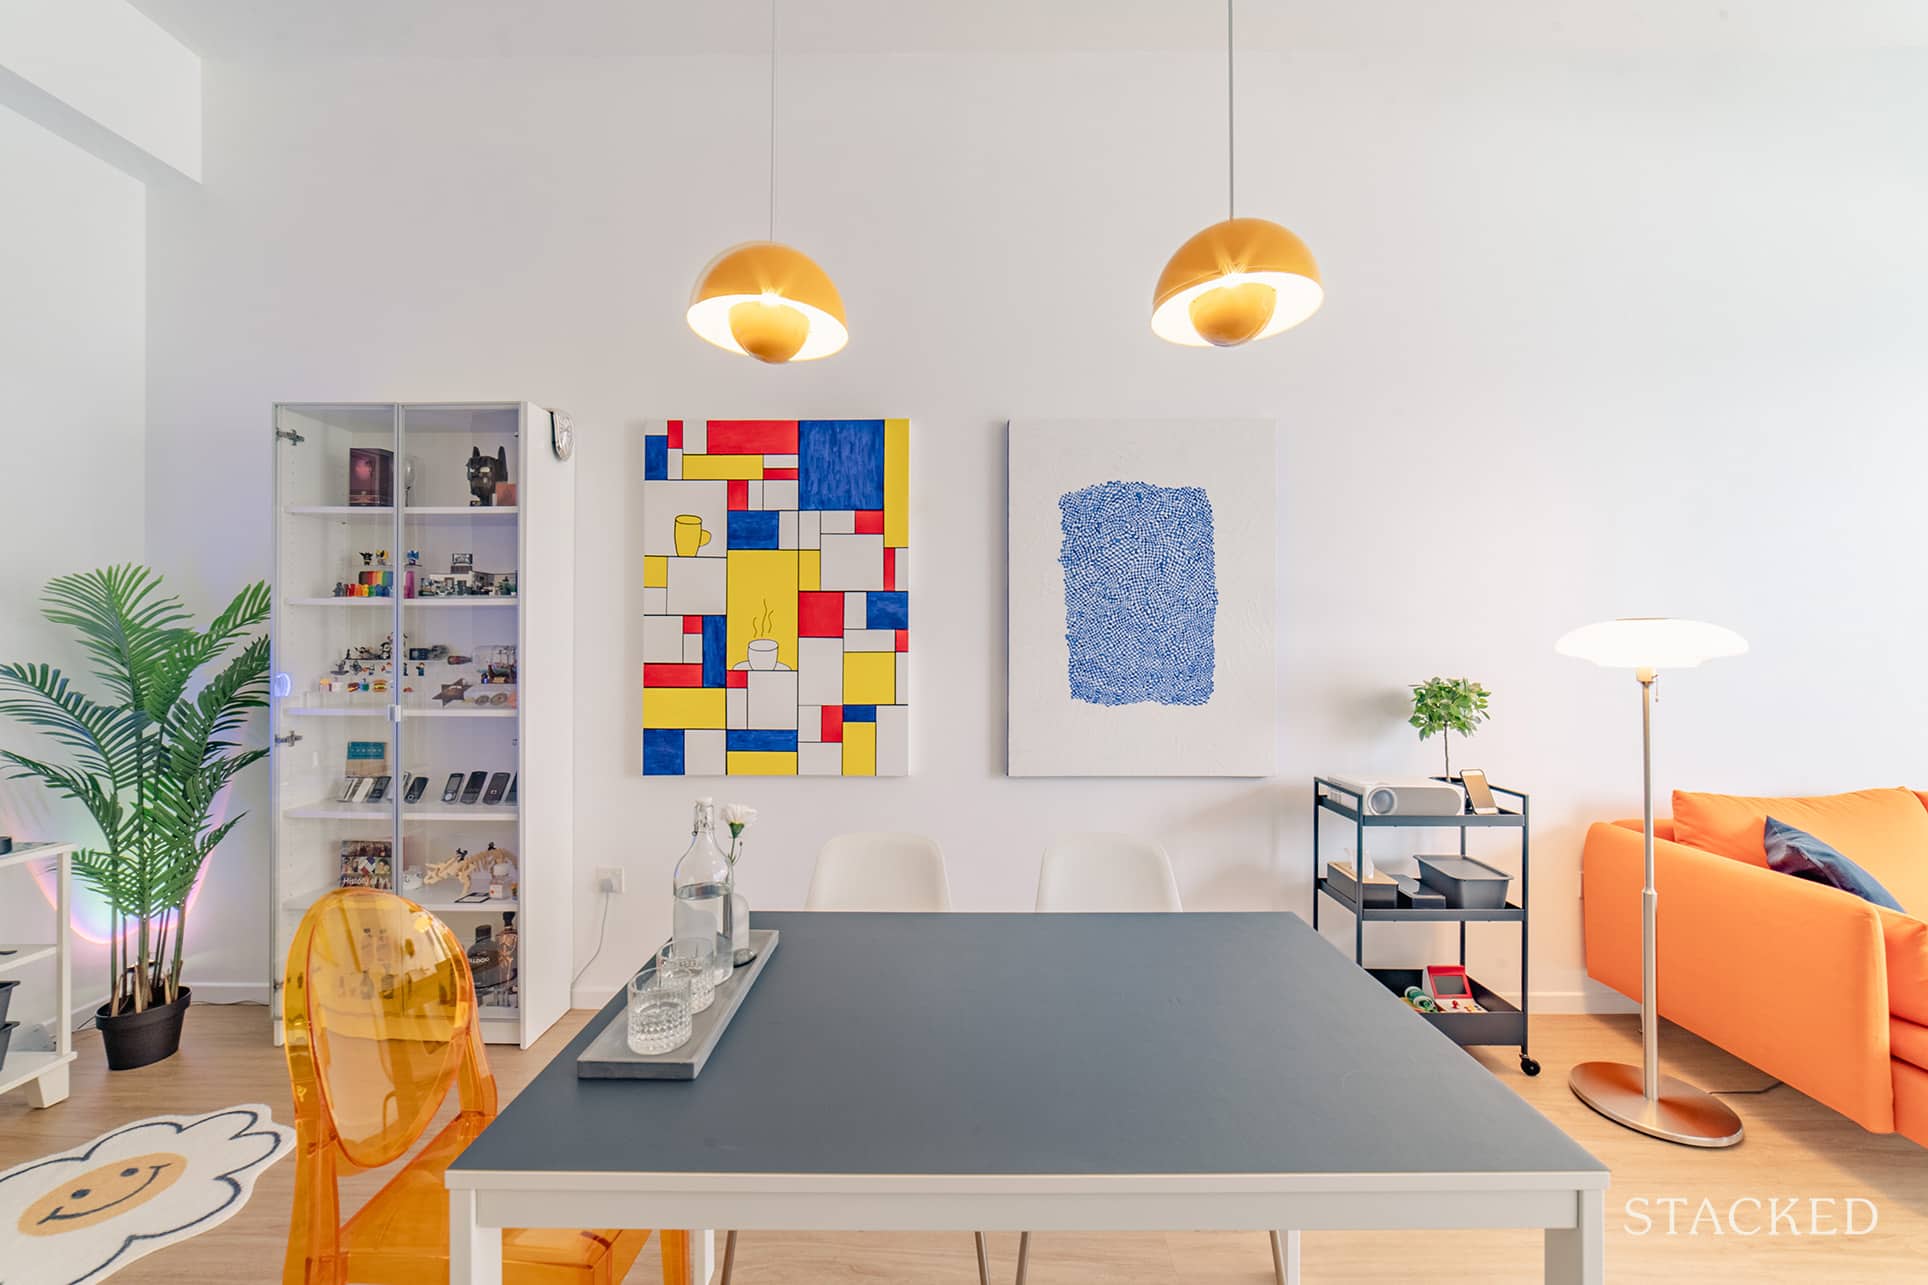
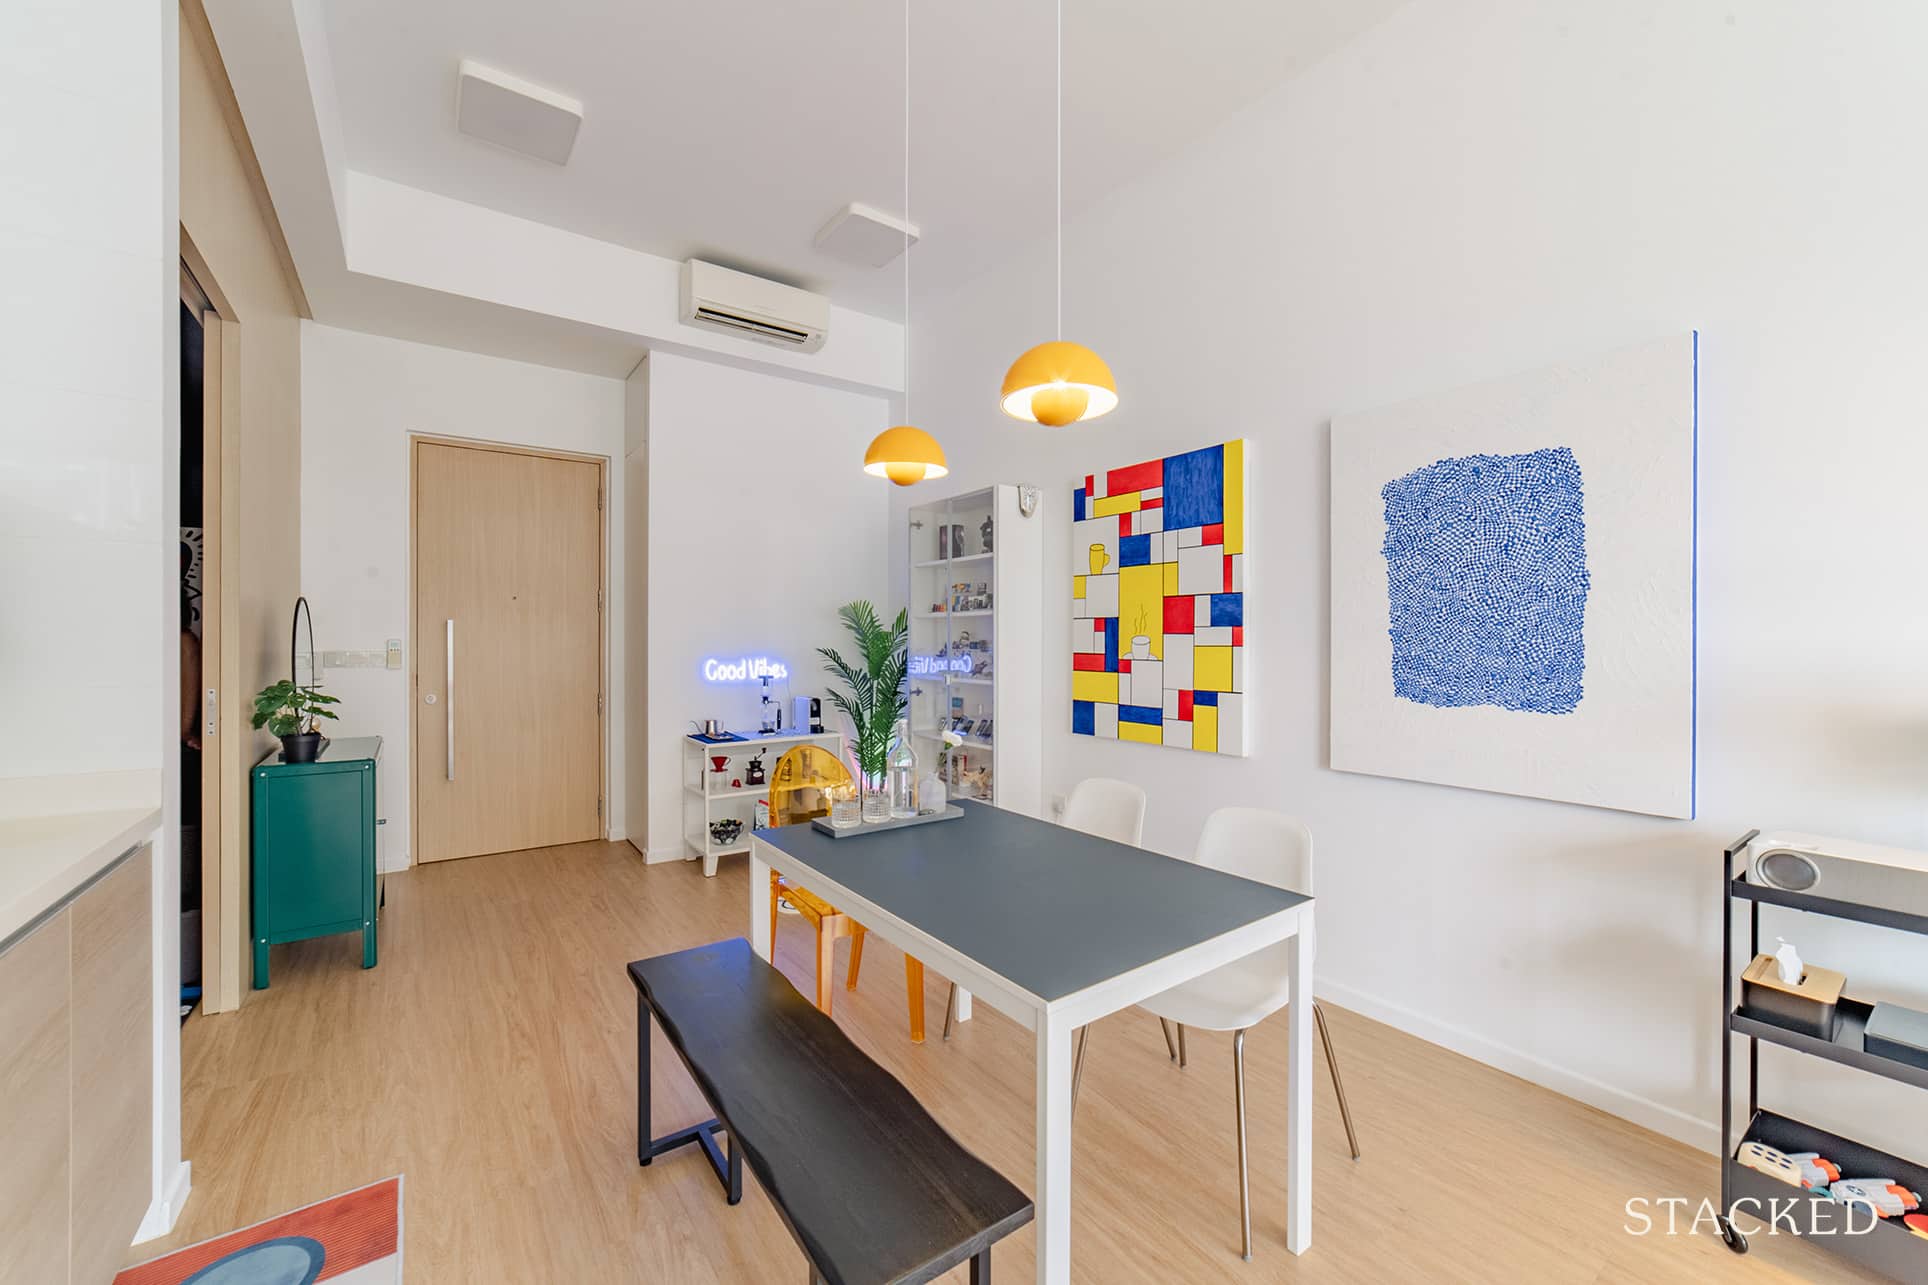
In the dining room, they swapped the two ceiling lights with hanging yellow pendant lights instead. Again, this type of lighting adds to the illusion of space as it creates an impression of a high ceiling. The style also accentuated the dining area well, and really stood out with the pop of colour.
Instead of flushing the chairs to the side wall, as shown in their floor plan above, they decided to change the orientation and place it in the middle. This helps ensure that no space is wasted.
Q added that they chose to go with fun-shaped lamps and mismatching chairs to create contrast instead of uniformity. Safe to say, these statement pieces really helped to bring about a playful vibe to the home.
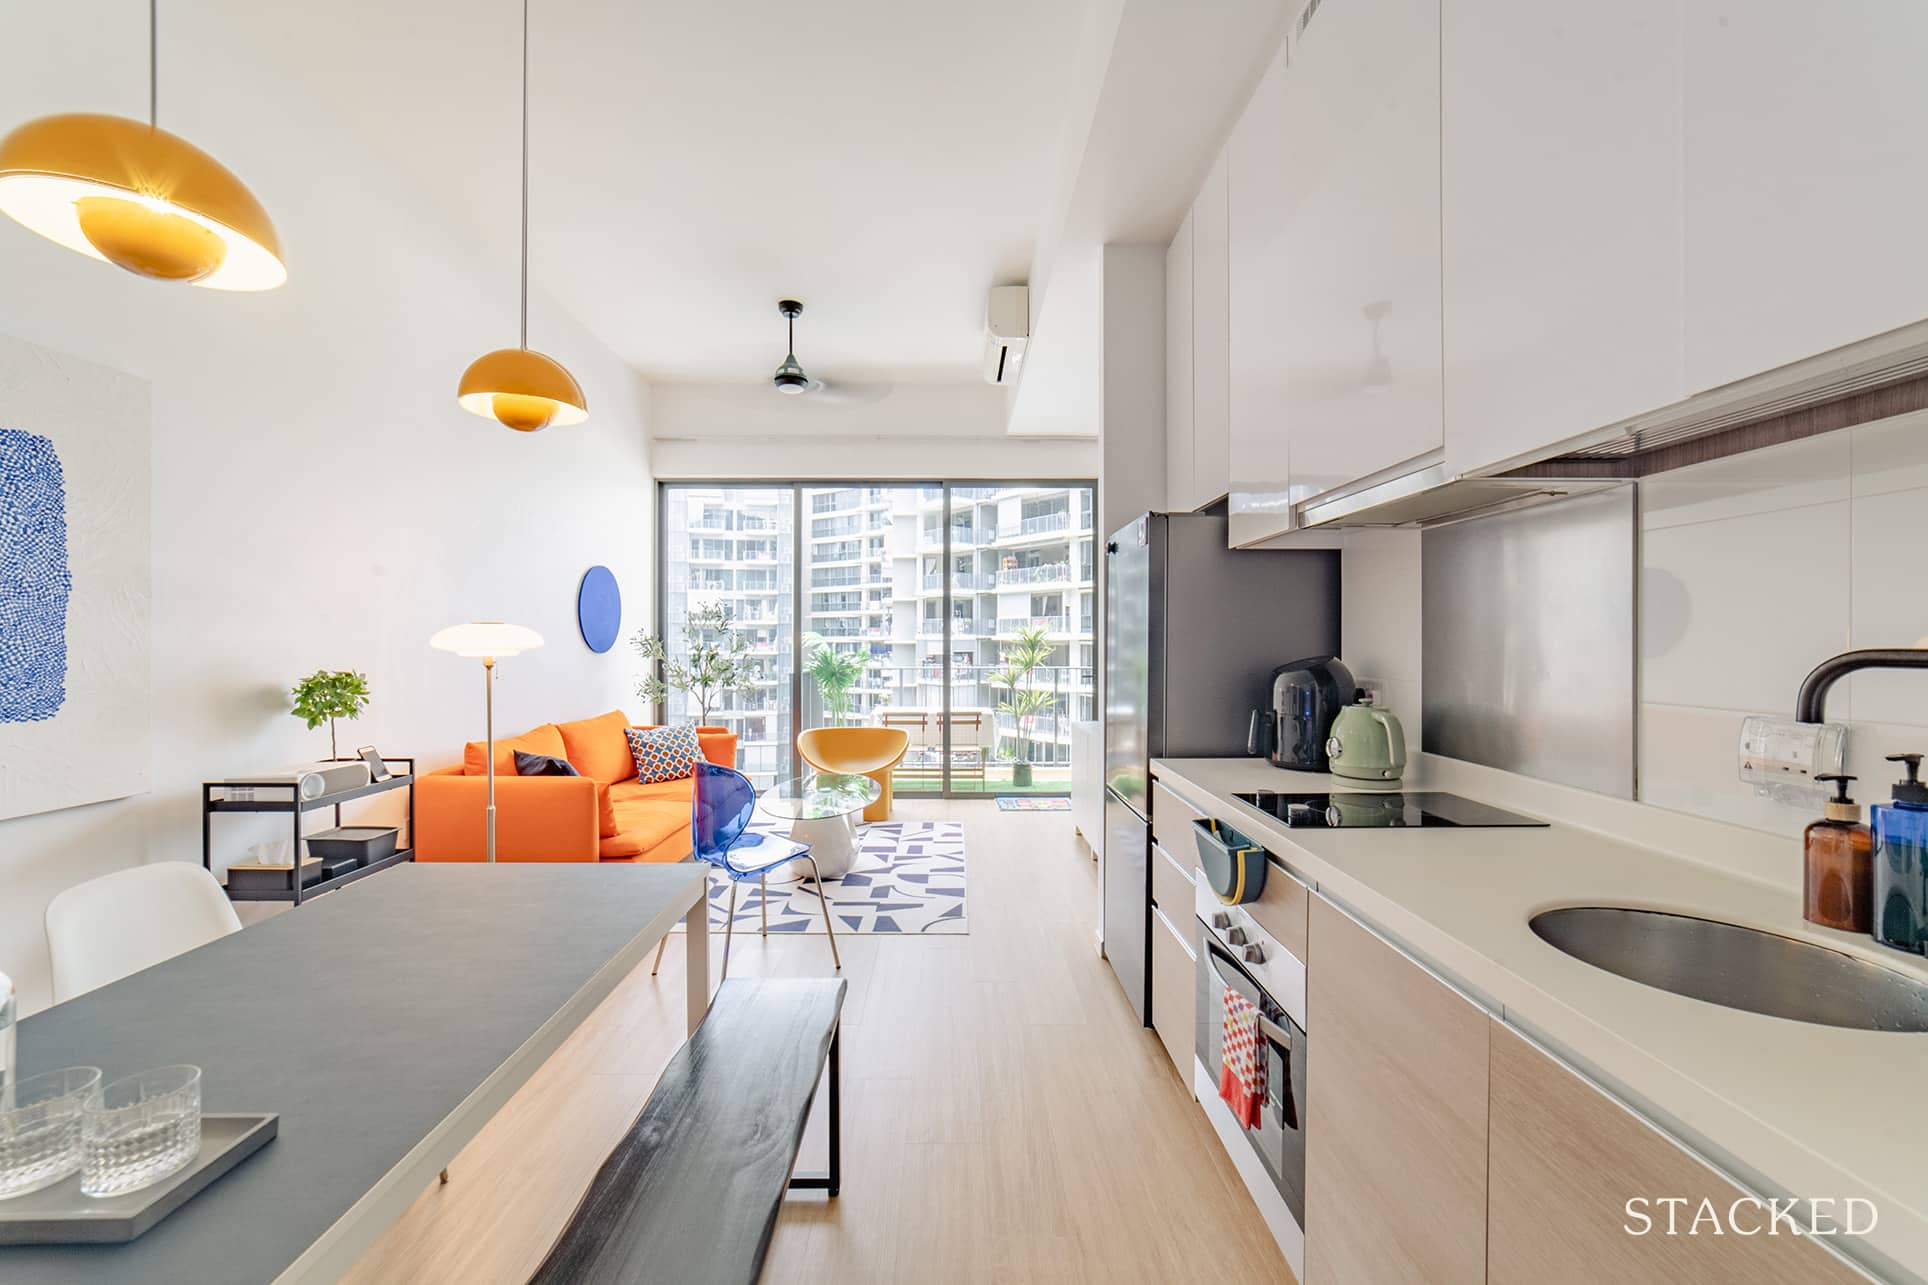
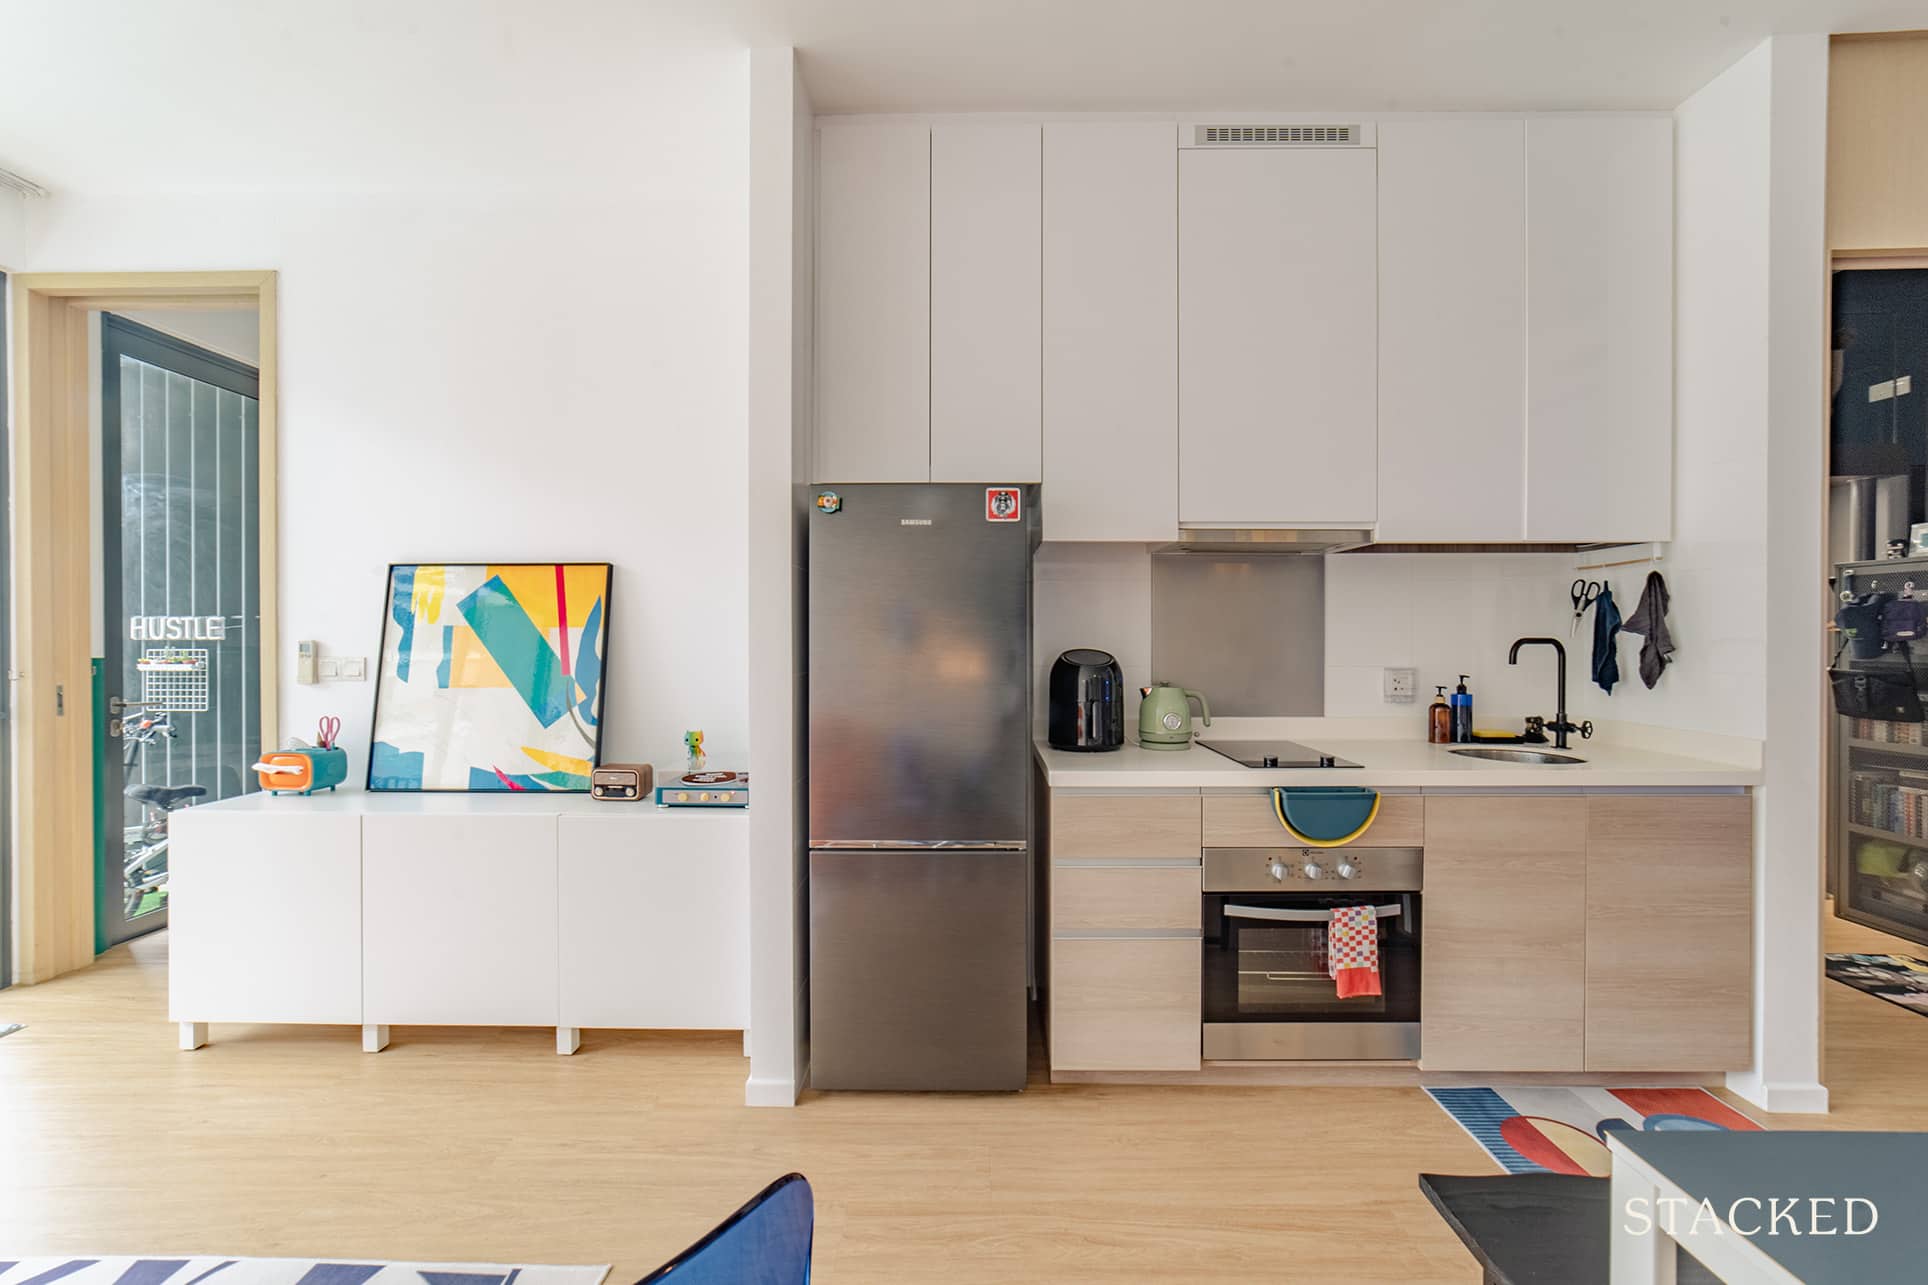
Kitchen
The kitchen didn’t undergo structural changes and retained its original layout. However, they made sure to change the kitchen tap to something more in line with their decor.
Bedrooms
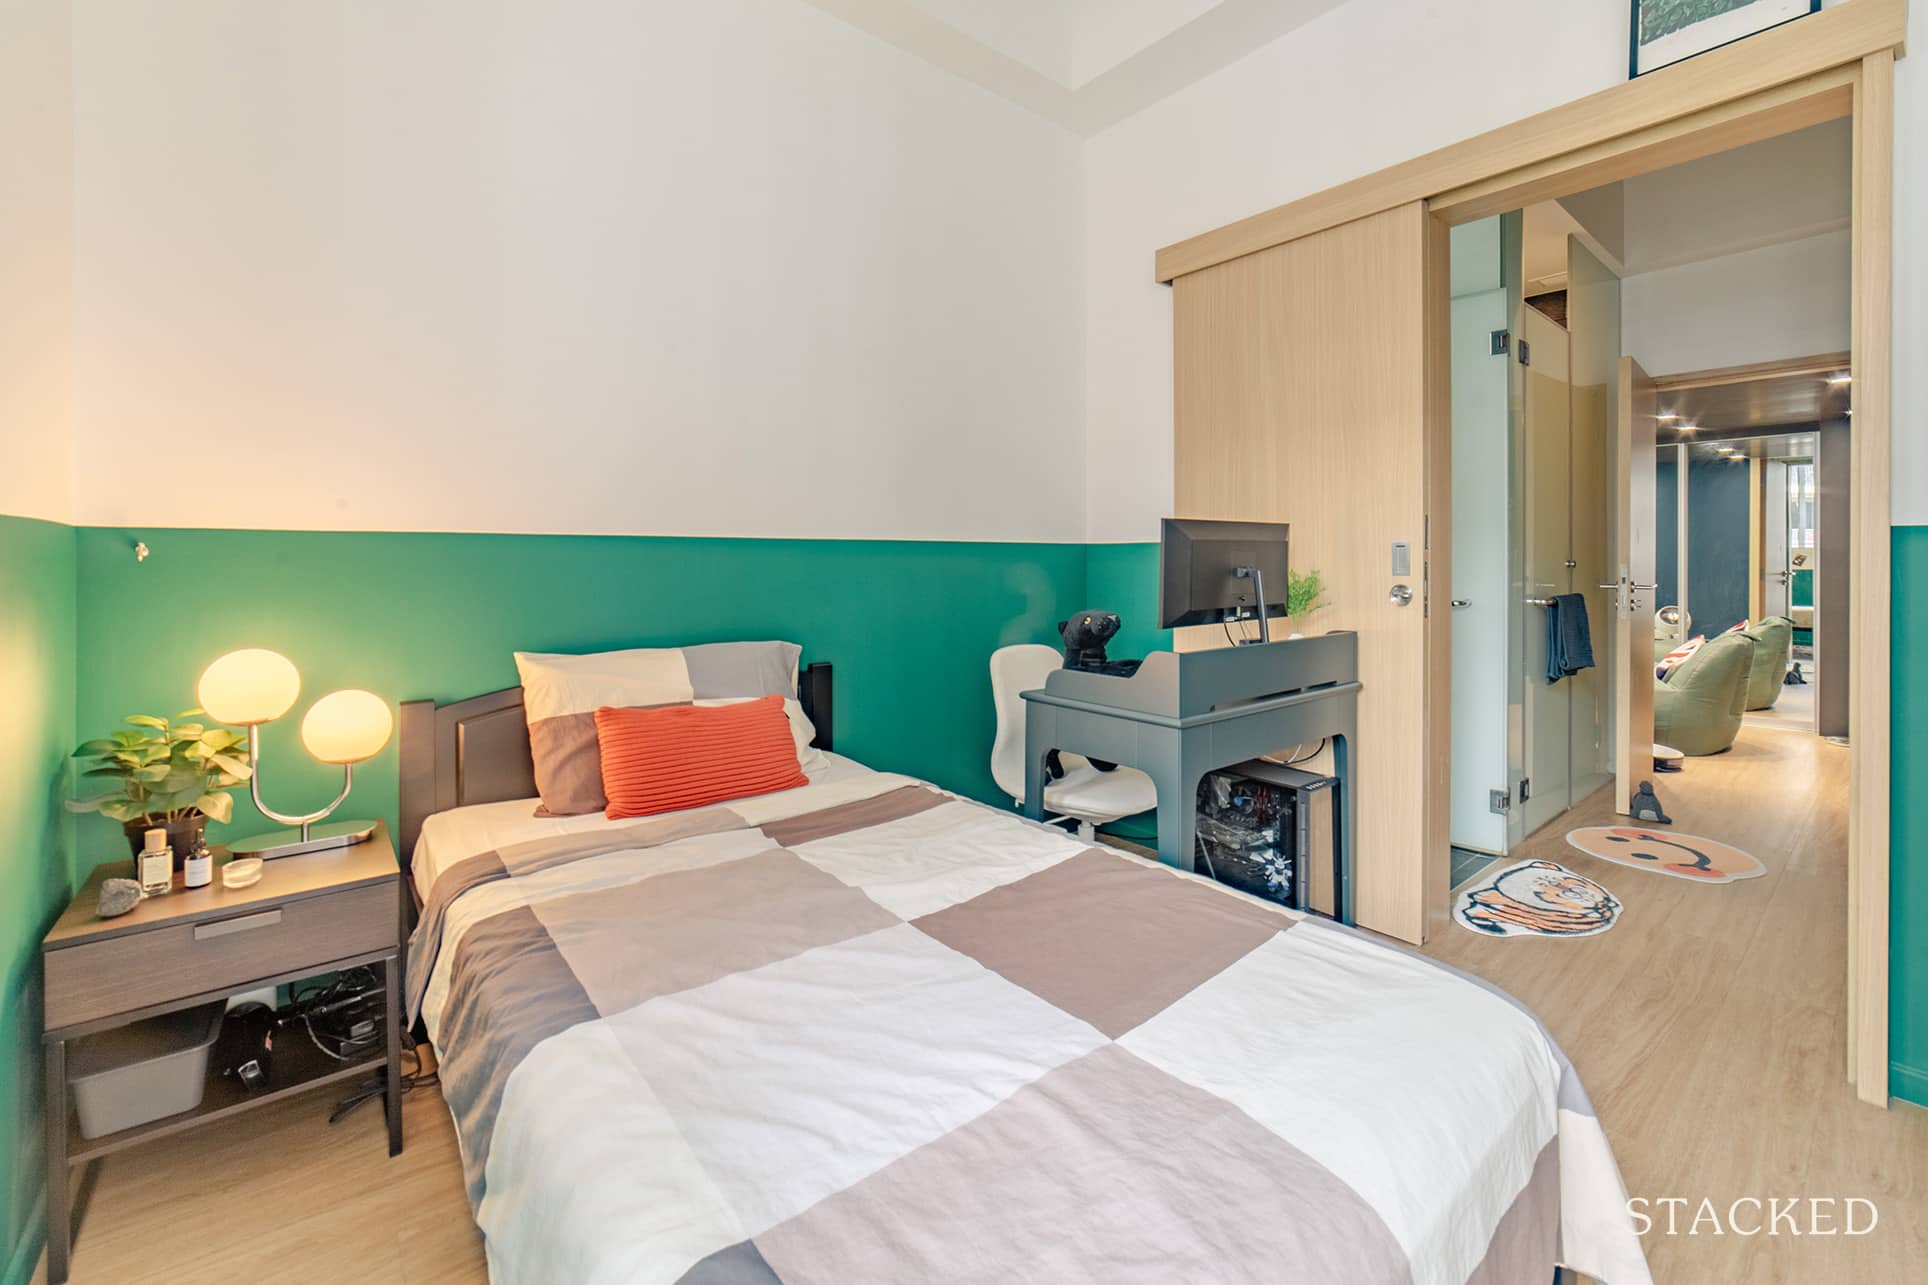
For the room with a built-in loft, they were able to make it dual purpose effectively. It’s a work lounge at the floor level and a sleeping quarter at the loft. The room’s dark blue walls, rustic wooden table, beanbag, and amber light lamp all help to make it cosy too.

For the master bedroom, they painted the walls in a duo-tone, white at the top and green at the bottom. Q said she wanted it to be eclectic, so she just added whatever she needed without much thought.
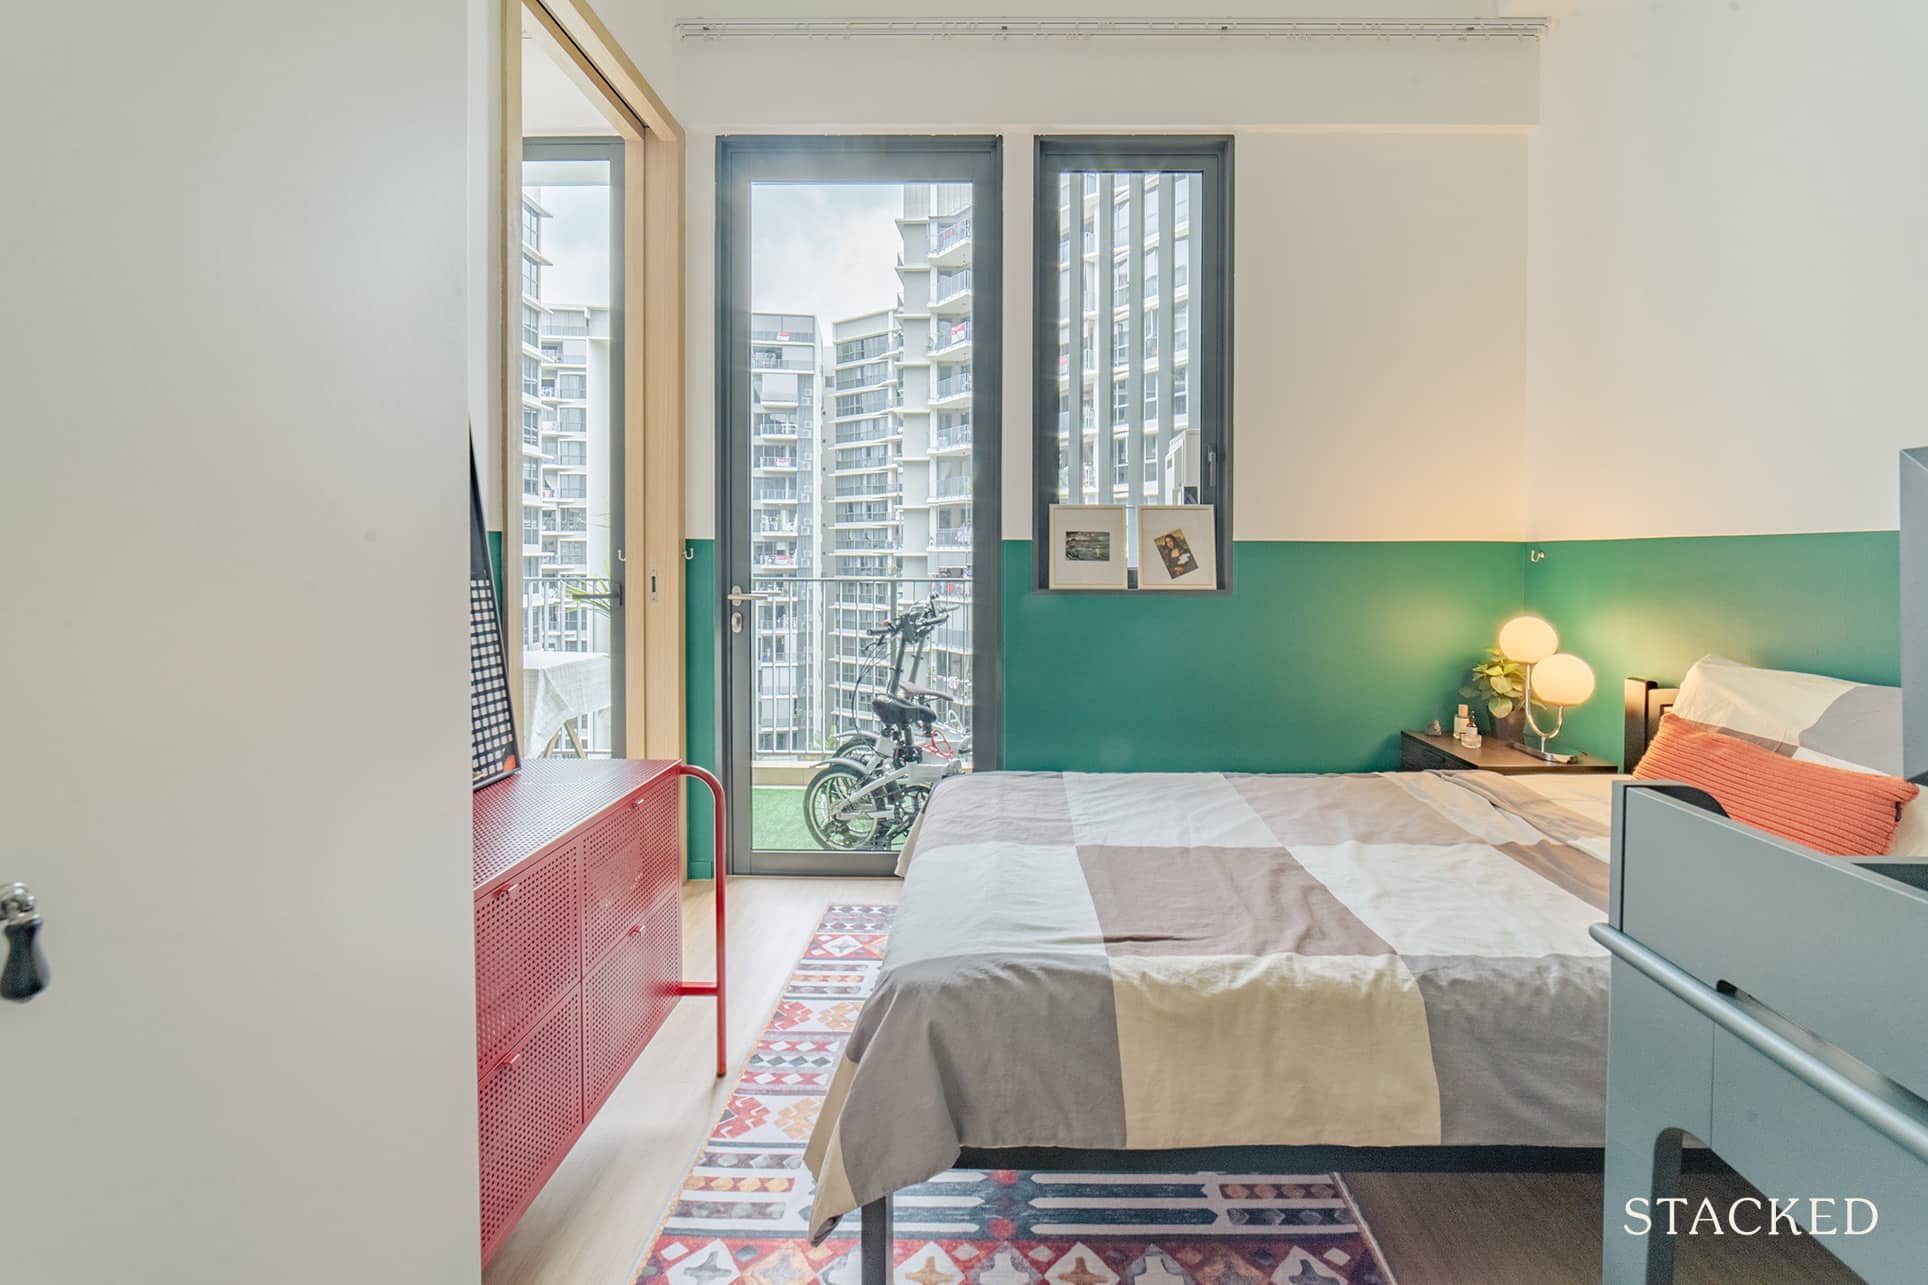
The previous owner placed a king-size bed in this room. However, she chose to make good use of the space by squeezing in a computer desk, super-single bed, bedside table, wardrobe, and storage drawer.
Bathroom
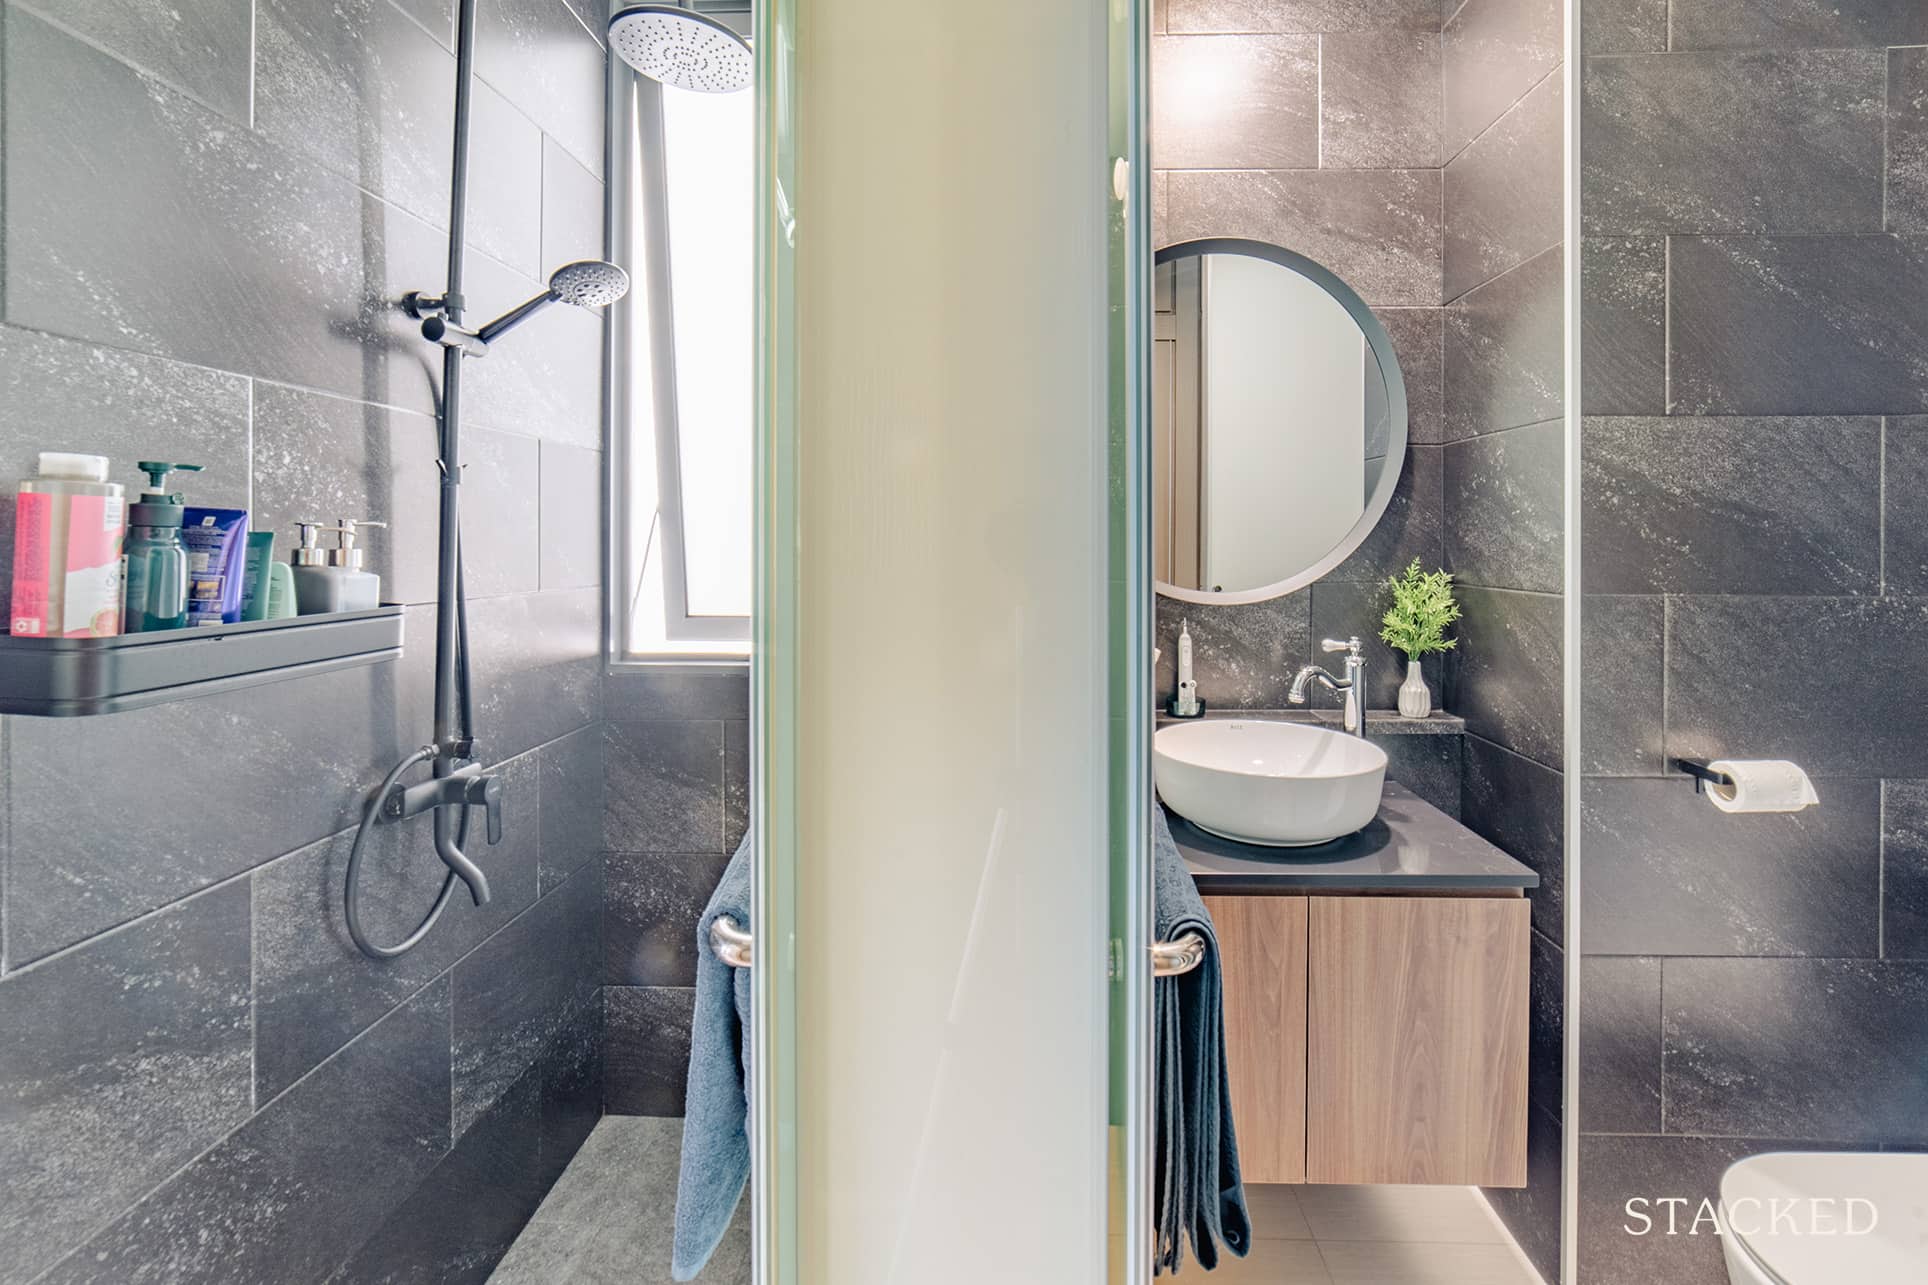
Compared to the rest of the house, the bathroom probably had the biggest overhaul. They overlaid the wall and floor tiles and removed all the existing fixtures in the bathrooms. They even replaced the basin, shower, and even the toilet bowl with brand new ones.
Bringing The Vision To Reality
We asked Q if the final outcome turned out to be what they actually envisioned before the reno started. She thoughtfully replied, “Yes and no. As the saying goes, there is no perfect renovation.”
She elaborated further on some of the things that weren’t aligned with their plan. One of which was the two pendant lights in the dining room, as they were supposed to be aligned in a straight line. However, when you look at them from the side, they’re not really straight.
Then there’s the duo-tone green line painted across the bedroom. It was wavy and not straight like they wanted it to be. As such, they had to repaint it themselves to fix it.
There’s also a small part of the ceiling which came off during the installation of pendant lights. She said that although the contractors tried to salvage it and cover the gap, it has remained uneven to date. Finally, a part of the overlaid washroom strip tile had uneven width as well.
The pair worked with several contractors, and Q was very generous to share who they were and some of the costs they incurred.
Evorich
This contractor was responsible for the flooring in the living room as well as those in the bathroom. They also took care of the bathroom walls. “We wanted to go to a one-stop centre where we can get everything at once. Hence, we decided to check it out due to its proximity to IKEA.”
Here’s the breakdown of the cost:
- Overlaying wall tiles for 2 x Bathroom: $2,727
- Overlay Vinyl Floor (entire house): $4,237
- Trimming of 2 sliding doors, 1 main door, and 1 bedroom door: $650
Singapore Cement Works Pte Ltd (SCW)
For bathroom accessories and cabinet installation, the pair delegated the task to SCW. They are located right beside Evorich’s showroom. She admitted that they selected them as their contractor for these particular installations out of convenience.
The costs they had to incur are as follow:
- Dismantle accessories (toilet bowl, vanity mirror, basin) & clear debris: $750
- Install vanity cabinet: $ 776
- Install all accessories (toilet bowl, basin, tap, vanity mirror, rainshower) (labour cost): $800
- Wet floor tile (overlay): $470
- Changing out kitchen tap: $150
Ethan Interiors
Ethan Interiors handled the painting job and light installation. They chose this contractor based on their friend’s recommendation.
Here’s a quick breakdown of the cost:
- Paint walls for entire house: $1,800
- Electrical works (dismantle four ceiling lamps, install two pendant lamps & two ceiling fans): $550
- Change toilet ceiling light: $60
To keep the overall reno cost from piling up, they opted for wallet-friendly furniture pieces instead of the more expensive custom-made ones. Some of the stores they sourced from are IKEA, FortyTwo, Taobao, Shopee, and Lazada.
Since most IKEA pieces are designed to be self-assembled, it helped them save up on assembling fees. They also liked that as IKEA had a showroom to experience the products firsthand, this gave them the peace of mind about the quality when purchasing big ticket items like a sofa.
For smaller-sized items, they purchased them from online platforms, which provided a more affordable option. For instance, FortyTwo offers affordable glass tabletops tables, as well as chairs and sofas. On the other hand, Taobao, Shopee, and Lazada are great for affordable designer accessories such as cushions and carpets.
They also checked out local stores like Hipvan, Castlery, Scanteak, and Noa, but they didn’t carry the items in the colour they wanted. Plus if they were to have them custom-made, it would take several months to do so. Thus, they chose IKEA instead.
When it comes to the best area of their home, Q said that it’s the washroom. “We’ve overlaid it with Evorich’s non grout line evoWALLS, and so we didn’t have to deal with darkening and mouldy grout lines anymore.” Their washroom also became cosier because of its dark, moody colour theme.
Lessons Learned From A Successful Reno Journey
One of the main challenges they faced during the reno journey was managing their time. They had to take days off from work, spend time and effort to head down to the house, and ultimately monitor the renovation’s progress.
She said that overseeing and providing feedback on the contractor’s works also posed a challenge to them. “Firstly, we were too shy or lost on how to ask the contractors to redo their paintwork or align the pendant ceiling lamps.”
As such, they ended up repainting the room themselves. While the workers can head back to do it, the pair felt it would be too much of a hassle.
To get through the burden of overseeing the project, they had to do extensive reading. They needed to learn how to check the quality of the work donem which helped ensure that the contractors did not short-change them.
And then, they also had to deal with renovation delays. The problem actually came from only one of the contractors, but it affected the rest of the project. Because of the manpower shortage due to COVID-19, they had to reschedule the subsequent work, and Q confessed that they felt annoyed and slightly stressed out. This was perhaps even more so since they were contacting the contractors directly themselves instead of having an ID to represent them.
If they can summarise all the lessons they learned into one, it would be to avoid being hasty. “Don’t rush on to decide on contractors, interior designers, and even products that will be built-in,” she said. “We saw the booth of SCW located just right beside Evorich’s showroom, and right there and then we decided to buy their products and hire them.”
If given another chance, she said they would go to at least two to three options and compare them before making a decision. They would definitely source for more contractors – maybe prioritising recommendations by word of mouth.
Another tip they had was to “afford what you can and if you can’t spend money, spend time researching.” Here’s a few more really helpful tips to ensure a smooth reno process:
- Don’t calculate what you’ve saved; instead, calculate what you’ve spent. She recommends not to sign on packages you don’t need and to be in constant communication with your ID. Also, always have a backup stash or a buffer in your budget for unexpected costs in the project. Cracks in the wall and leaking pipes are just some of the issues that may appear suddenly.
- Do it in a way that suits your needs. You shouldn’t base your decisions on others’ typical perceptions of a home. She said to ask yourself questions such as do you need a huge space to host all your guests? Do you really need a feature wall? Do you need a TV?
- Pre-order overseas items before moving in. This advice pertains to items to need to be shipped from overseas. And if you need to get lighting and electronics, be sure they’re compatible with our local switches.
- Plan ahead for IKEA items. Items from IKEA often run out of stock, and sometimes they’re only available for a certain period of time. As Q and Z experienced, IKEA doesn’t carry SODERHAMN sofa in orange anymore. Thus, it’s really important to plan ahead.
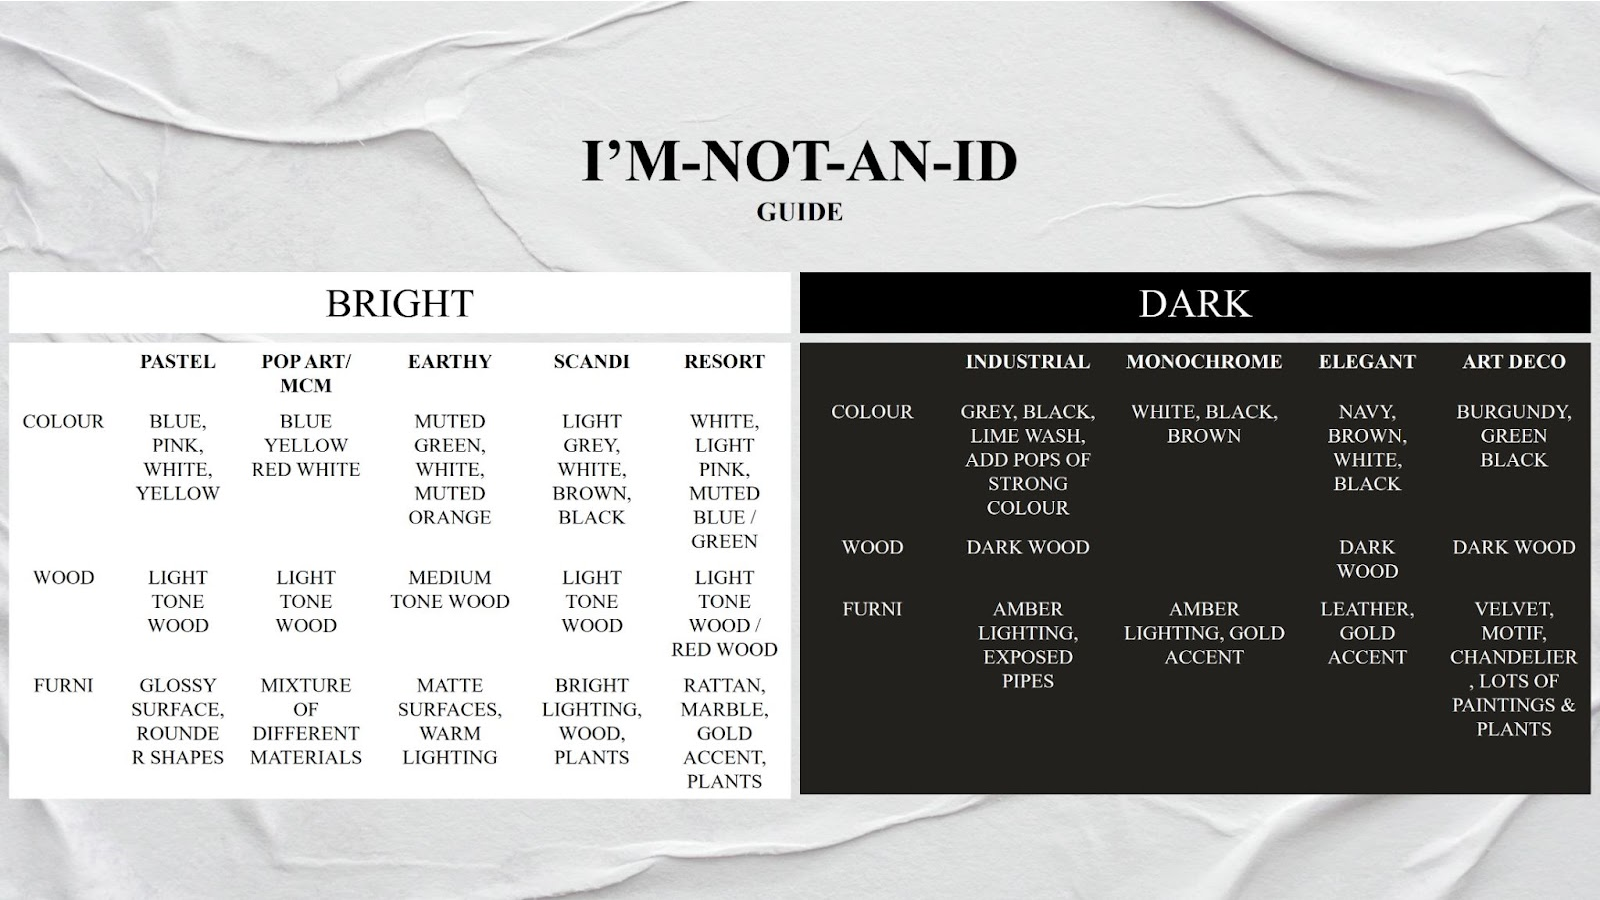
Below is a simple aptly named “I’m-not-an-ID” guide Q shared to illustrate her thought process while she was deciding on the theme of their house:
Lastly, she recommends coming up with a moodboard, with Pinterest and YouTube as excellent sources of inspiration. This will help you visualise how the individual items would look when put together.


Imagine buying a condo and only spending 13k on the reno, lol!
Kind of like buying a car and fitting it with cardboard tyres.
I think it is clear this is more of a design/decoration/furnishing project and the renovations are quite minor and not really the focus. The header itself mentions this.